Community Admins can request that their community members share profile information with other members, helping foster more meaningful connections.
This feature requires a Business or Enterprise plan to set up, but all community members can participate.
Enabling Community Profiles (Admins)
To turn on community profile sharing, you must be an admin of your Community and the feature must be set up on desktop.
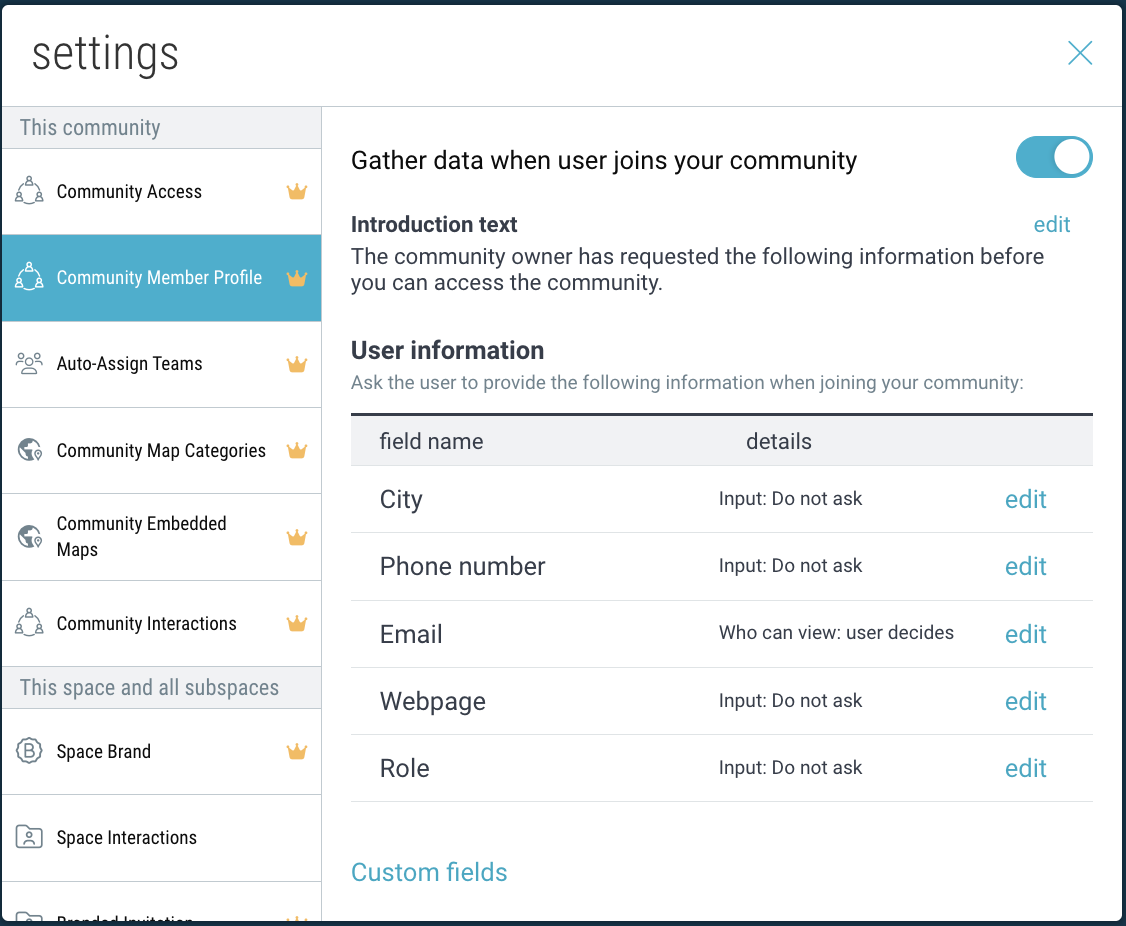
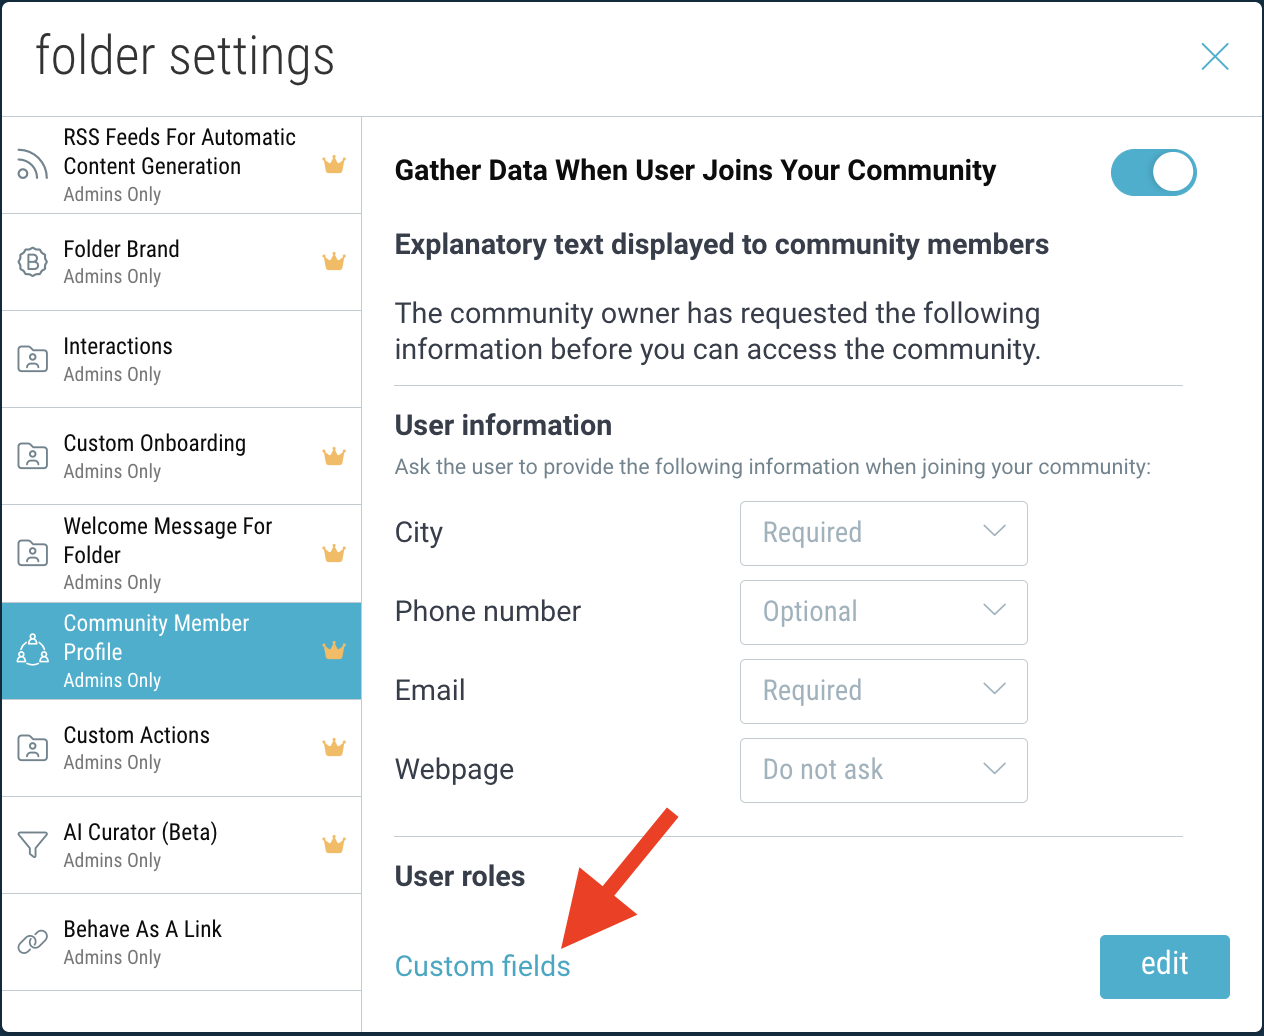
- Open your Community folder and click the “settings” icon in the upper-right corner (or go to ☰ menu > “Folder Settings”).

- Then navigate to the Community Member Profile” tab and click the toggle to enable “Gather Data When User Joins Your Community”.
- Customize the descriptive text that will appear when members are prompted to create their profile.
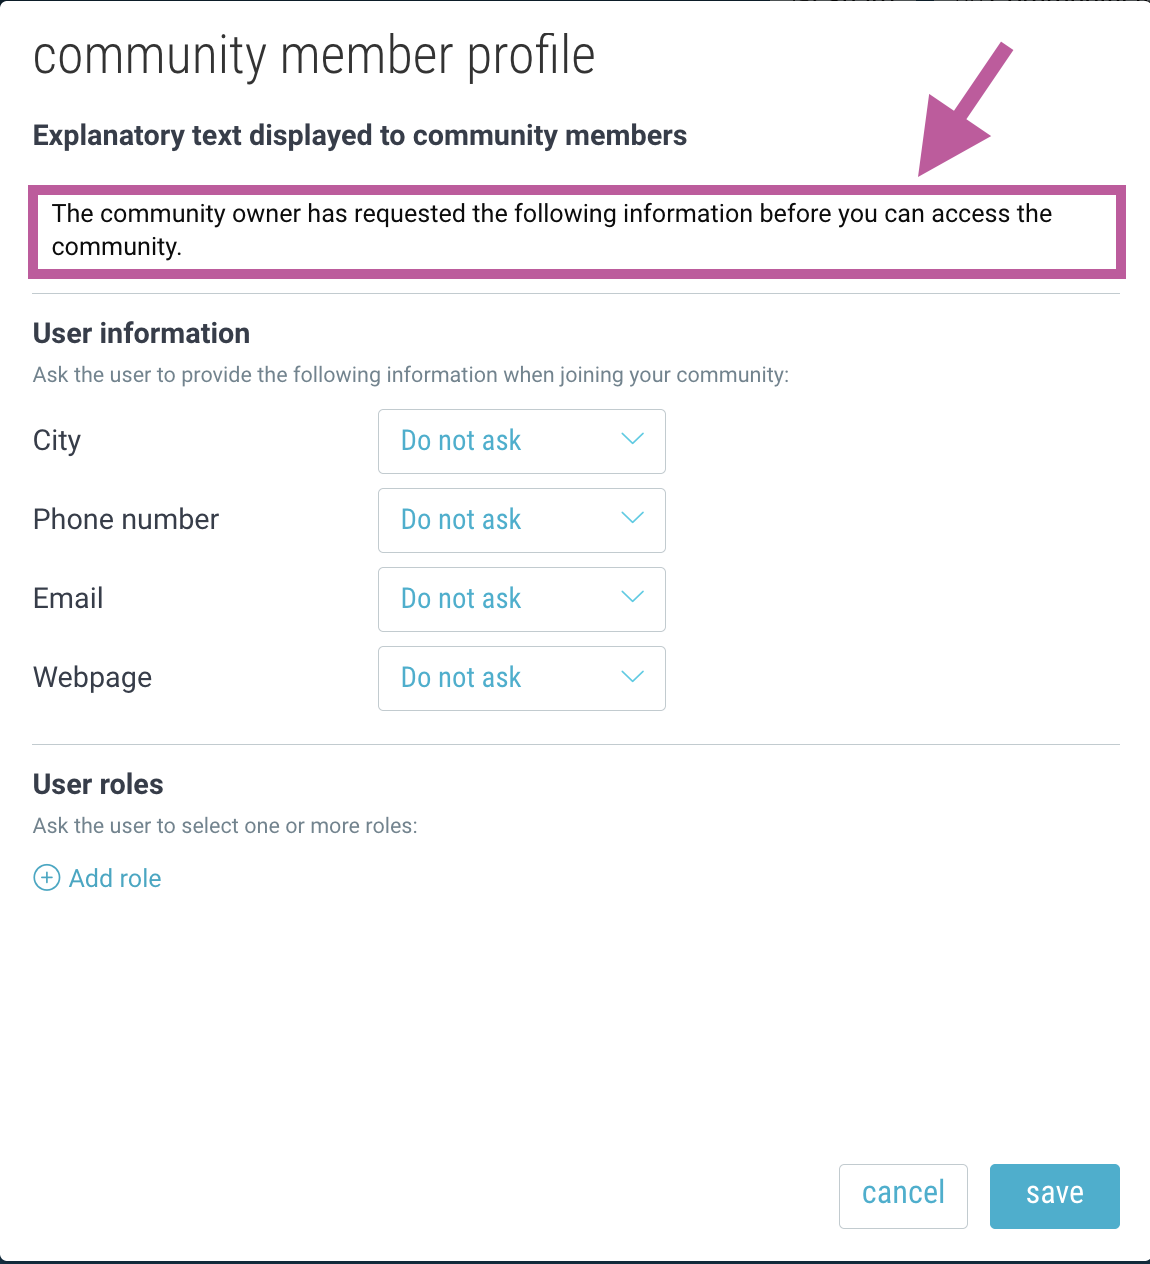
- Specify which fields are required or optional.
- (Optional) Add user roles for members to choose from.
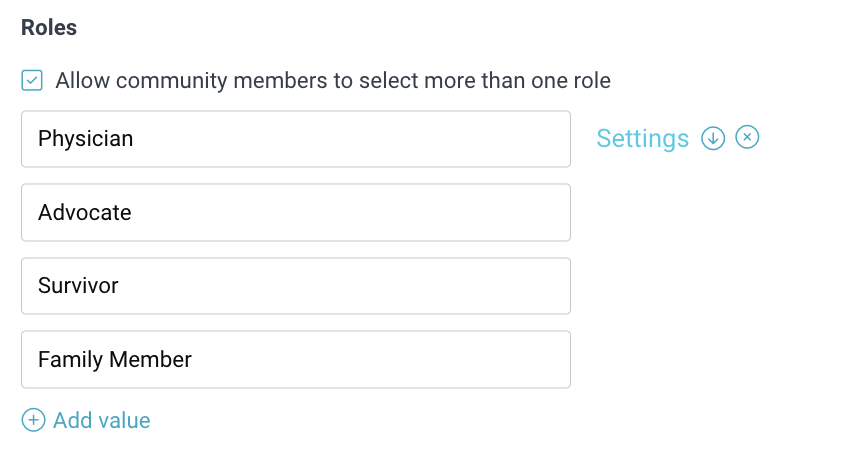
For example, if you have a medical community for a rare disease support group, you may want to know whether a member is an “advocate”, “donor”, “researcher”, etc. Pro tip: You can map a role to existing teams. Hover over the role and click “Settings”. Then select which team(s) you’d like that role to be assigned to.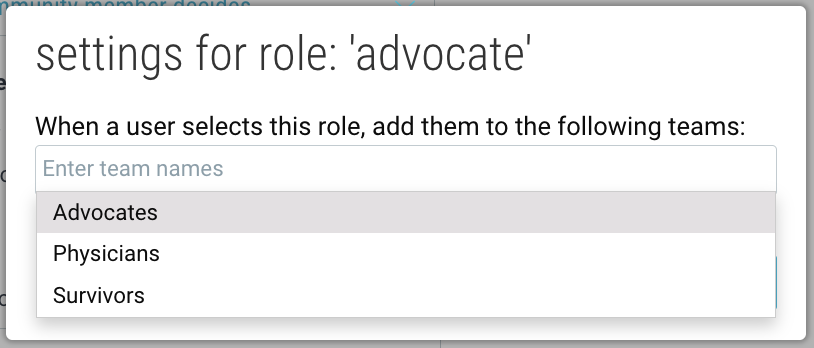
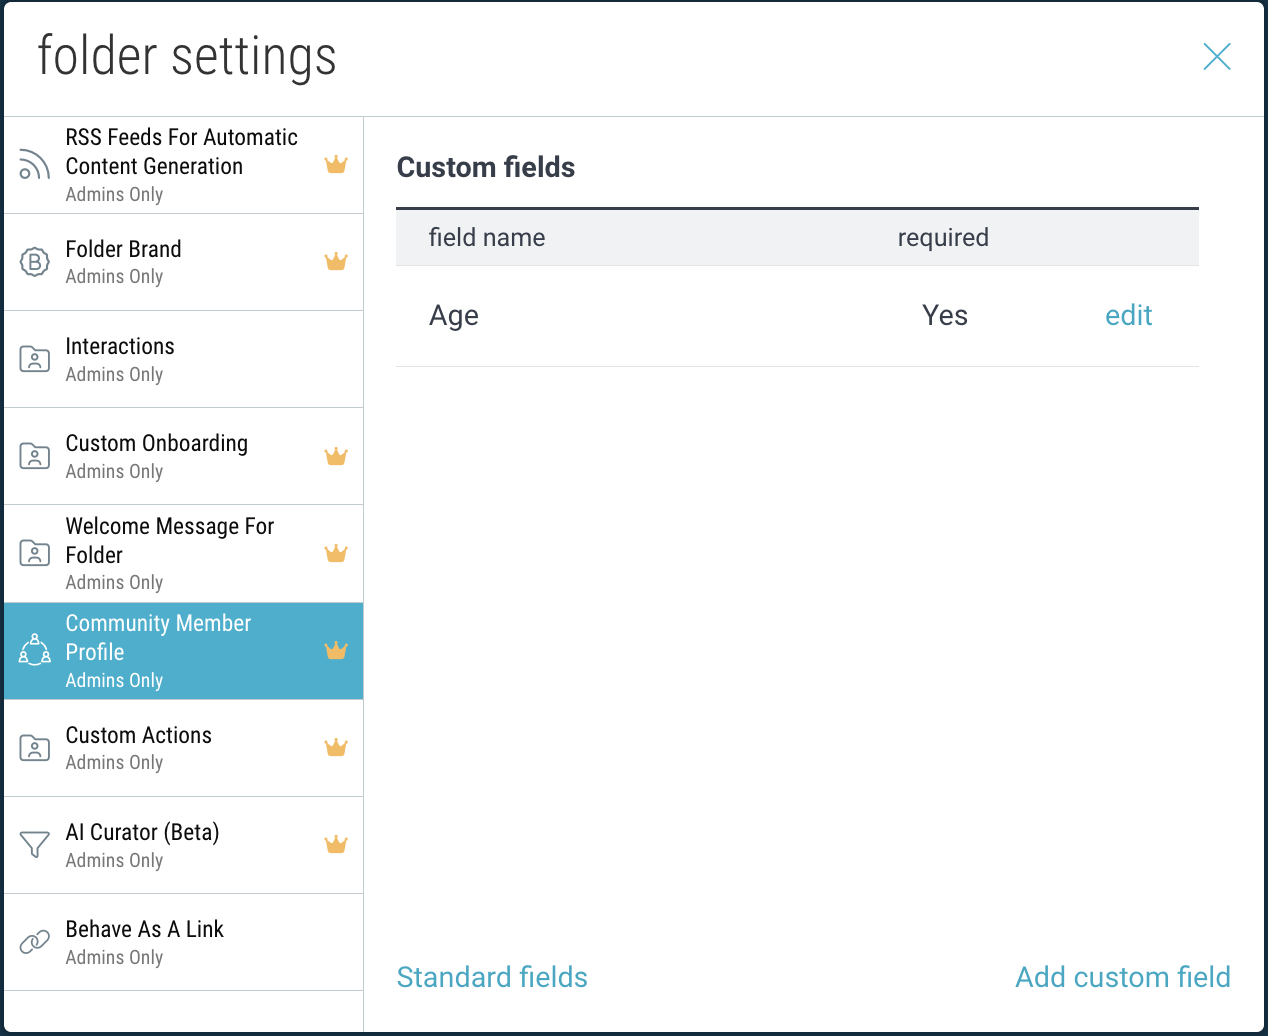
Adding Custom Fields
(Optional) Add additional custom fields for your members to fill out.
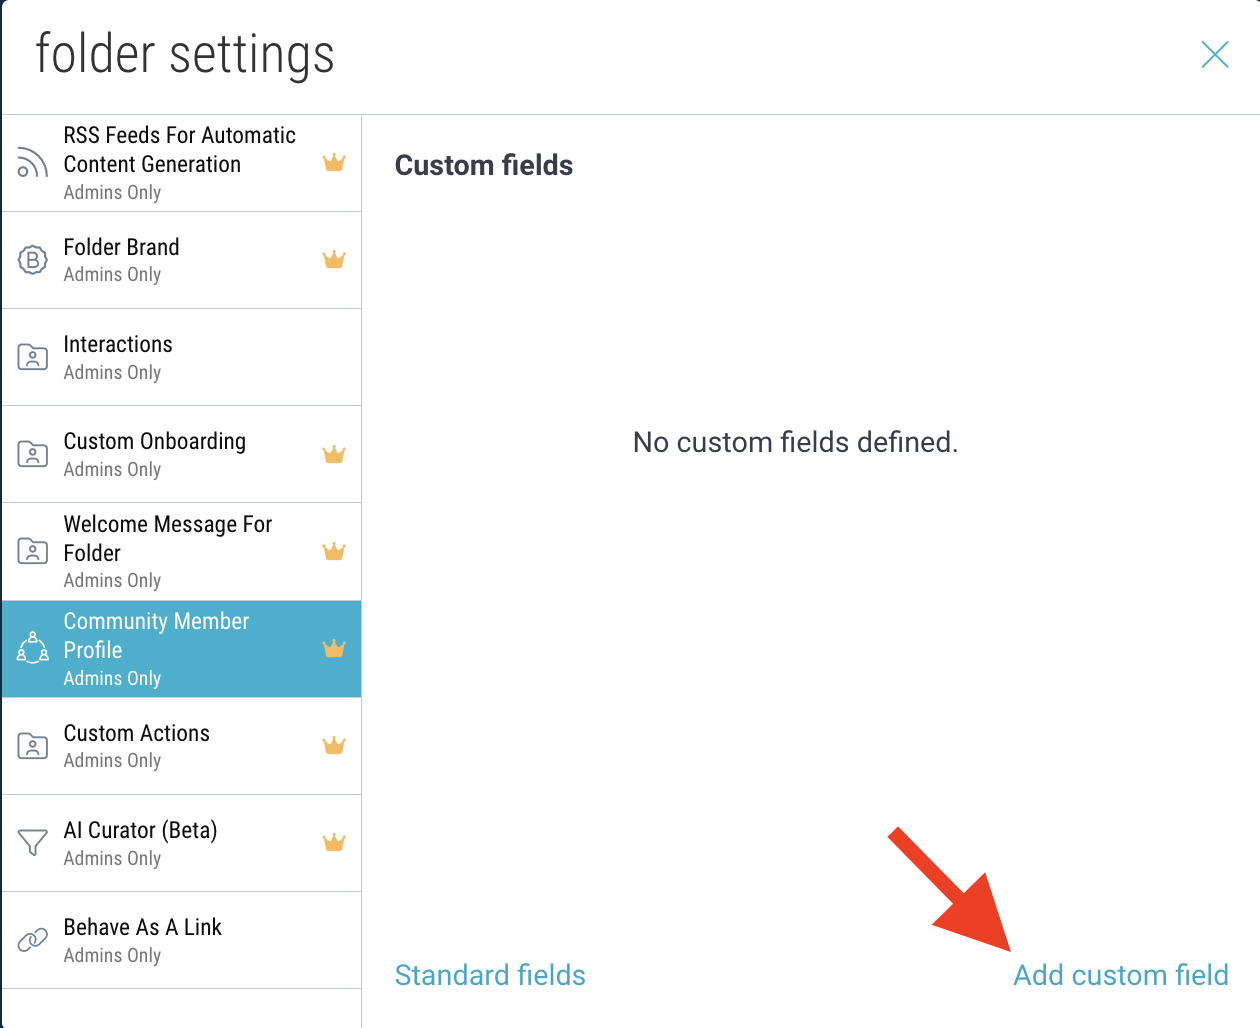
- Click “custom fields”.
- Click “add custom field”.
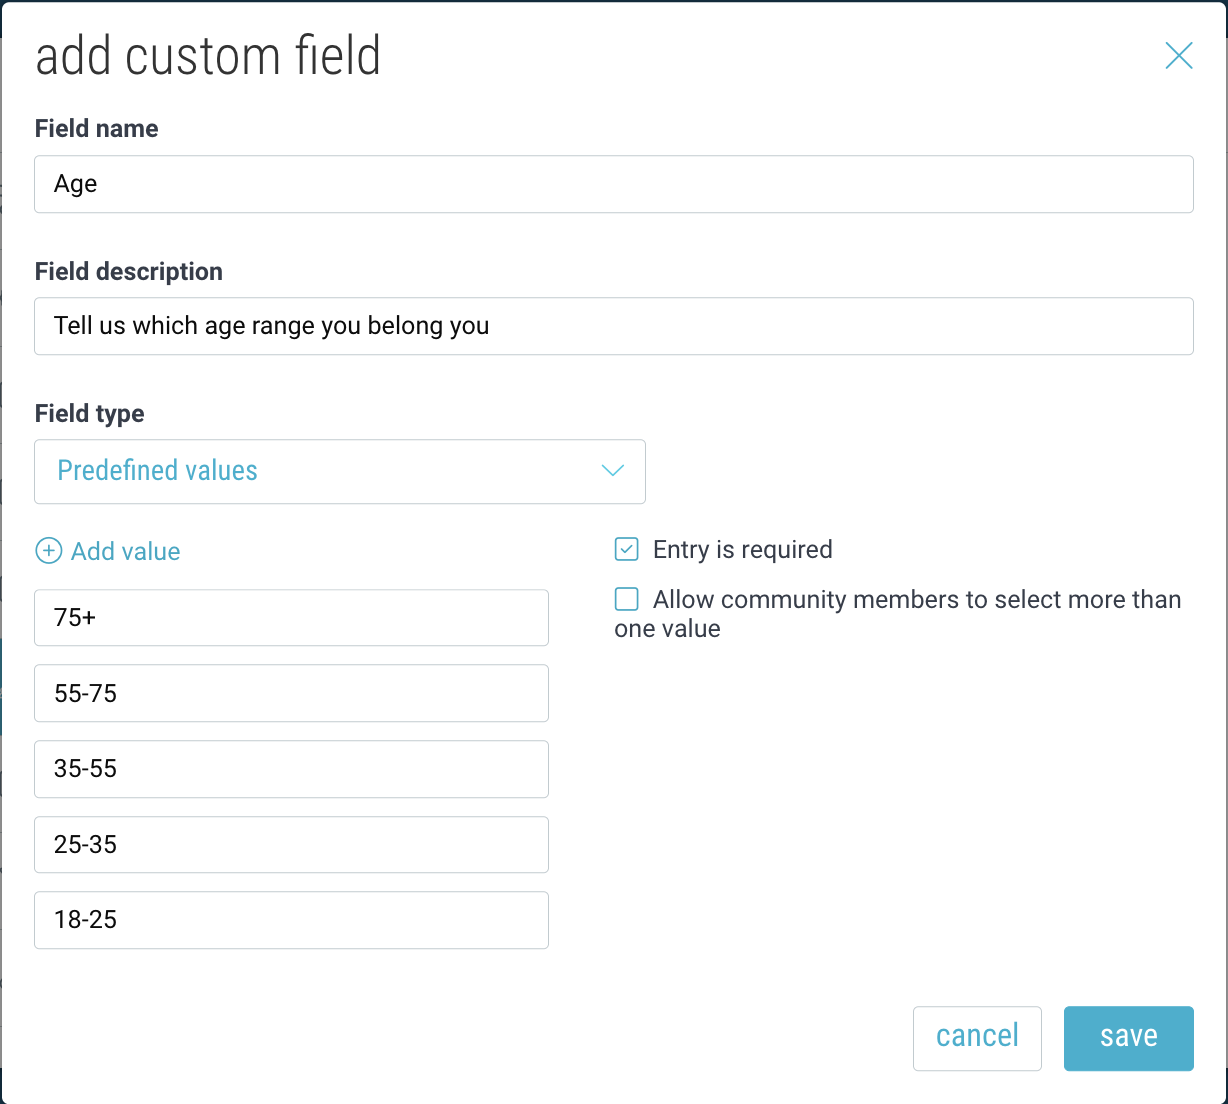
- Add a name and description for your field, and choose between predefined values or free form text. If you select “predefined value”, enter the values members can select from.
- Edit an existing field or add new ones. To return to the standard fields, click “Standard fields”.
Editing Your Profile Settings
To edit your community profile settings, go to “Folder Settings” -> “Community Member Profile” and click “edit”.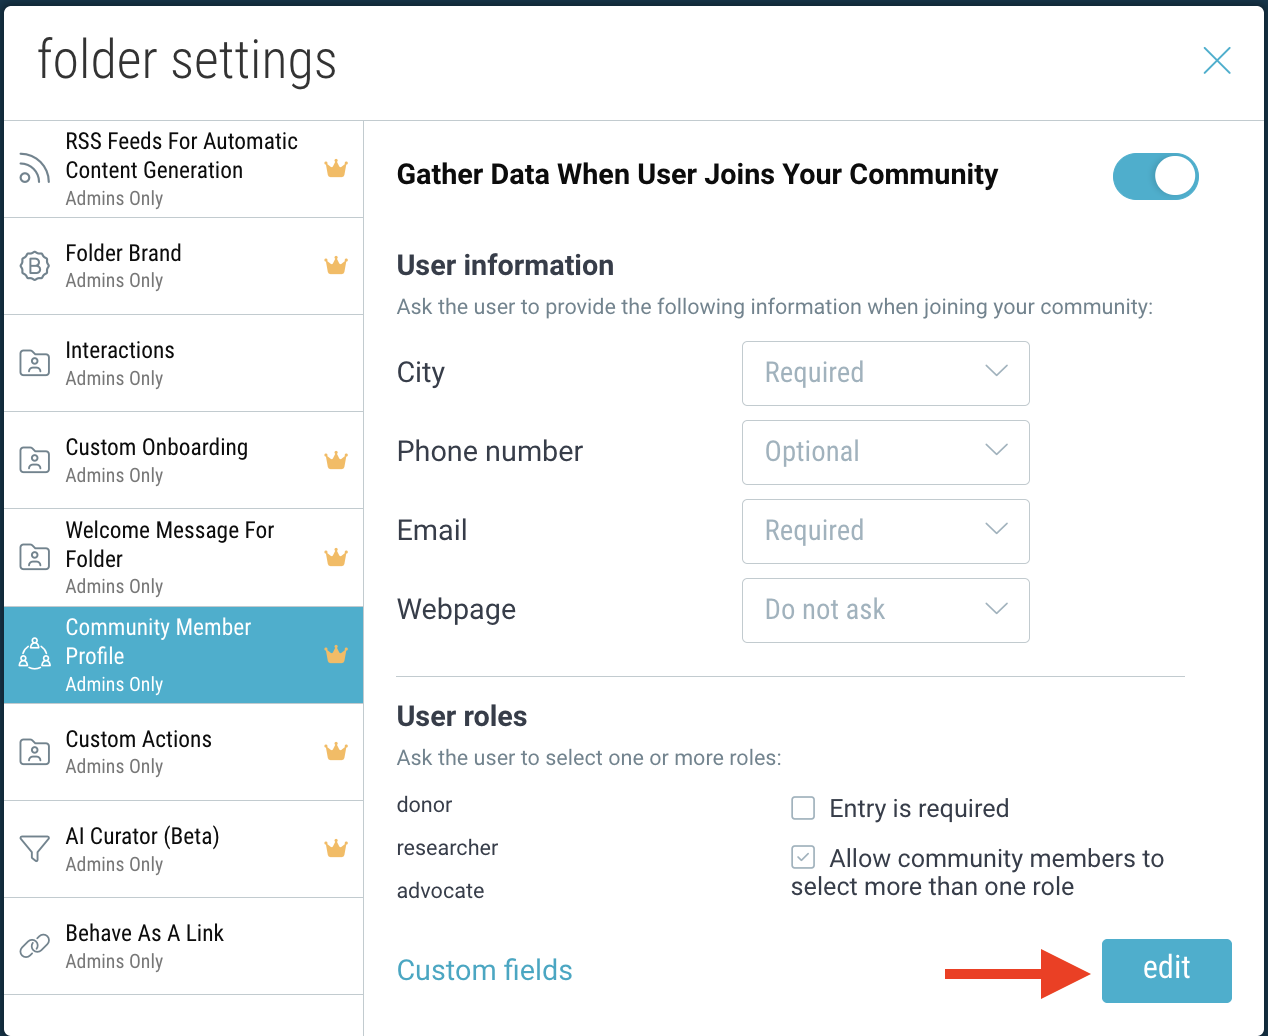
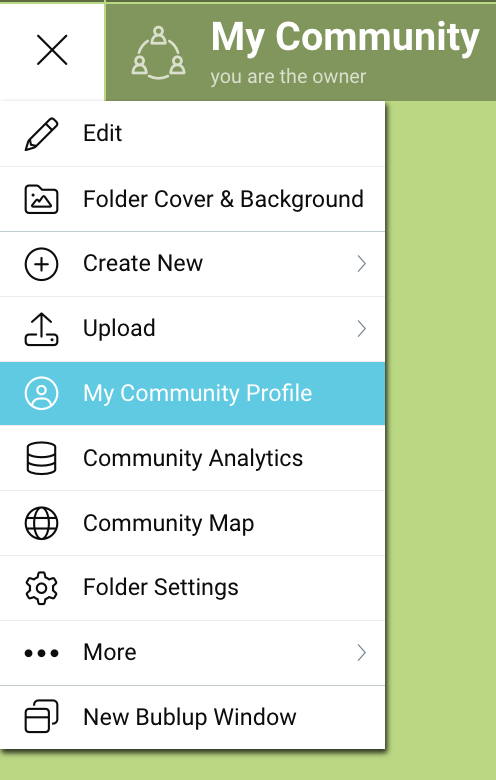
My Community Profile (Members)
When you join a Community where this feature is enabled, you’ll be prompted to fill out your profile information.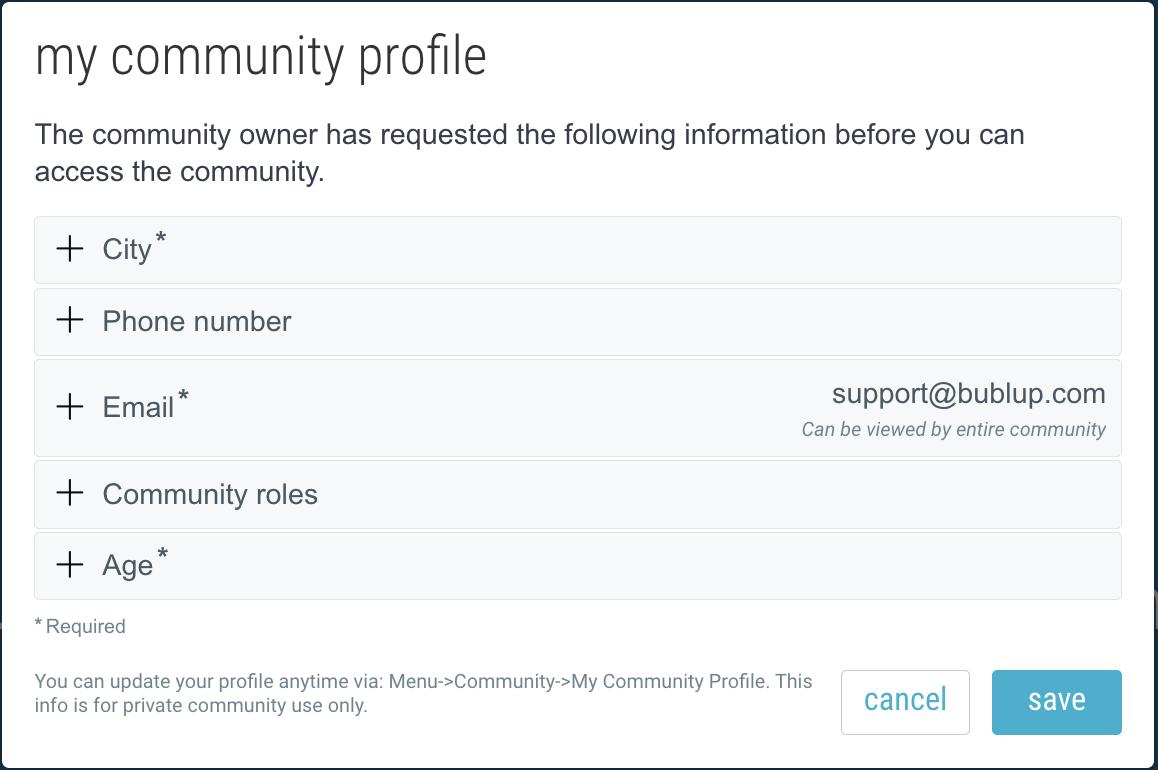
To view and edit your profile information, open the Community folder and go to ☰Menu > “Community” > “My Community Profile”.