Showcase sponsorship brands directly within your Community space and subspaces.
ForBusiness and Enterprise accounts.
Create a Community Sponsorship
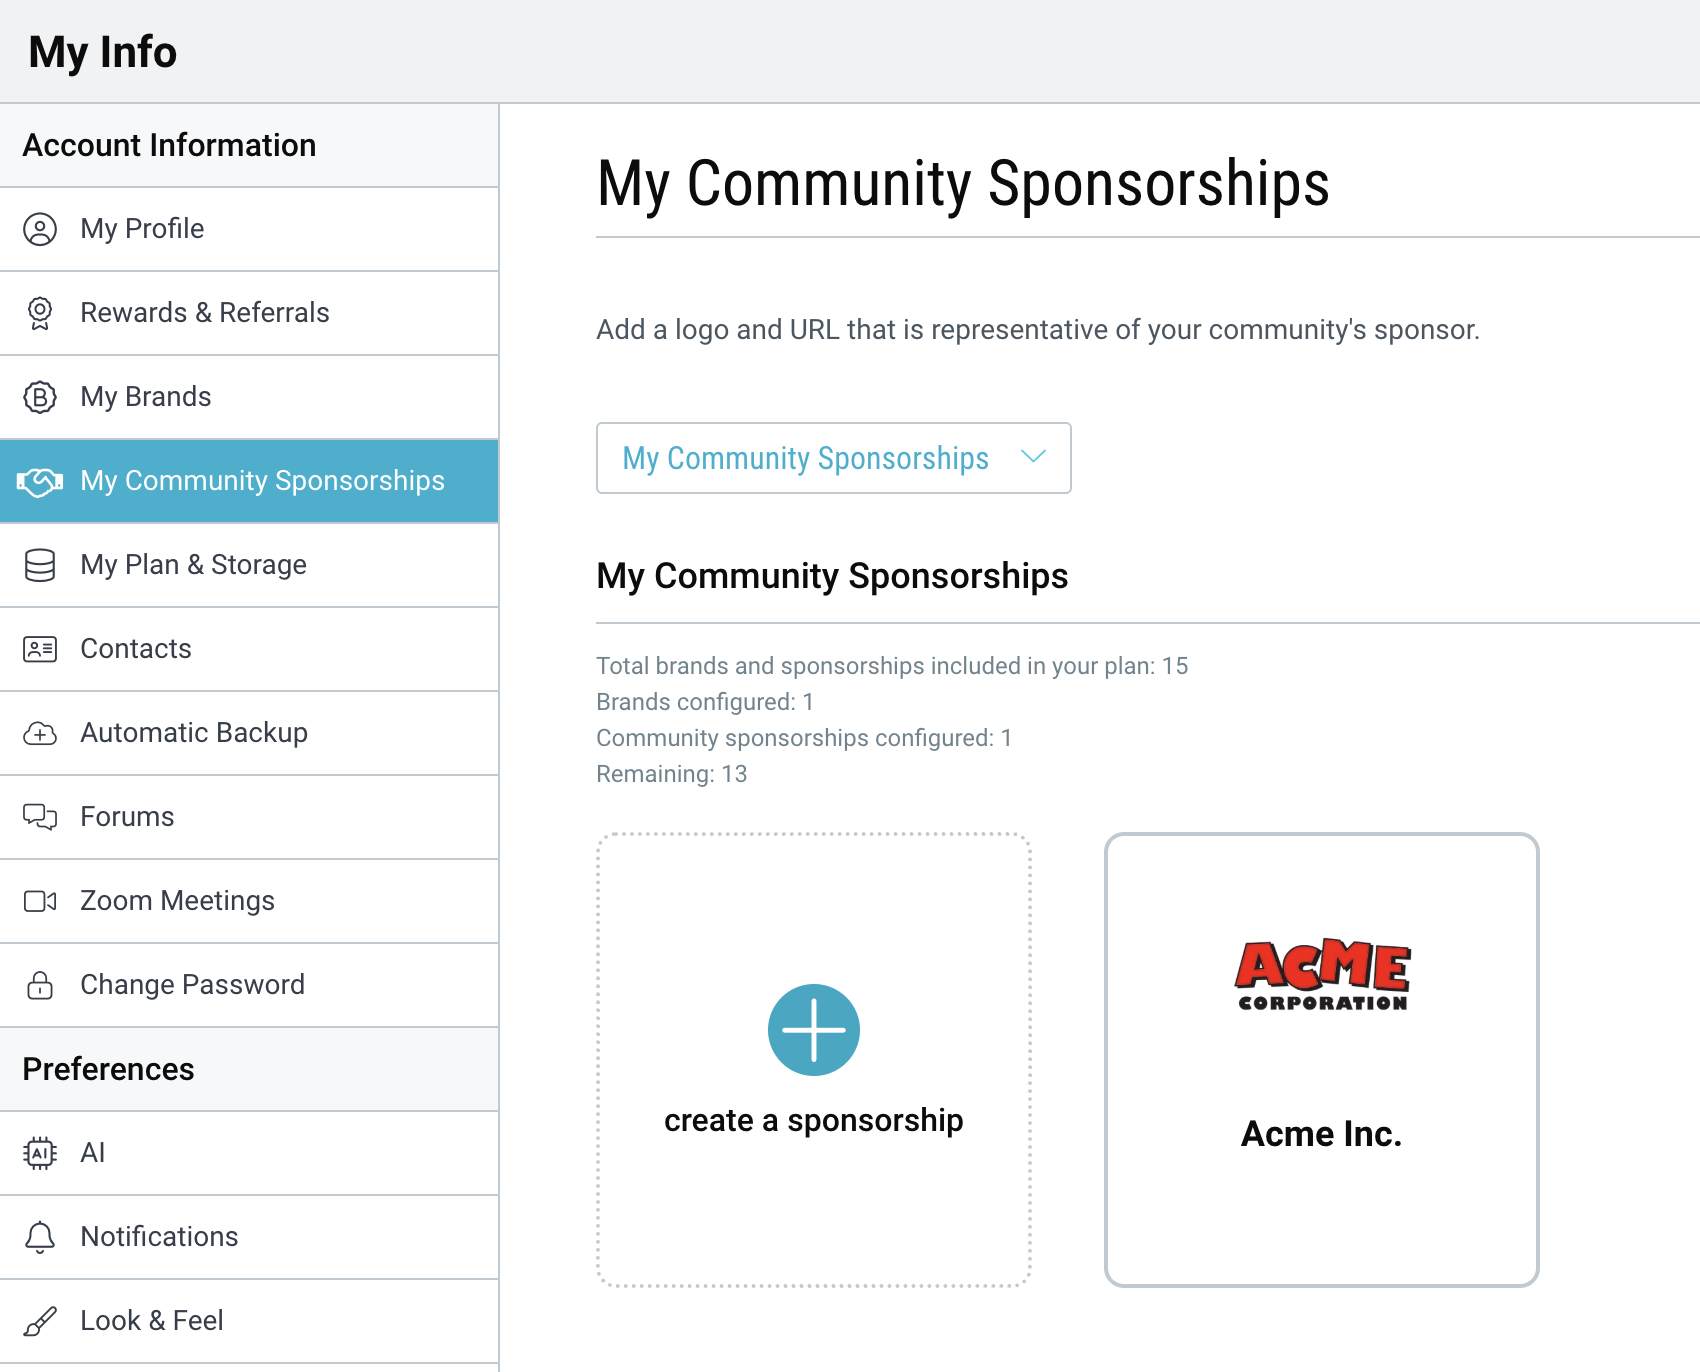
- On desktop, go to My Info → “My Community Sponsorships”.
- Click “create a sponsorship”.

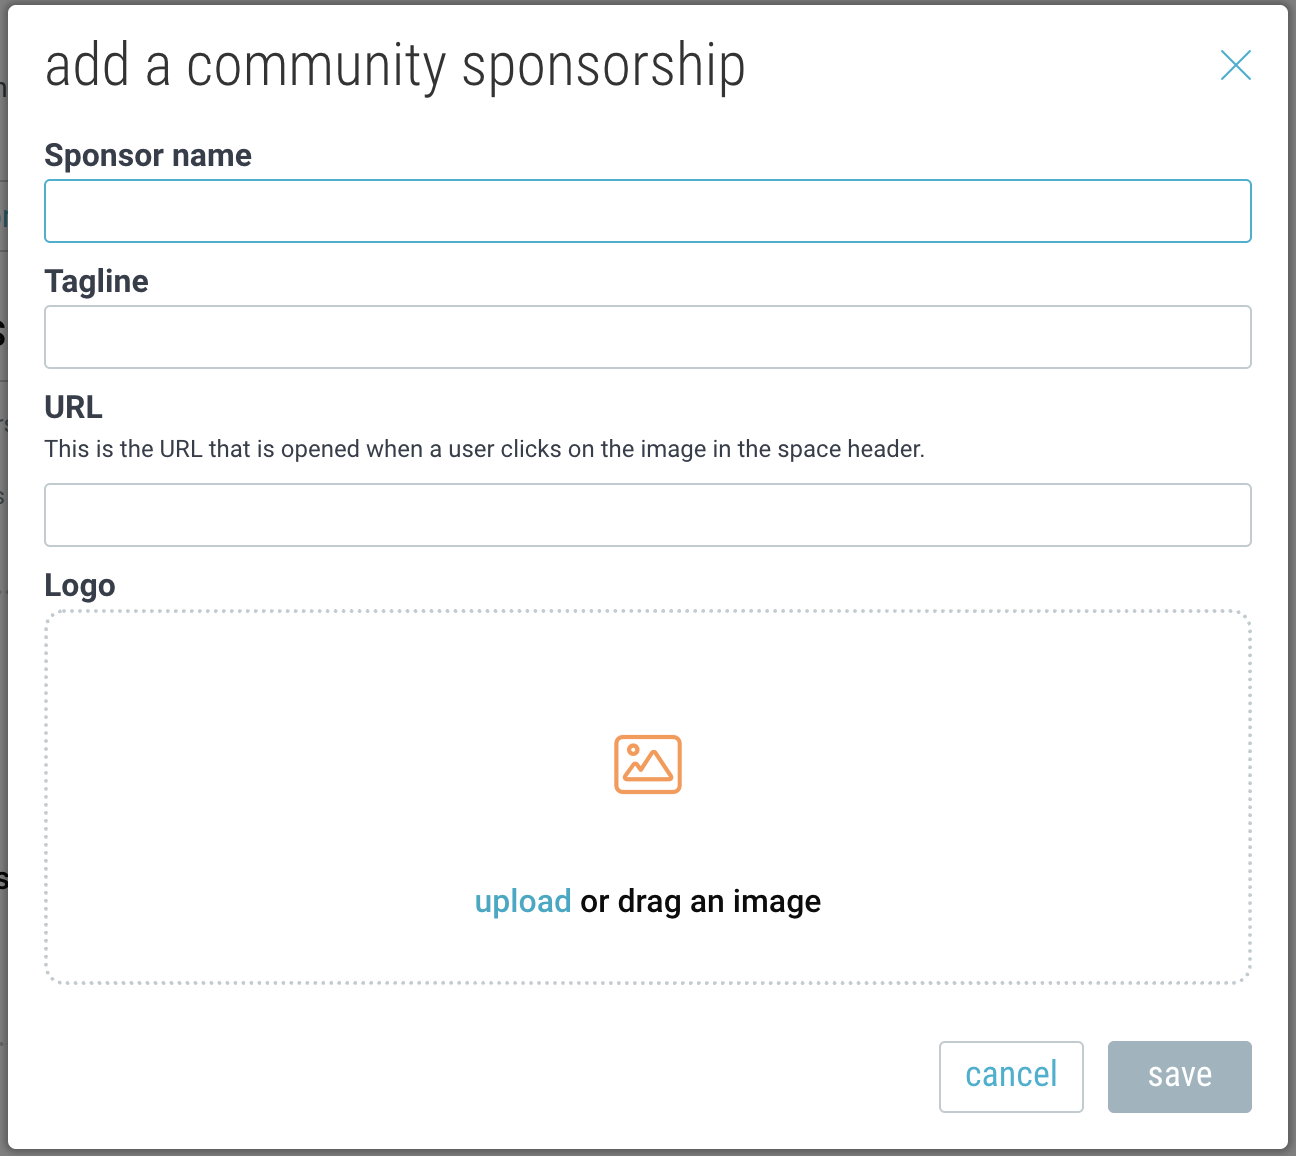
- Add the sponsor name, tagline, URL, and logo.
- You may add multiple sponsors depending on your plan. To edit a sponsorship brand, hover over the sponsor and click edit.
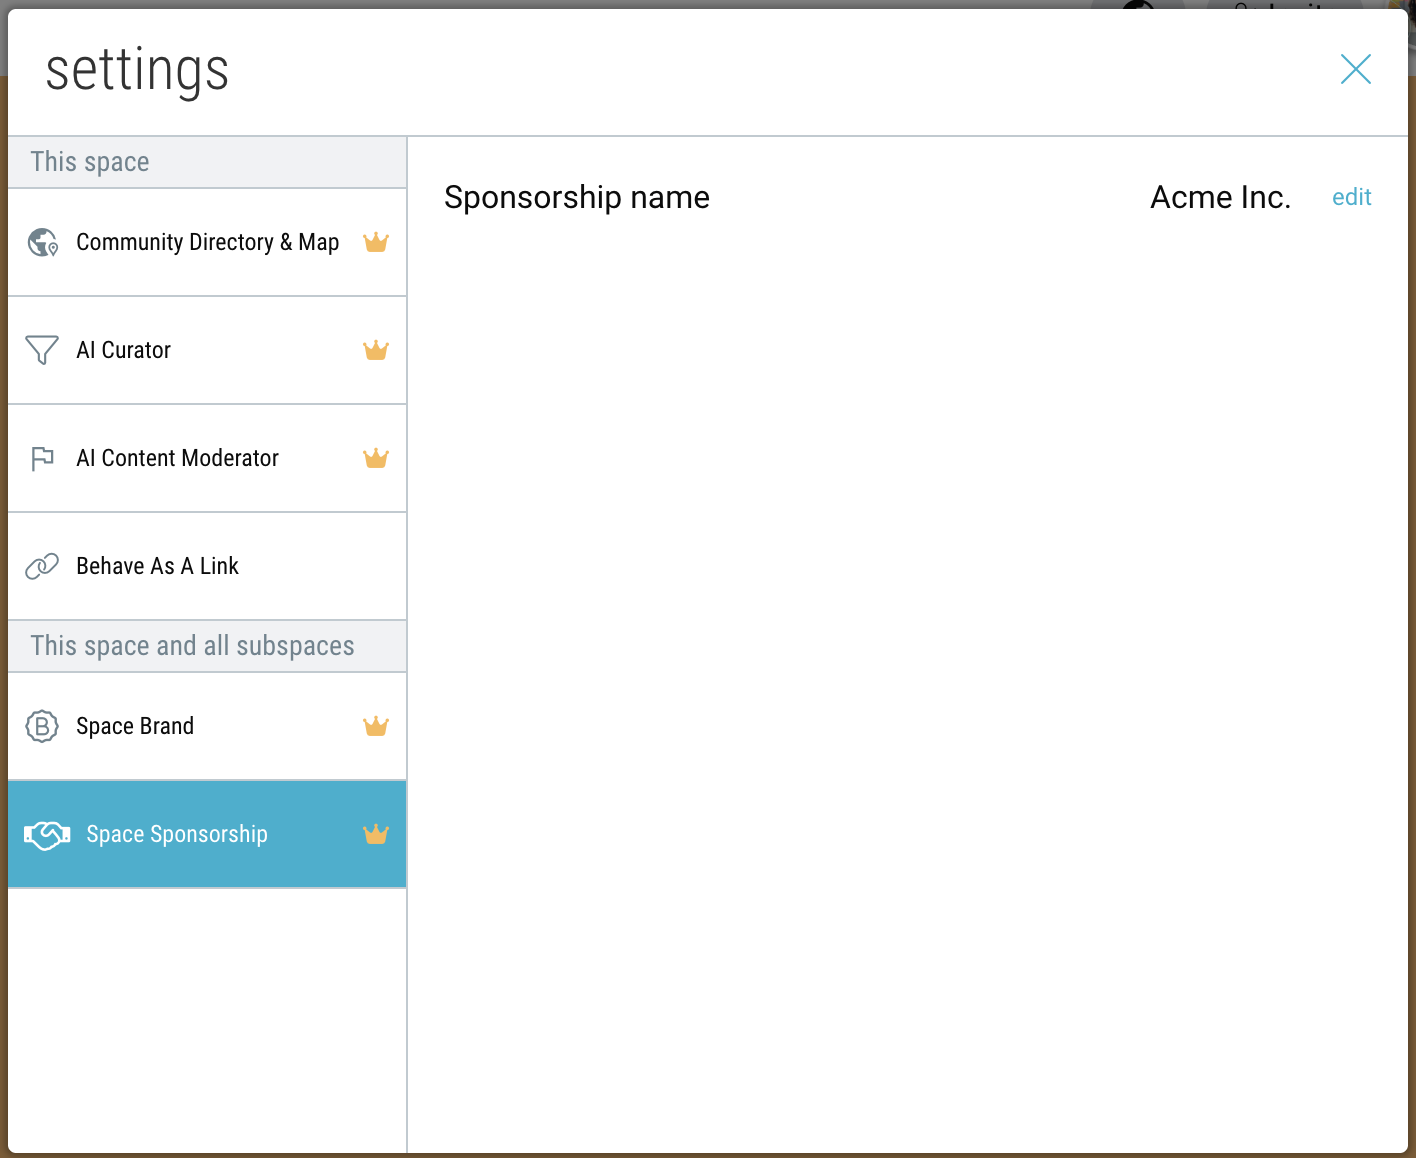
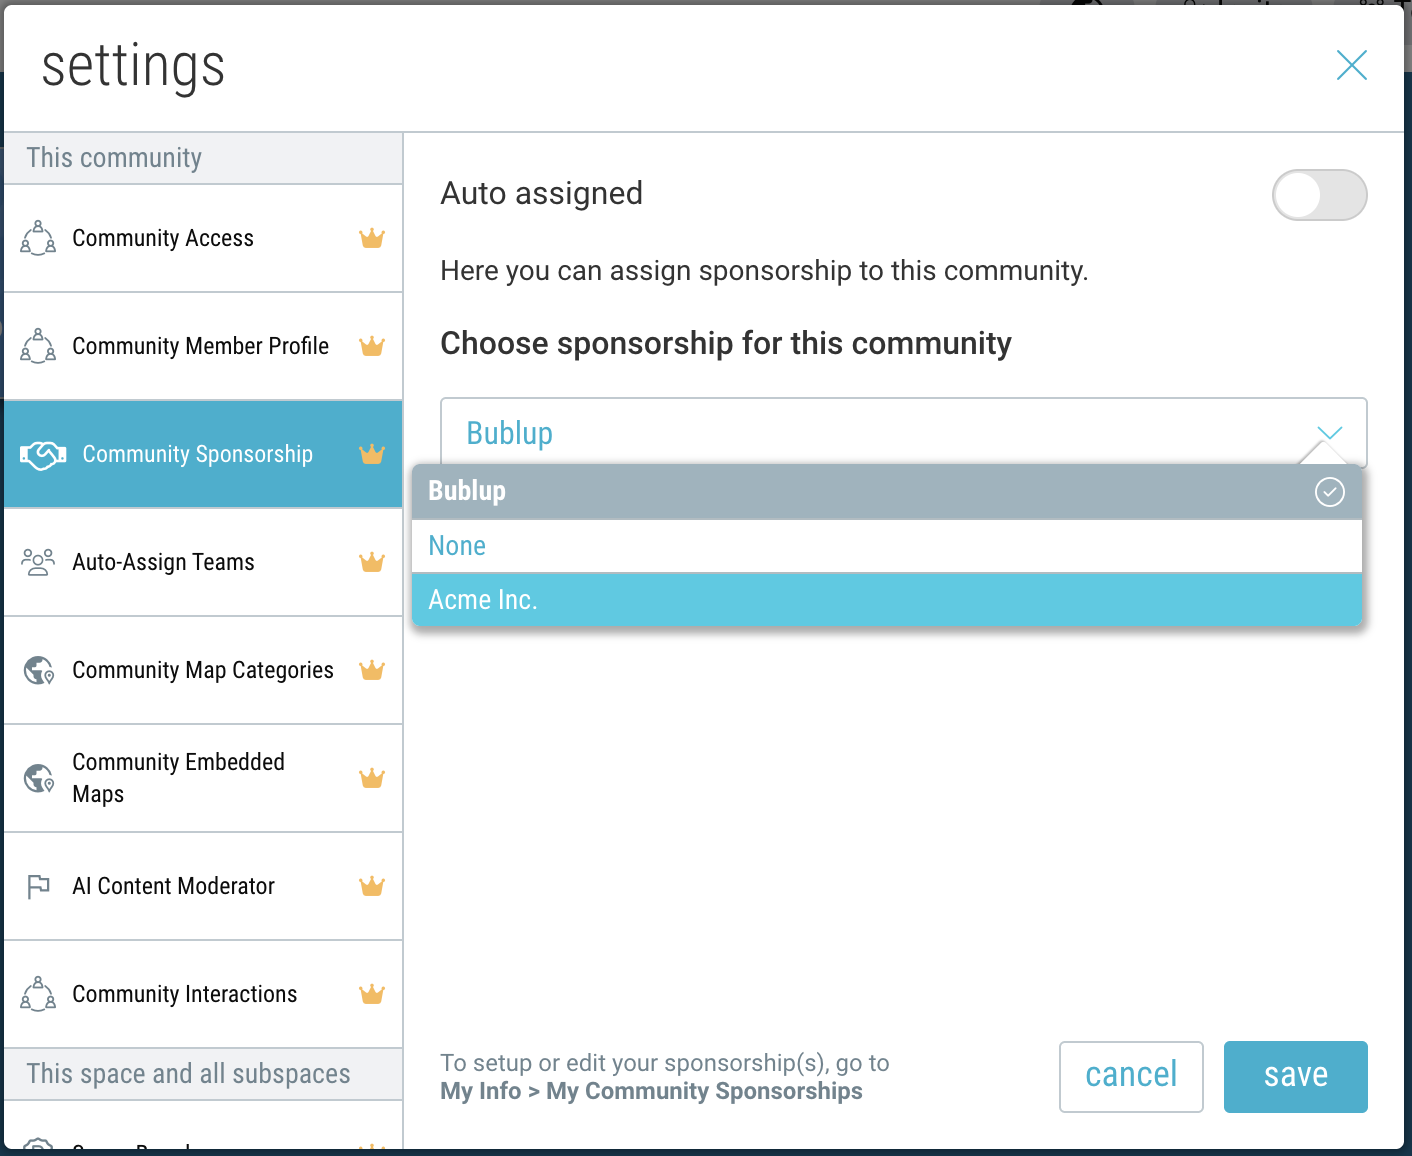
Enable a community sponsorship on a Community space or subspace
- Navigate to your Community and click the Settings icon in the upper-right corner.

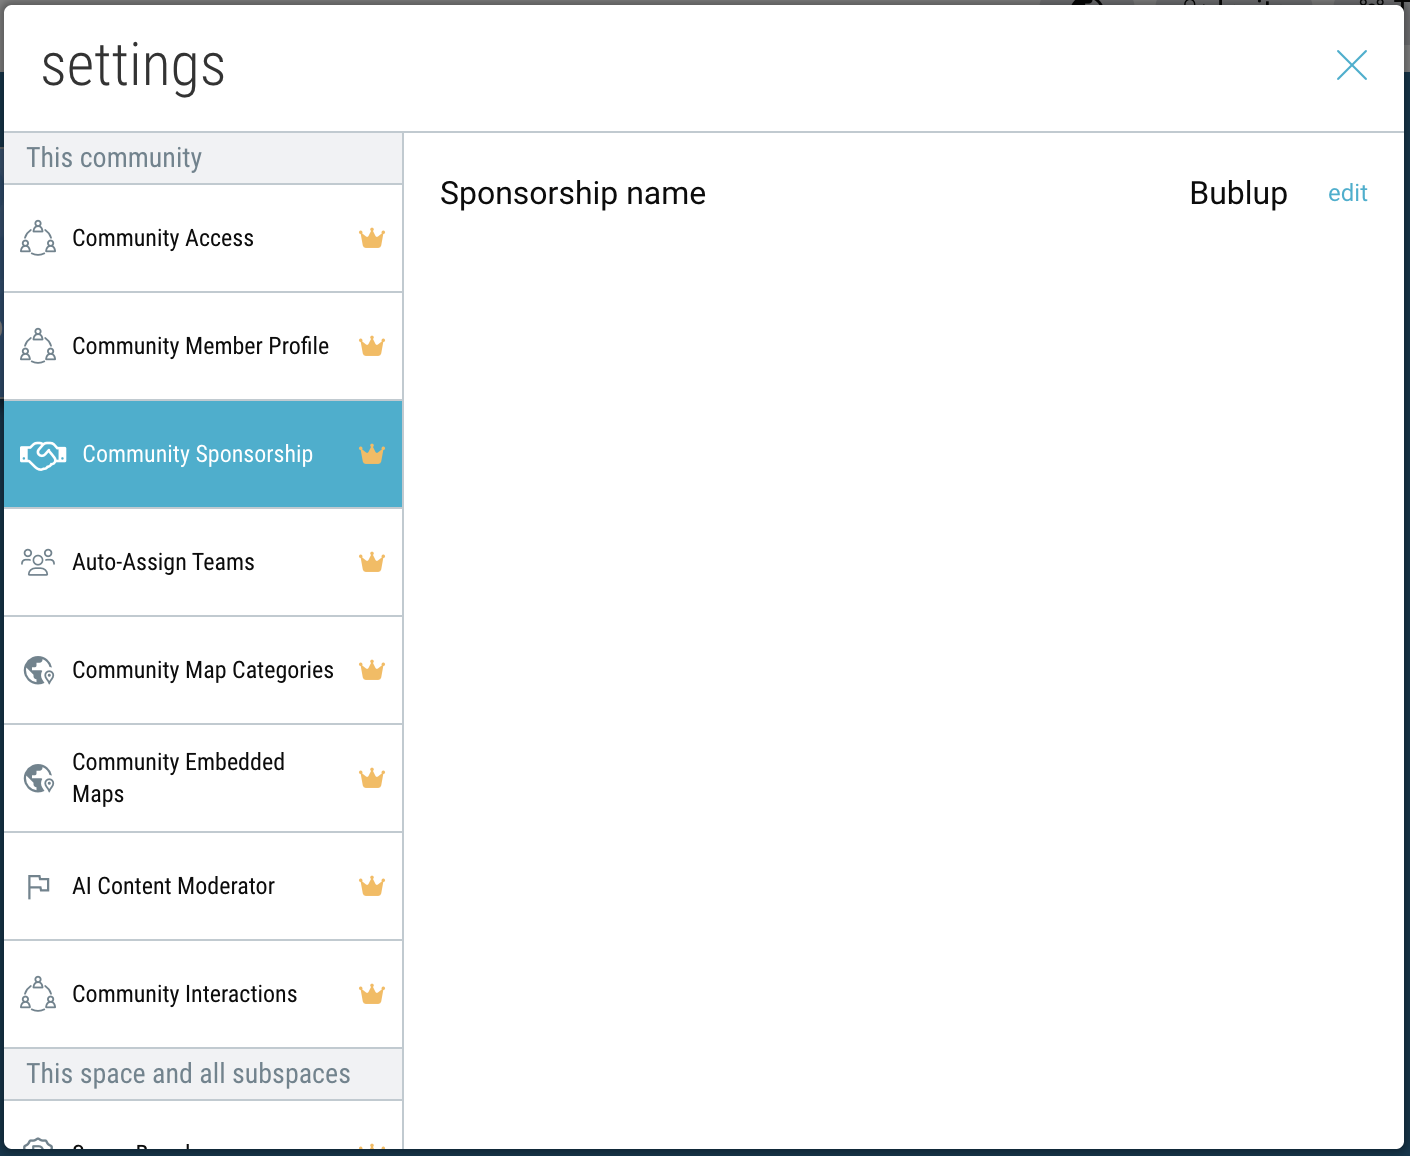
- Go to “Community Sponsorship” and click “edit”.
- Toggle off the “auto-assign” and select a sponsor from the dropdown list.
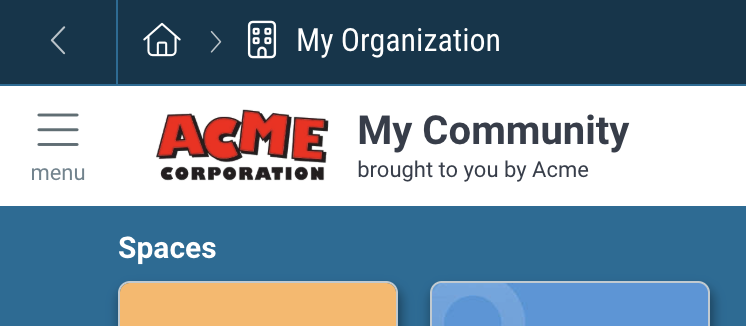
- Your sponsorship will appear at the top of your community, with the tagline and logo. Clicking on the logo will redirect to the URL you specified in your community sponsorship setup.
- By default, all subspaces of your community will inherit the same community sponsorship. To set a different sponsorship for a specific subspace, navigate to that space and click the Settings” icon → “Space Sponsorship”. Then click “edit” and select a different sponsor.