Create an Organization
In order to create a Community, you must first have an Organization. Business and Enterprise accounts will automatically have an organization added to your Home.

Name your organization. Then apply a custom cover and background image to your Org by going to ☰ menu → “Change Cover & Background”.
To learn more about Organization management, visit this page.
Create a Community
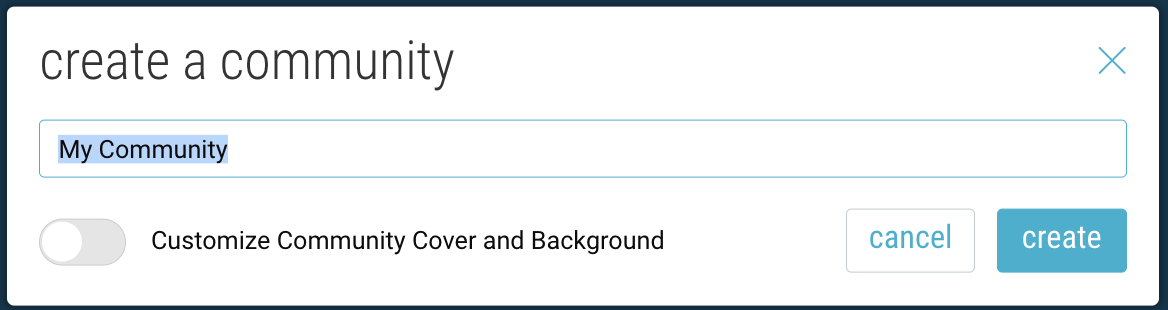
- Within your Organization, click the + button and select “Community”.
- Name your community and click “Create”.
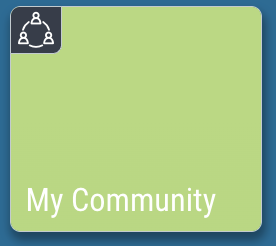
- Community spaces are indicated by the icon in the upper-left corner.
Customize Your Cover Image & Avatar
Customize your Community’s cover image and background by going to ☰ menu → “Change Cover & Background”.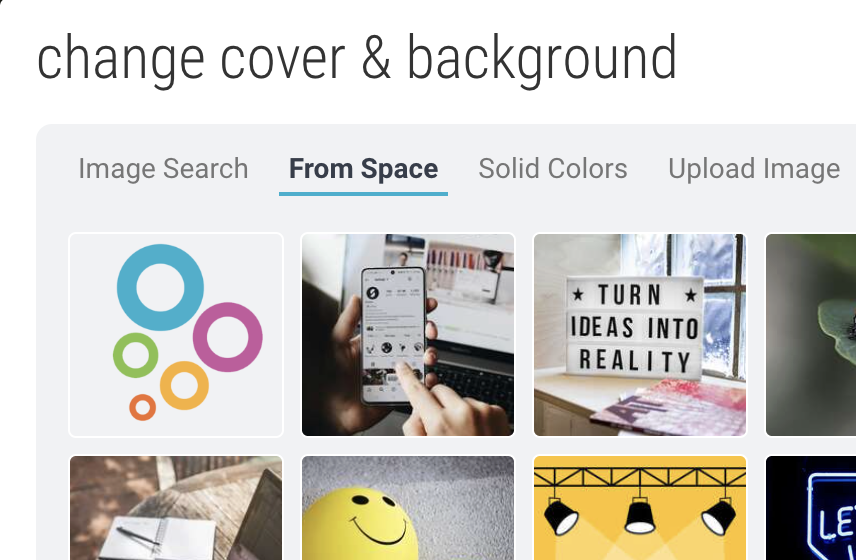
Search Bublup for images, select an image already within your space, choose a solid color, or upload a new image. This can also be done for your Organization space, as well as any subspaces you create.
Customize your account avatar by going to “My Info” → “My Profile”. 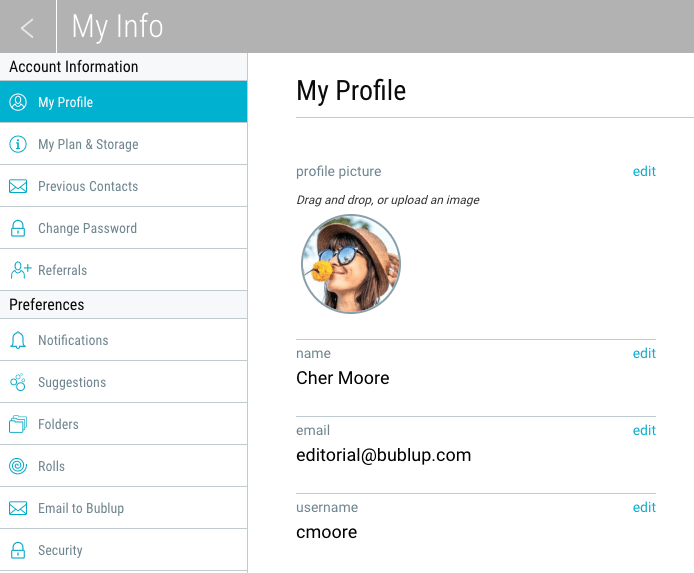
The name, username, and image set here will be visible within the community whenever you add content or leave comments.
Note: You can also set up branding within your Community (See next section.)
Set Up Custom Branding
Custom branding allows you to create visually impactful, branded experiences whenever you share content from a Bublup space.
Create a Custom Brand
1. Click on “my info” in the upper-right corner. Then select “My Brands” and choose “create a custom brand”.
2. Start by naming your brand and adding a logo image. Note: The branding for a space will apply to rolls you create, emails, shared space invitations, and shareable links that you send from that space.
3. Add more information by using the 3-dot (…) menu on your brand and selecting “edit”.
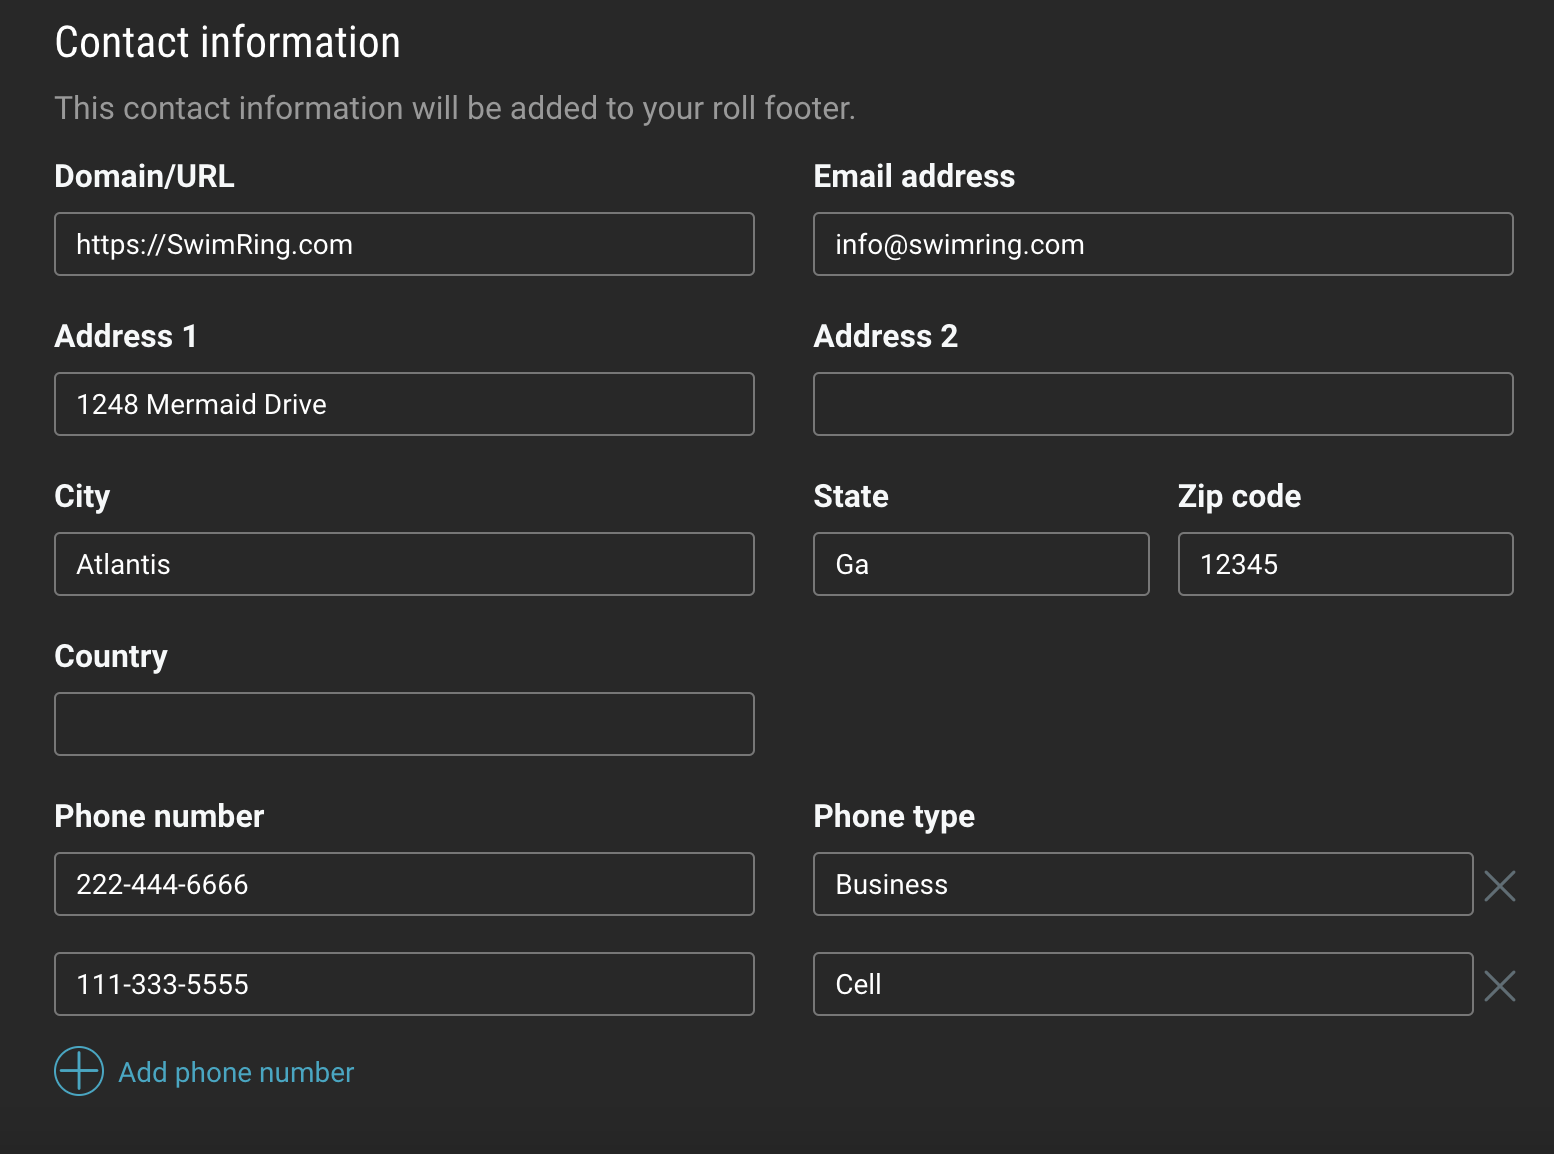
This information will be displayed in any branded roll footers: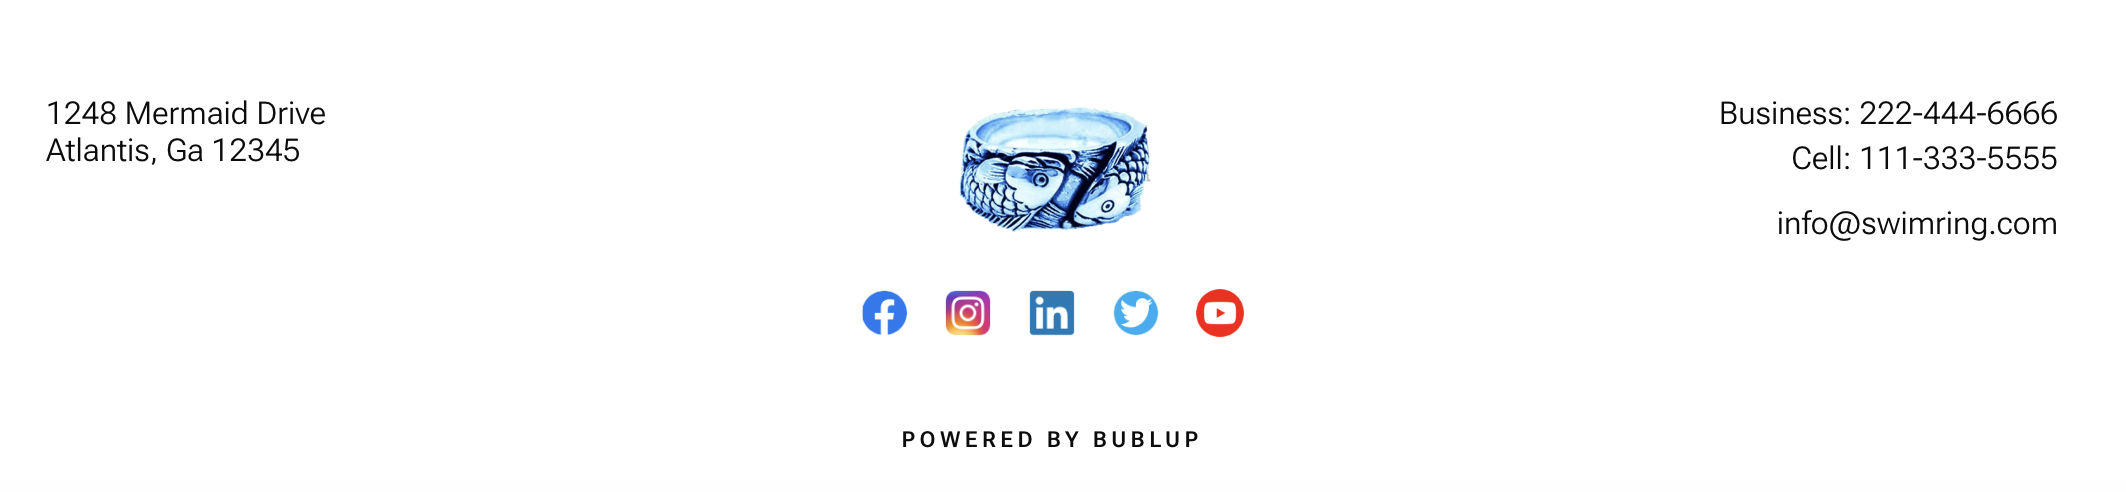
Now that you have created a brand you can easily apply it to a space:
1. Navigate to your Organization or Community where you wish to apply the branding.
2. Click the “settings” icon in the upper-right corner and select “Space Brand”.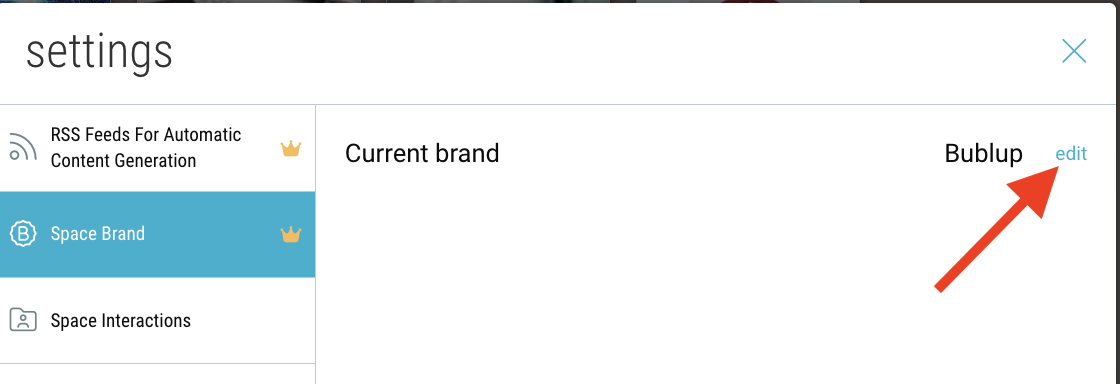
3. Click “edit”, then toggle off the “auto-assigned” option. Click the dropdown menu to open your list of brands. This will always include the “Bublup” and “No Brand” options. When you have selected your brand, click “save”.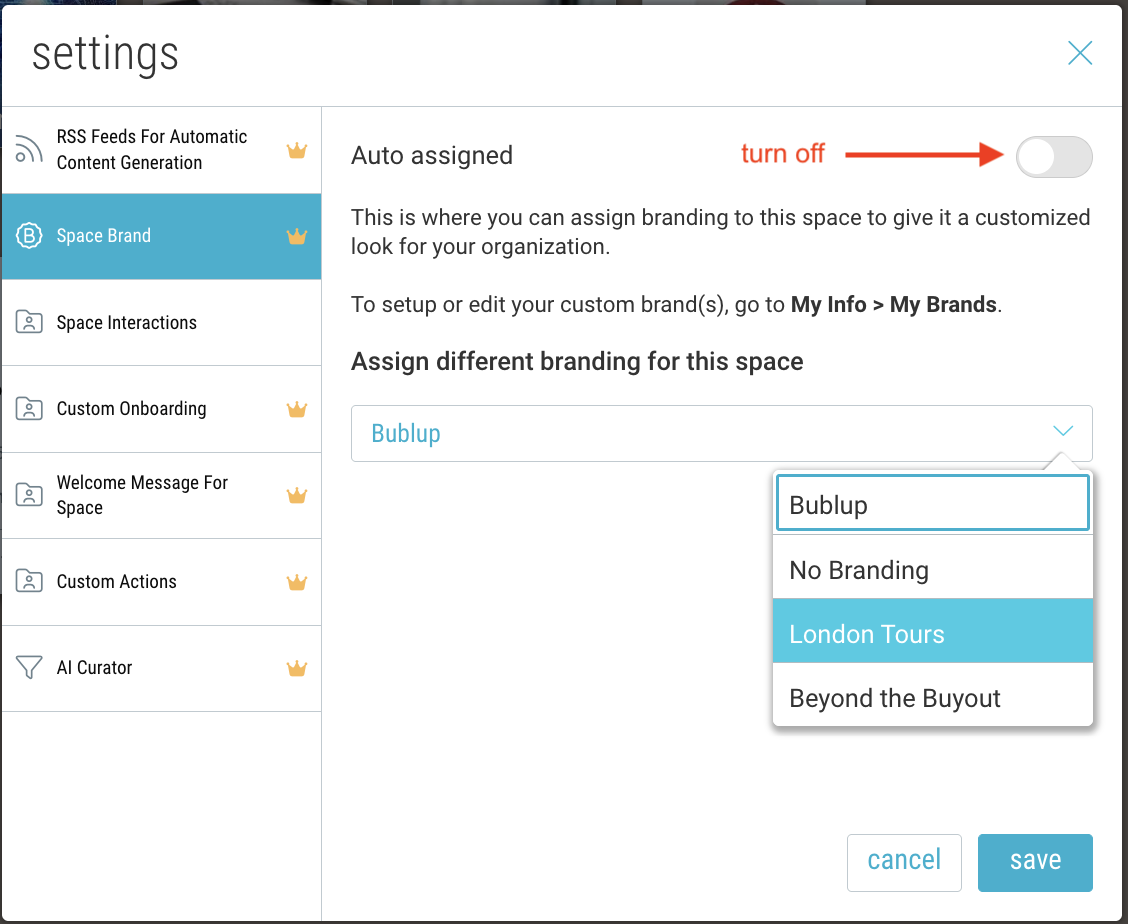
4. Notice the space now has a header that includes your brand image.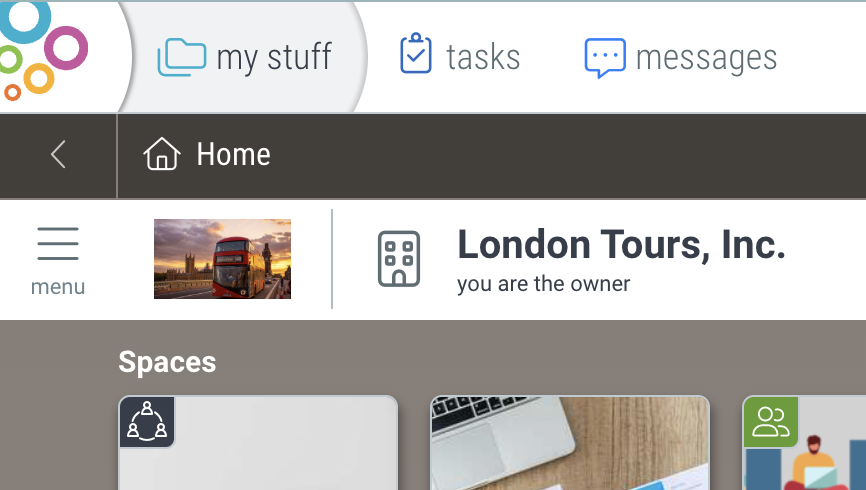
Note: Your brand image will hyperlink to the domain URL you specified in your brand’s contact info during setup.
Pro Tip: You can create up to 3 brands in your account. This may be useful to you if you are associated with multiple organizations, or if you want to have different versions of your favorite logo.
Add Spaces & Subspaces
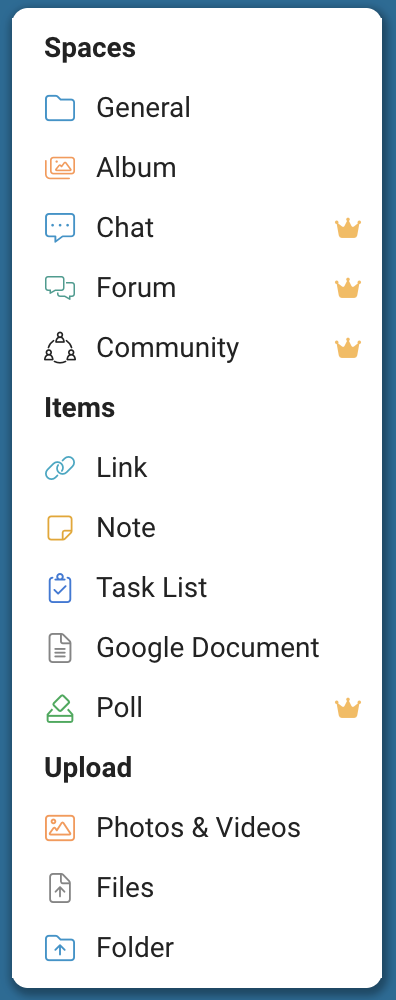
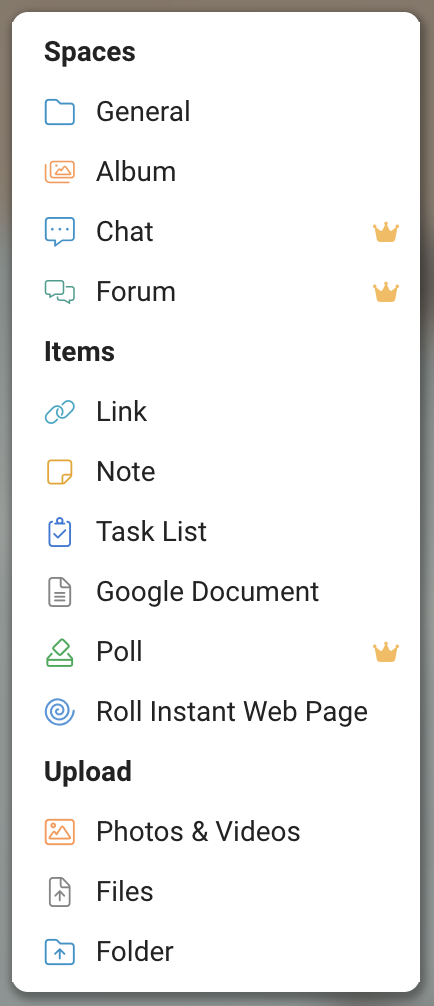
Spaces are how you organize your content in Bublup. In addition to your Community space, there are spaces catered towards specific use cases. Within spaces, you can create subspaces and save content using the + menu.
The different space types include:
- Community (1 per Organization)
- General Content
- Albums
- Chats
- Forums
- Feeds
To learn more about the different space types, click here.
Add Items to Spaces
Use the “+” menu to add different items to your spaces.
In Bublup, you can upload:
- Links
- Notes
- PDFs
- Documents
- Photos
- Videos
- Audio files
- Task lists
- Polls
- Imported folders or files
- Google Docs, Sheets, Slides and Forms
Customize Your Community Onboarding with Branded Invitations
On desktop, open your Community space. Then click the “settings” icon in the upper-right corner and select “Branded Invitation”.
Set a custom message which will display on the sign-up screen for new users joining your Community.

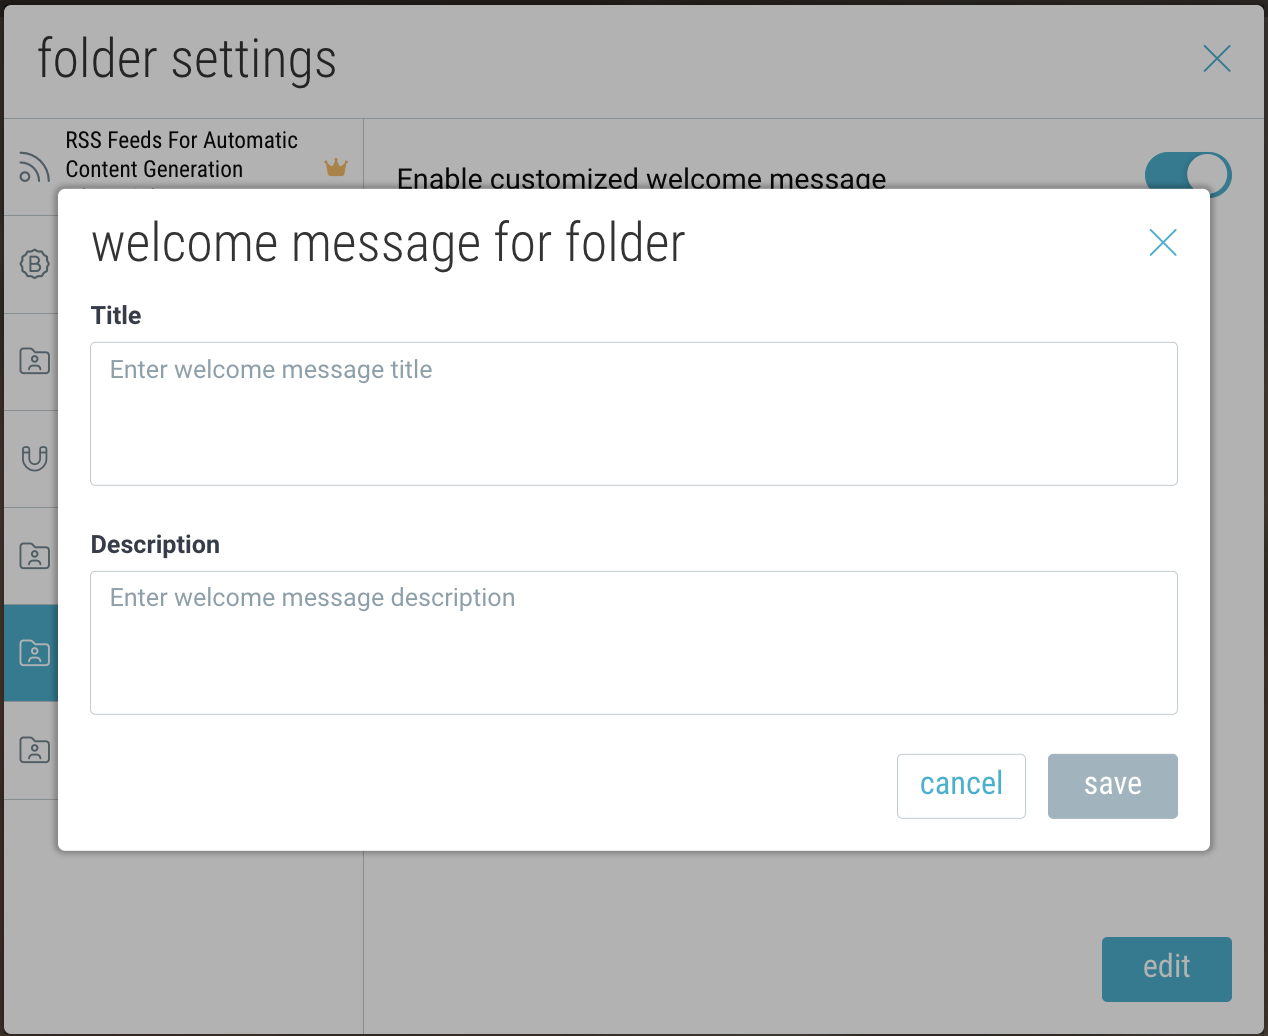
Create a Custom Welcome Message Inside Bublup
Provide a customized welcome message the first time a new member enters your community.
On desktop, open your Community space. Then click the “settings” icon in the upper-right corner and select “Welcome Message For Space”.
Restrict Community Access
Require admin approval for all community members prior to being admitted as a member of the community.
- On desktop, click the “settings” icon in the upper-right corner.
- Navigate to “Community Access” and enable the toggle.
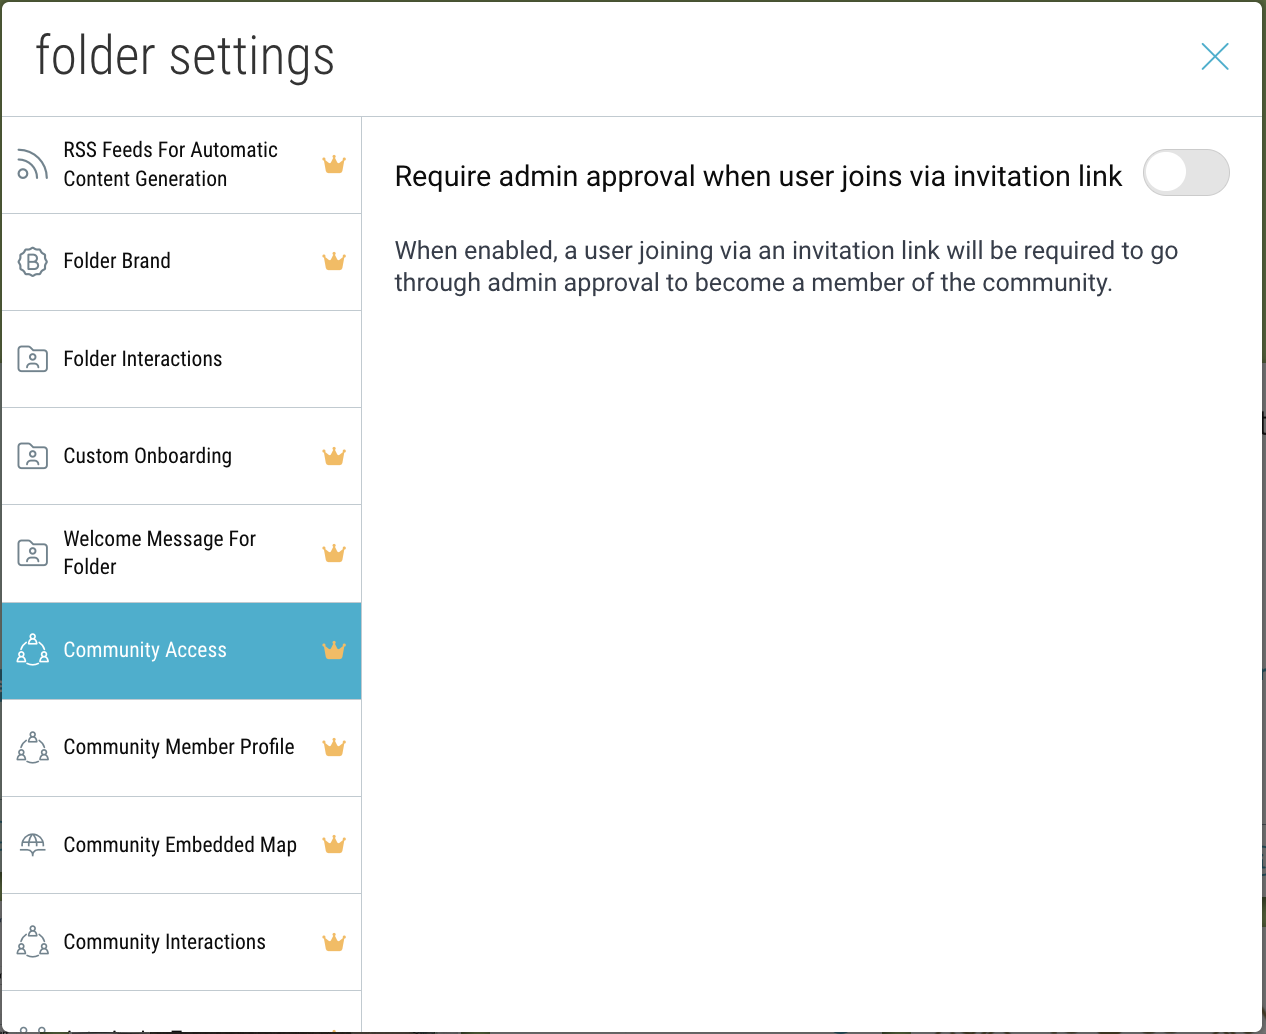
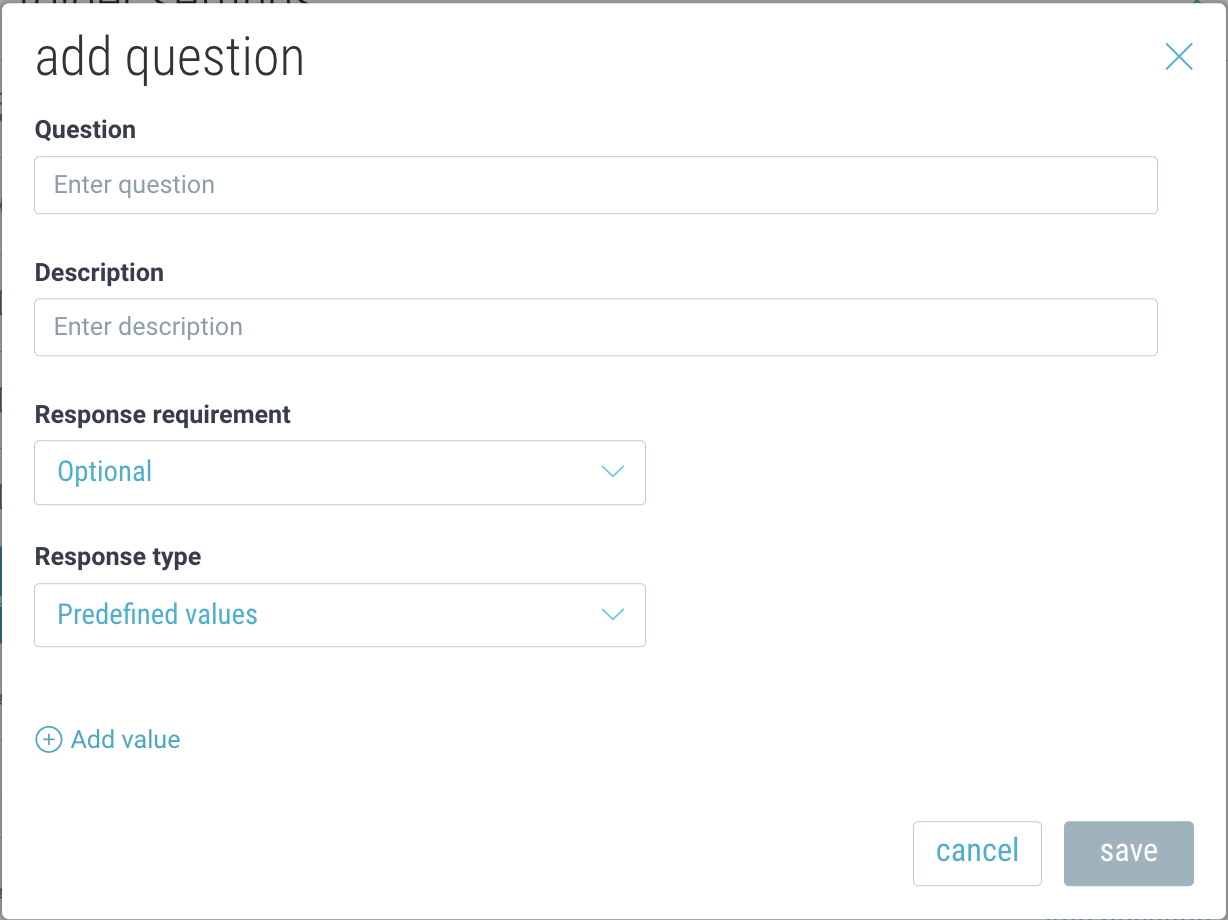
- Add approval questions for the members. These can be optional or required and can be open-ended or pre-defined.
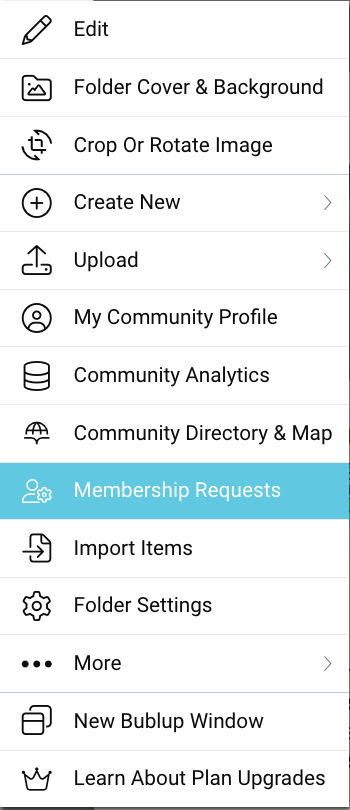
- To review and approve membership requests, go to the community ☰ menu and click “Membership Requests”.
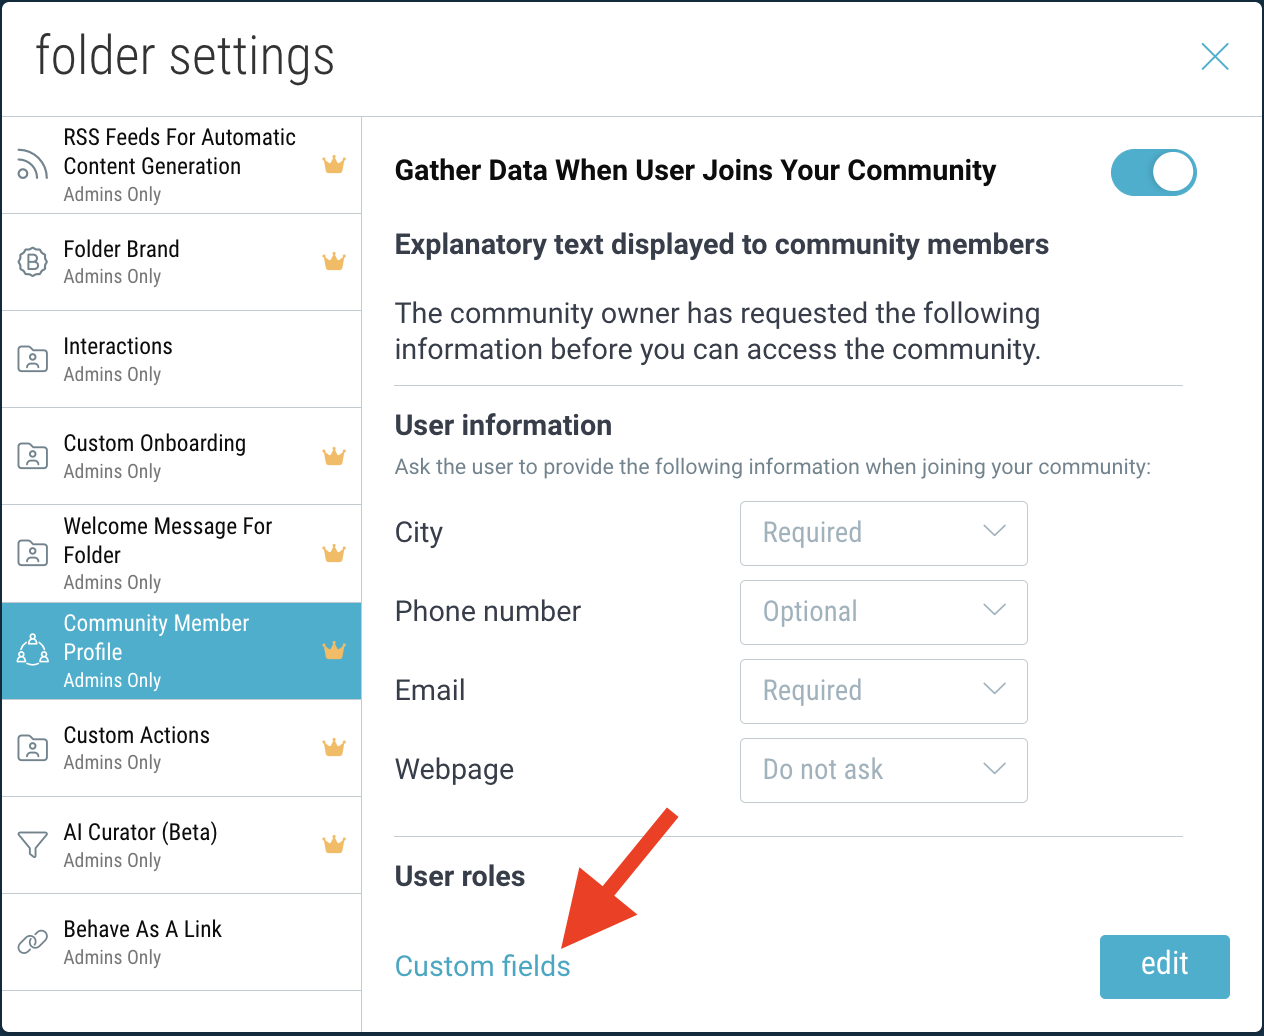
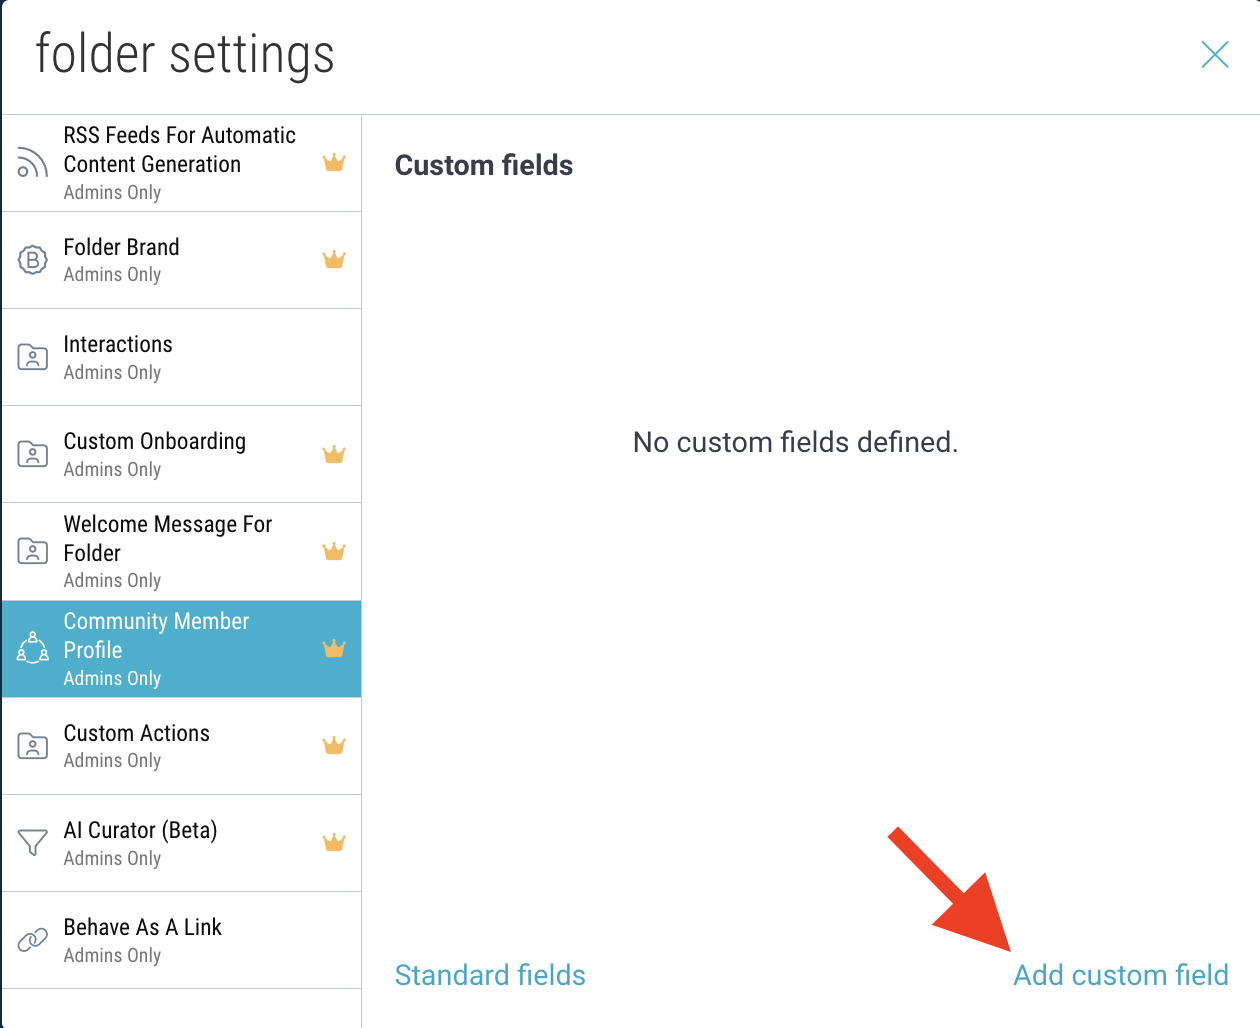
Enable Community Member Profiles
Community admins can enable and customize community profiles.
Enabling Community Profiles
- On desktop, click the “settings” icon in the upper-right corner and select “Community Member Profile”.
- Customize the descriptive text that will appear when members are prompted to create their profile.
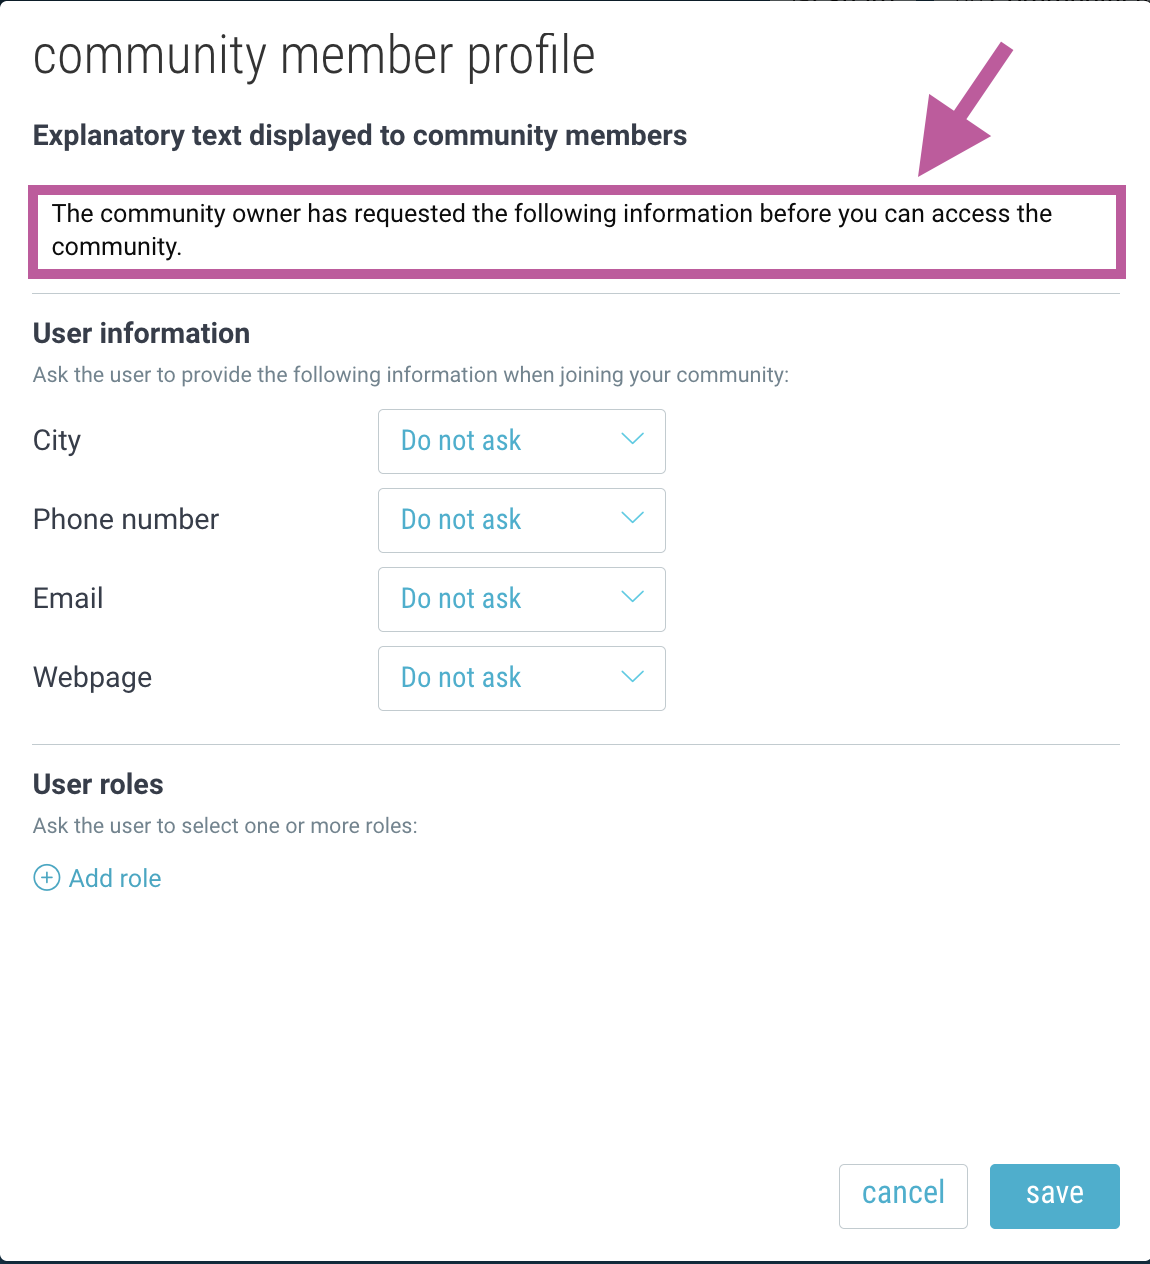
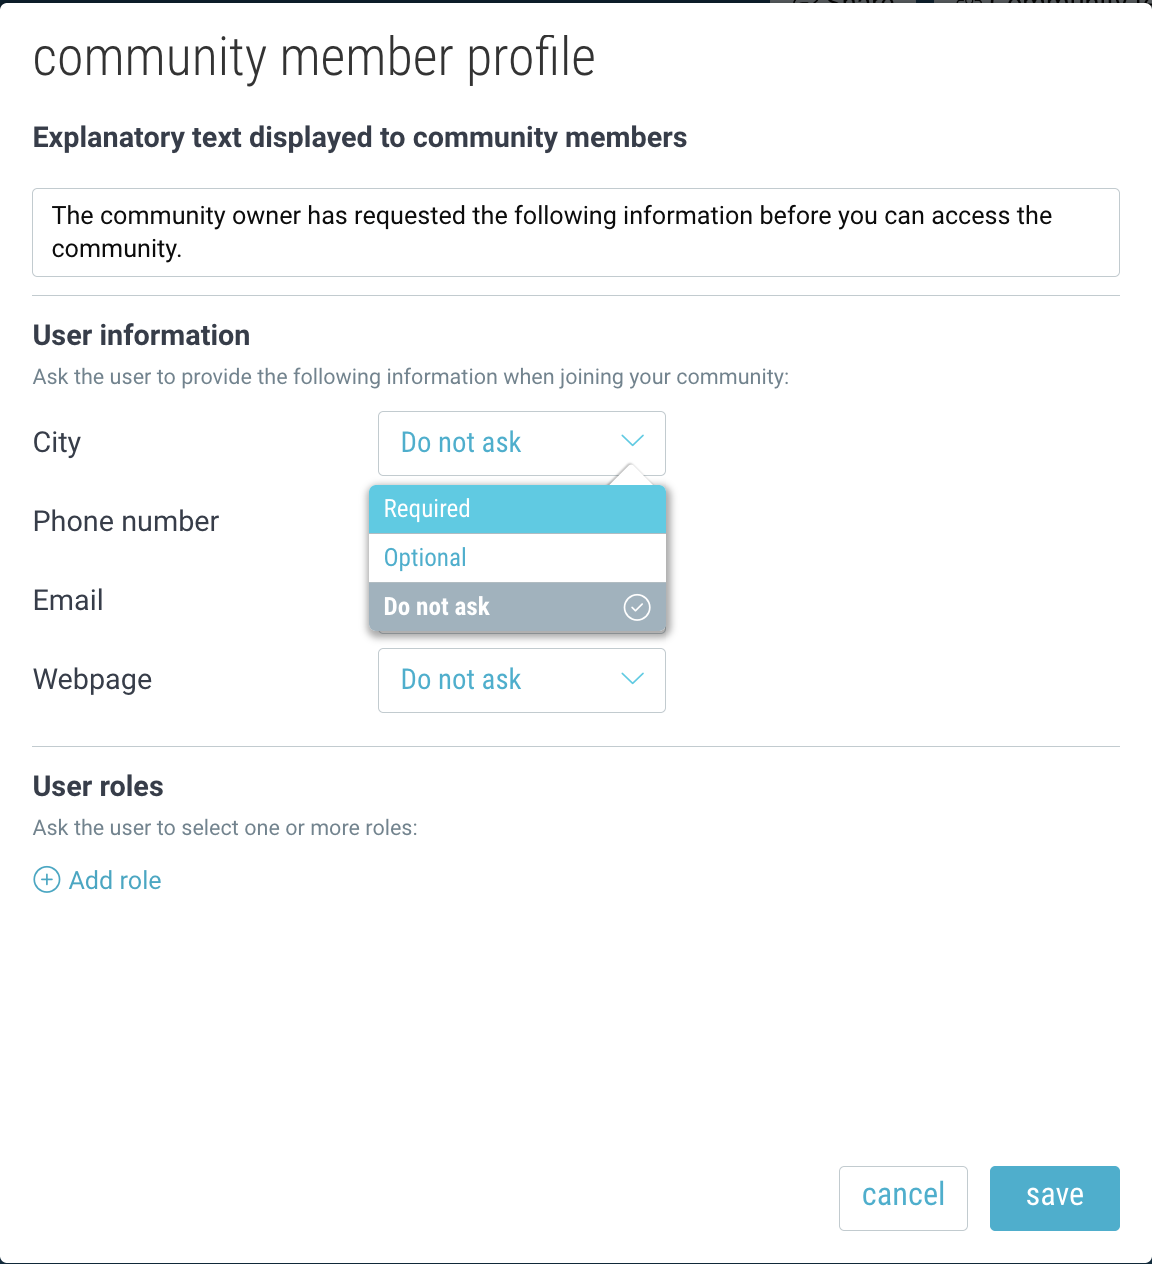
- Specify which fields are required or optional.
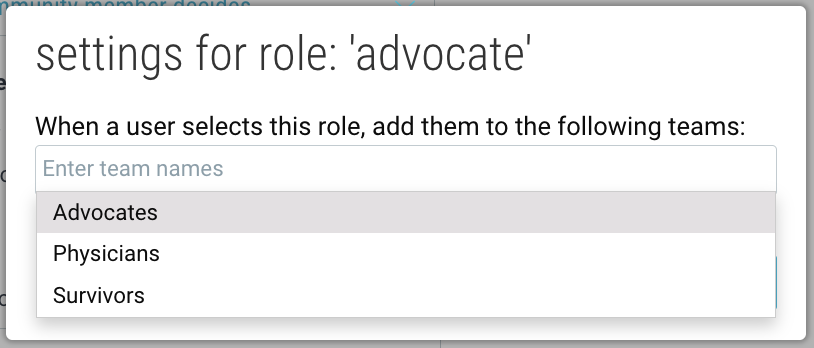
- (Optional) Add user roles for members to choose from.
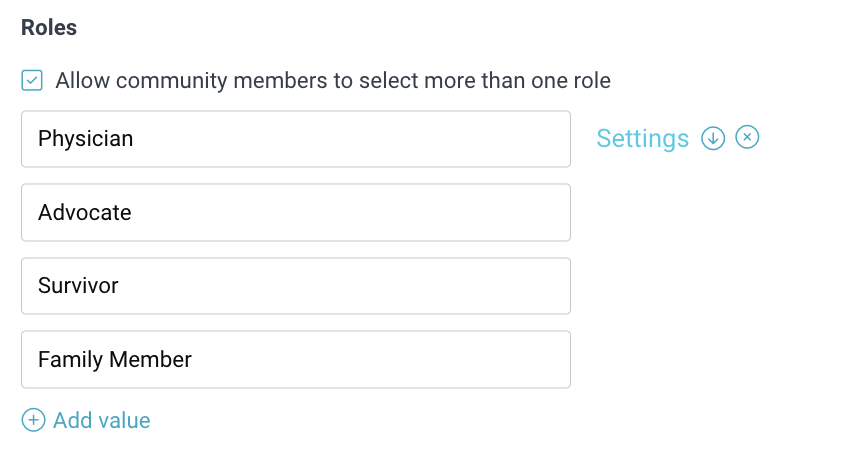
For example, if you have a medical community for a rare disease support group, you may want to know whether a member is an “advocate”, “donor”, “researcher”, etc.Pro tip: You can map a role to an existing Team by hovering over an existing role and clicking “Settings”.
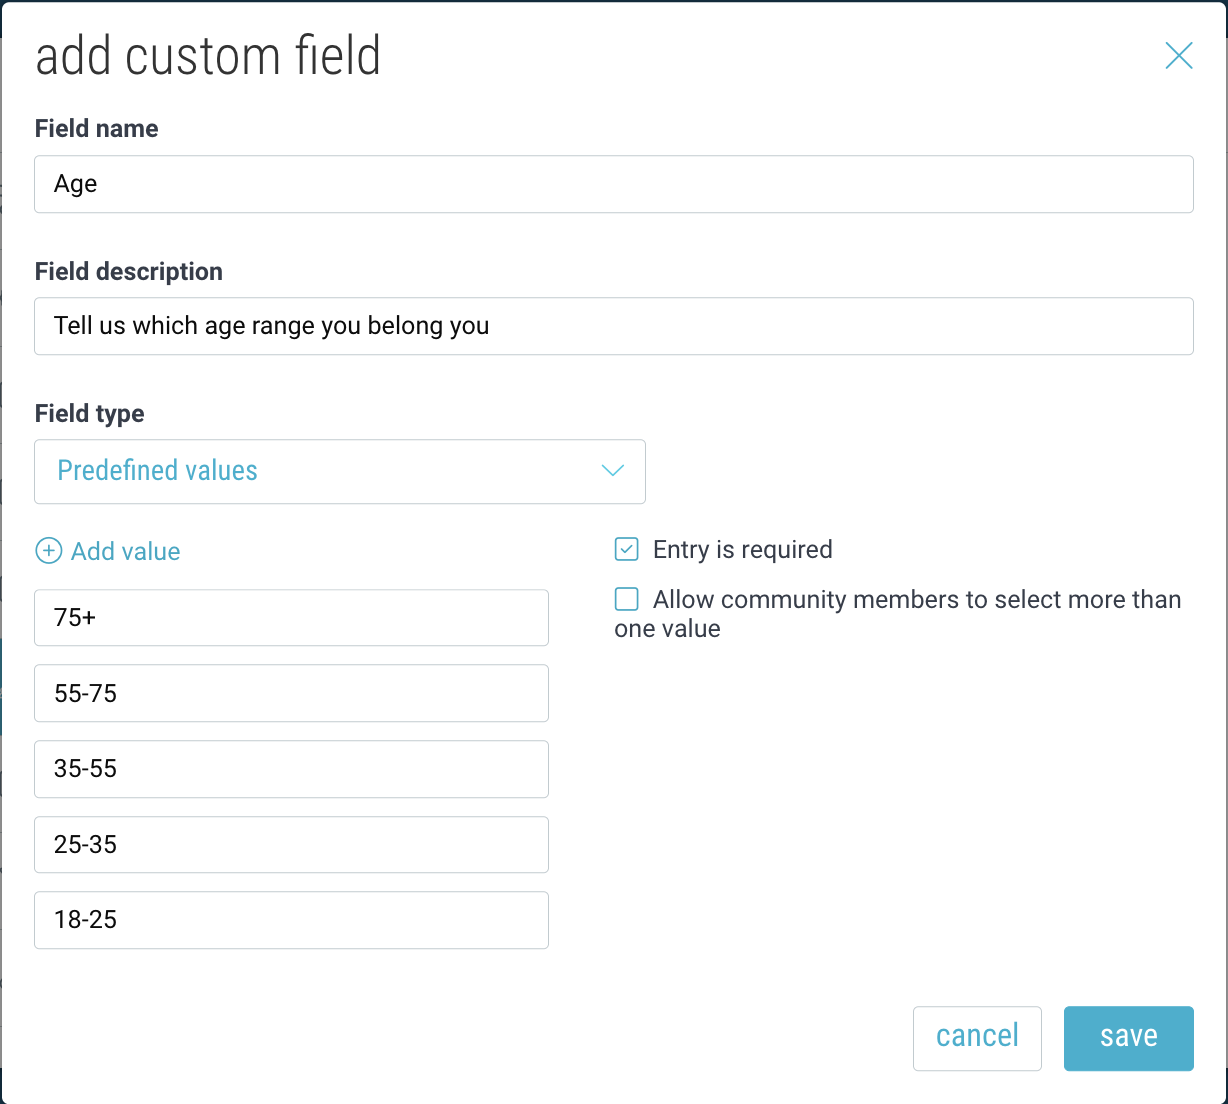
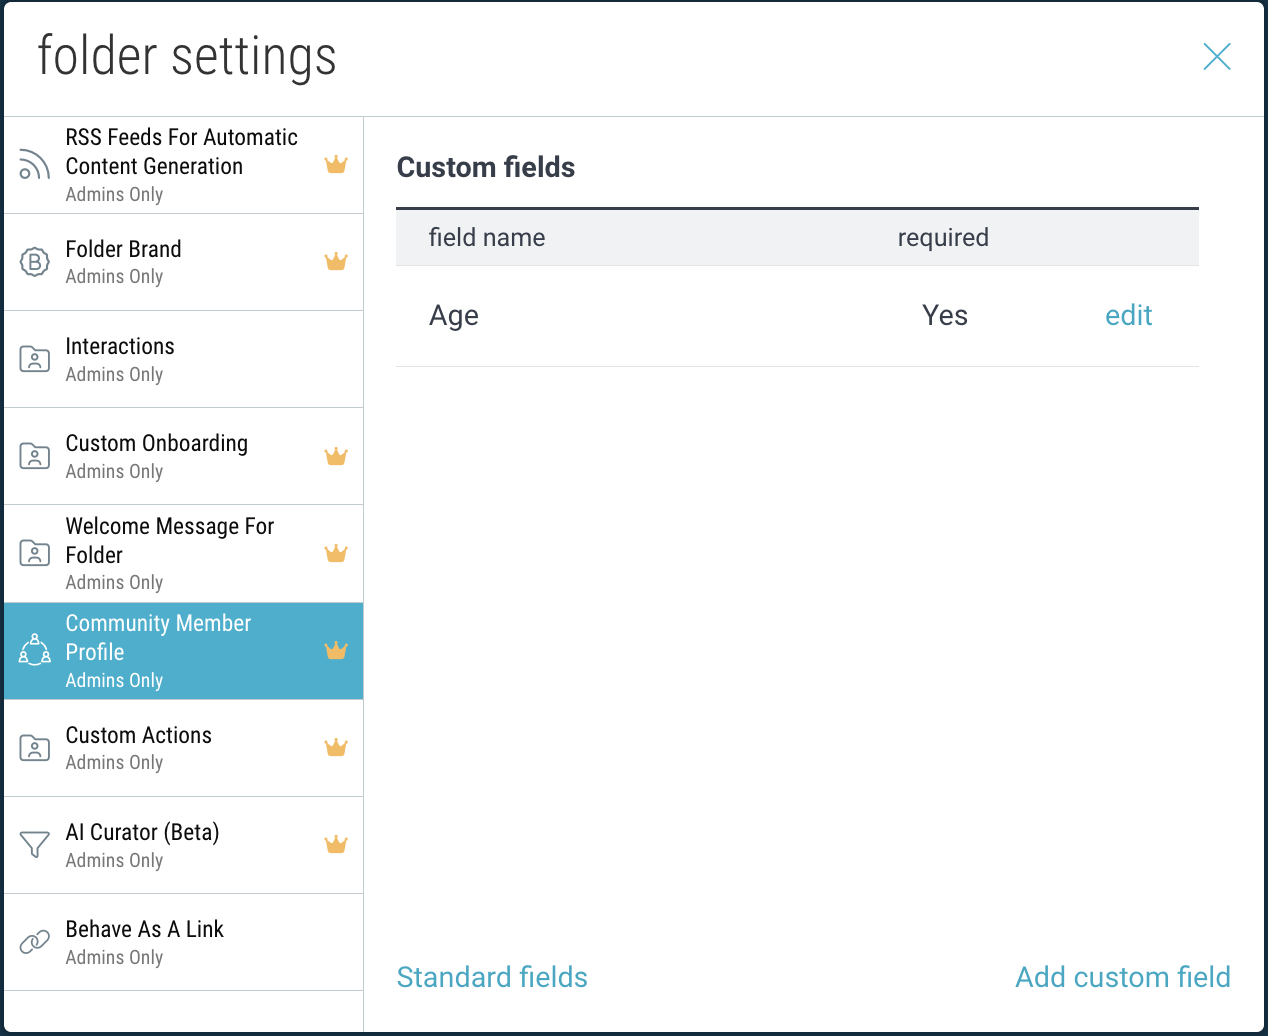
Adding Custom Fields
(Optional) Add additional custom fields for your members to fill out.
- Click “custom fields”.
- Click “add custom field”.
- Add a name and description for your field, and choose between predefined values or free form text. If you select “predefined value”, enter the values members can select from.
- Edit an existing field or add new ones. To return to the standard fields, click “Standard fields”.
Manage Community Teams
Managing Community Teams & Members
- Click “Teams” at the top of the Community to view & manage your teams.
- Click on a team to view its members and click the “edit” icon to modify the team name, description, or avatar.
- Hover over a team or a member and click “X” to delete them.
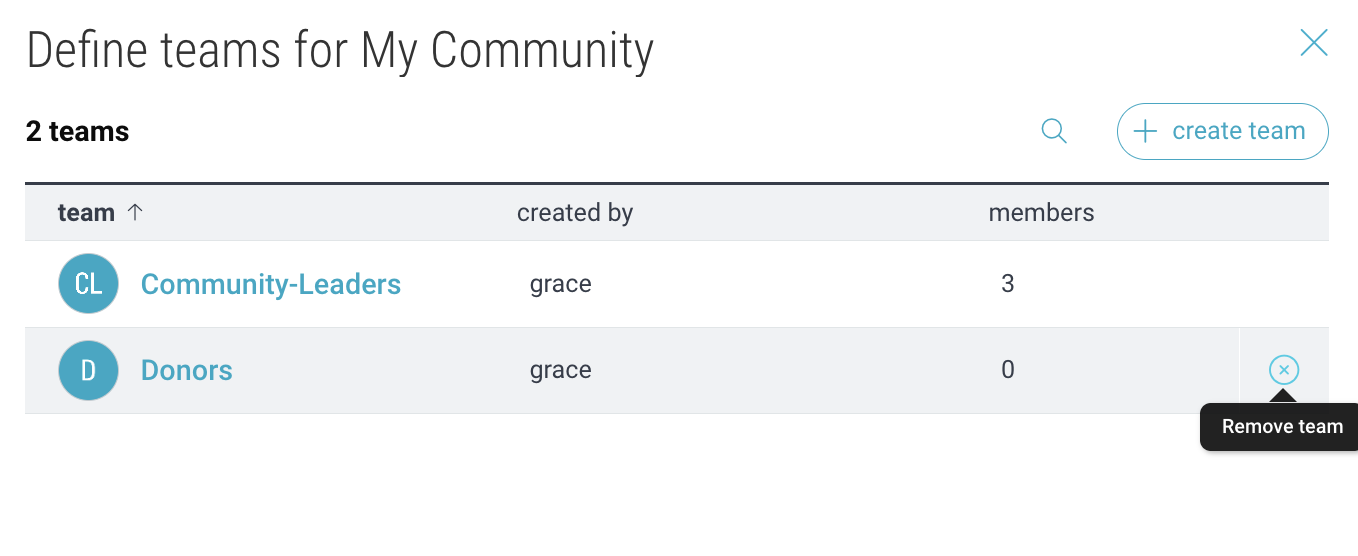
Note: Community teams are separate from Organization teams. Org teams can only contain direct members of your Organization. You can still reference Org teams within a Community.
Auto-Assign Teams
For mapping community “roles” to teams, navigate to “settings” (gear icon) → “Community Member Profile” where you have defined your roles. Then hover over an existing role and click “Settings”.
For creating more advanced rules, navigate to the “Auto-Assign Teams” tab.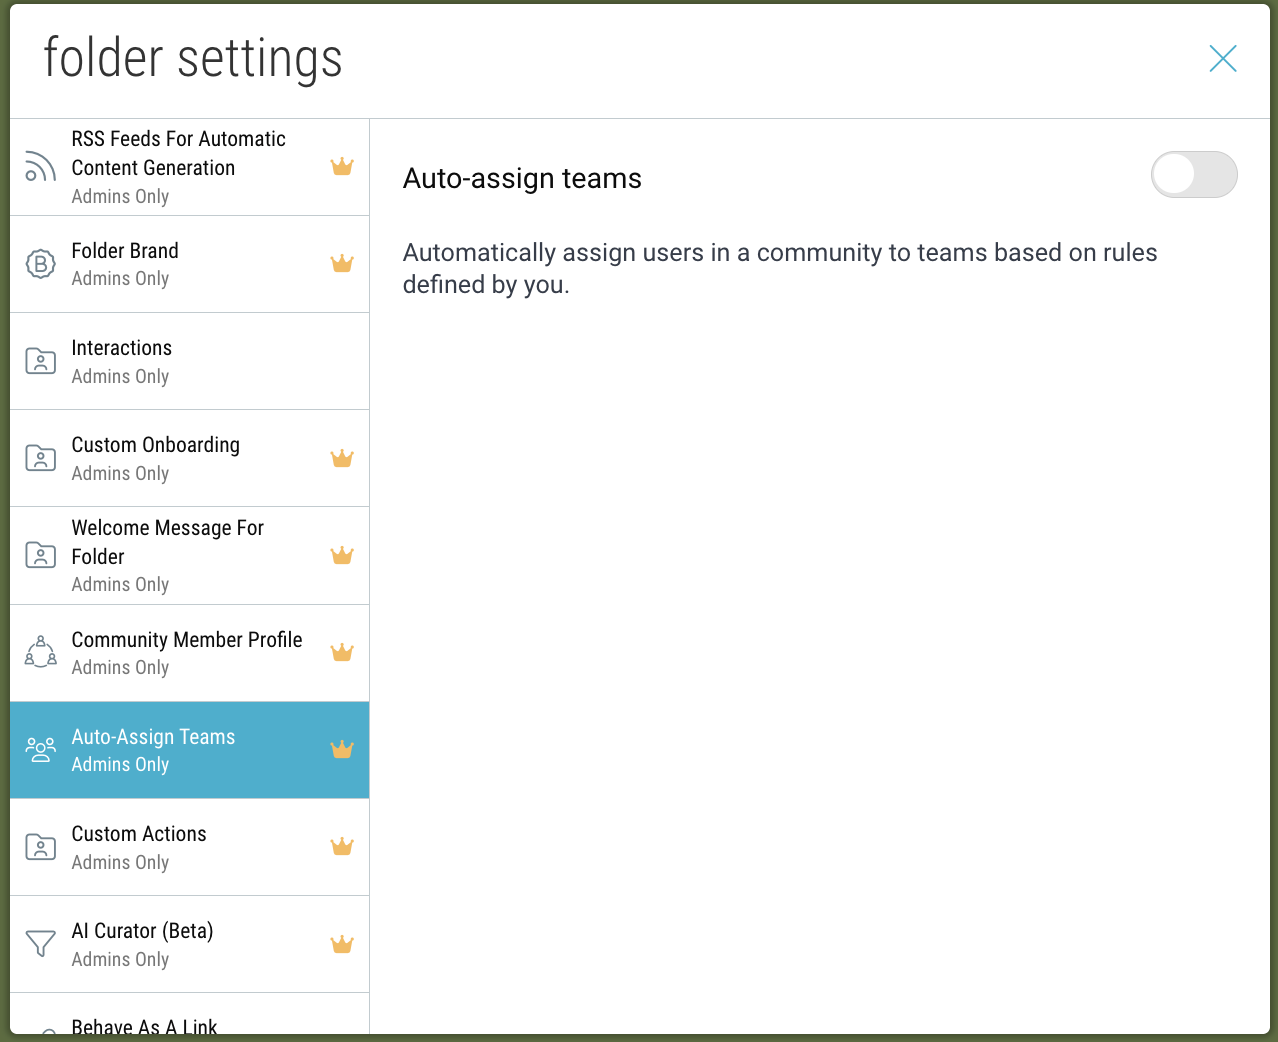
Enable the feature and click “Add rule”. Then enter your rule and click “save”.
The syntax must use the following convention: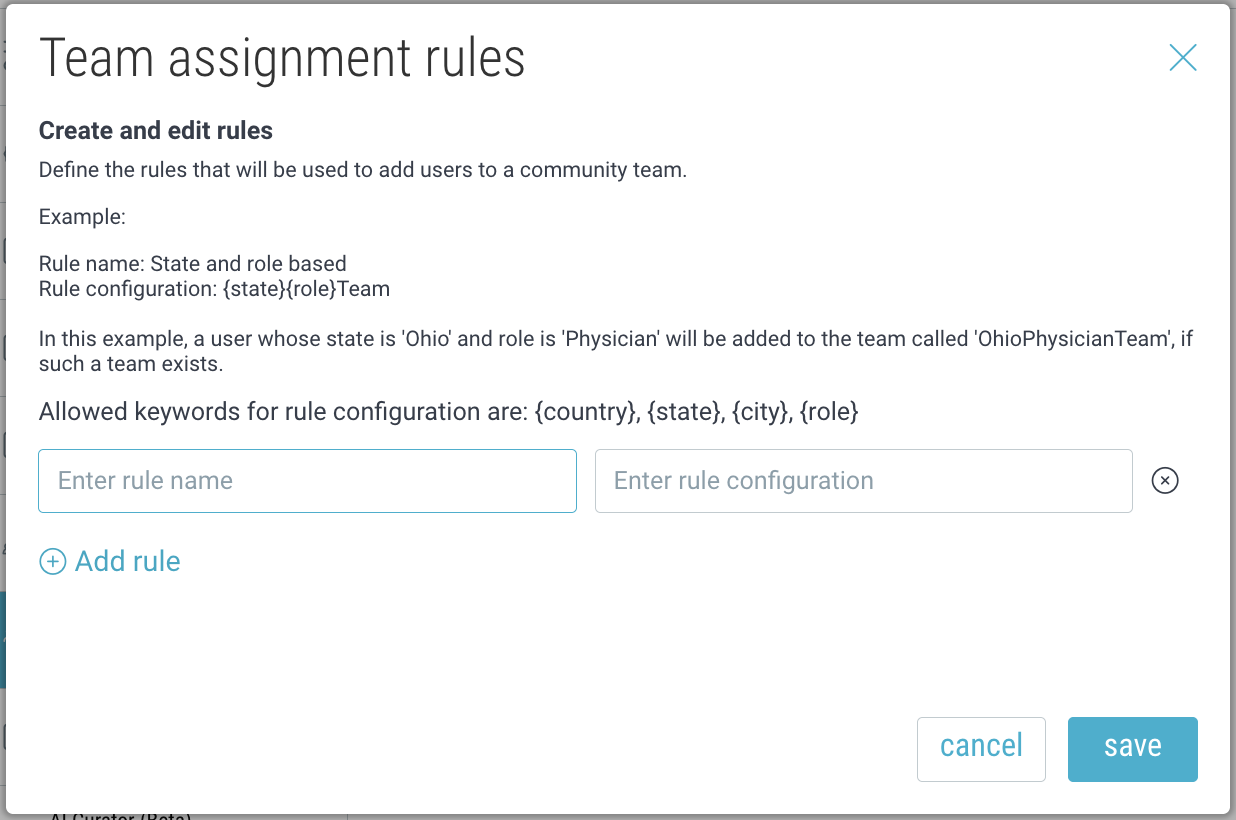
Add a Custom Action Button
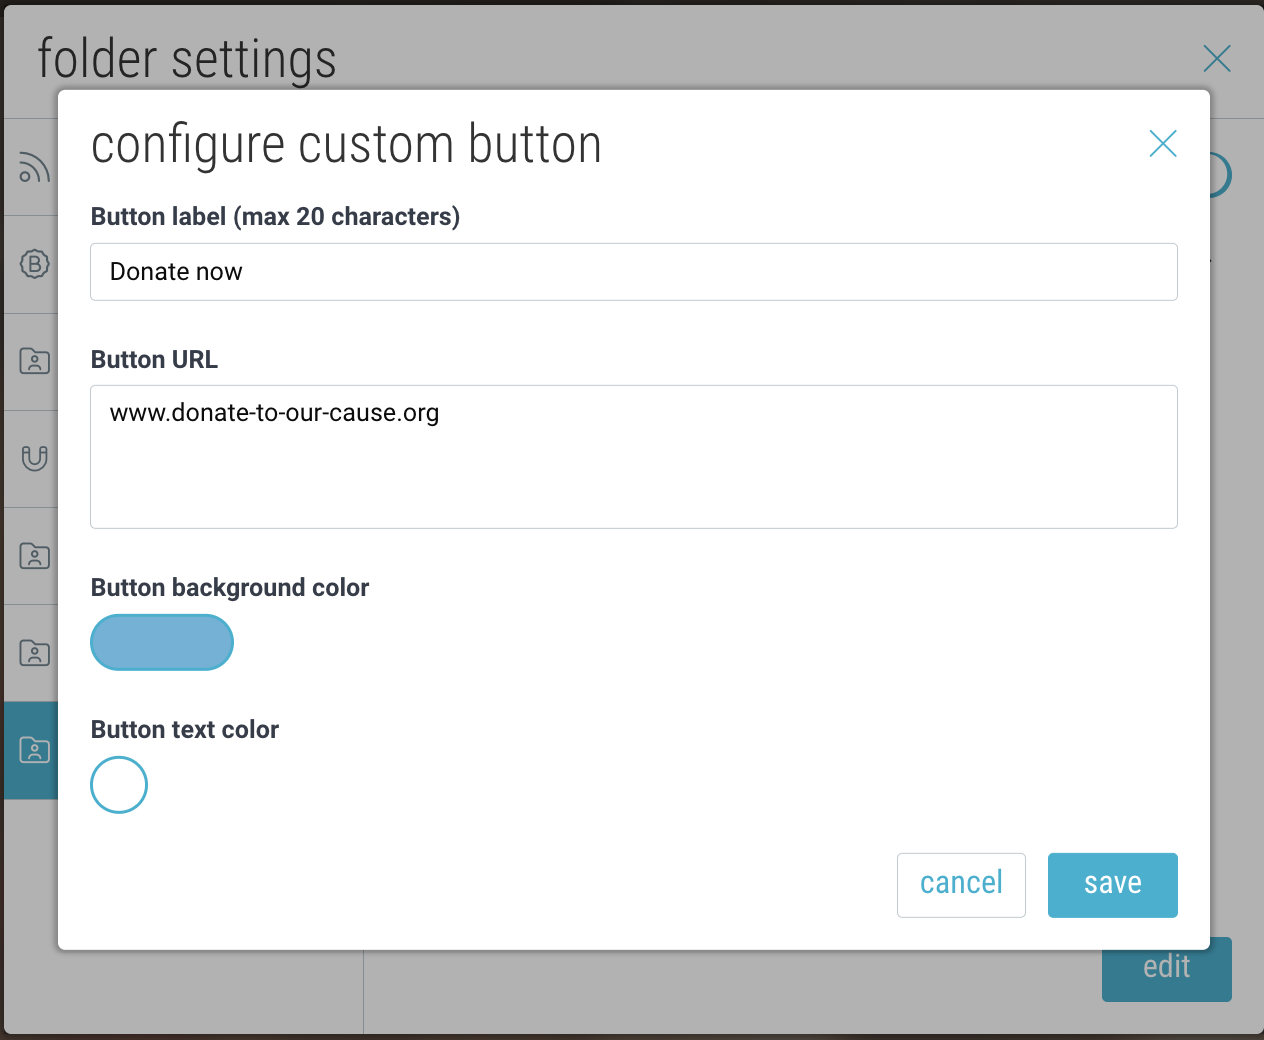
On desktop, click the “settings” icon in the upper-right corner and select “Action Button”.
- Display a custom “call to action” button
- Add a custom button at the top of your space. Customize the text and colors, as well as the URL that it will link to.

- Add a custom button at the top of your space. Customize the text and colors, as well as the URL that it will link to.
Create Forums & Topics
Creating Forums
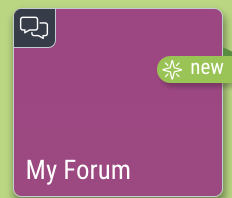
Within your Community, click the + Menu and select “Forum”. Forum spaces will have this icon in the upper-left hand corner.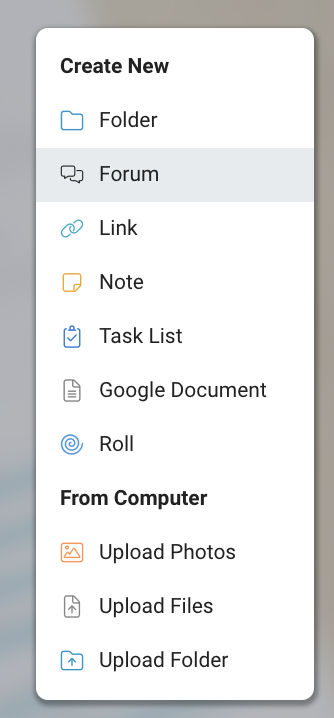
Member Permissions:
- Only Owners or Admins can create forum spaces.
- All members can create new posts, as well as comment and react to existing posts.
- A post can only be edited by its original author.
- An admin can “lock” a post to disable new comments and reactions.
- If a post has no comments, the author can delete it. Once there are comments, only the space owner or admin can delete it.
Creating Posts within a Forum
Inside a Forum, tap on “Start a post…” or use the + button to create a new post. Give your post a title and write your thoughts. You can also optionally include an attachment or add a cover image. Tap “post” in the upper-right corner to publish.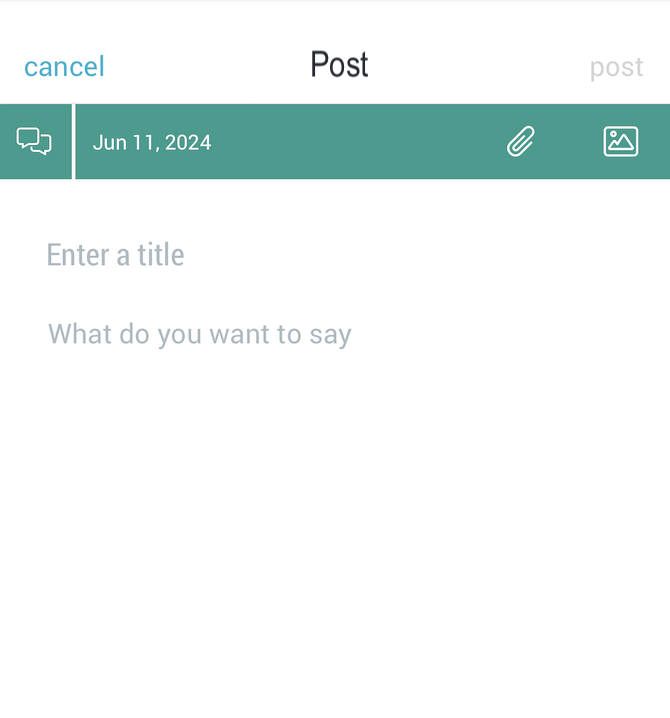
Track how many views, comments and reactions your post receives. Use the 3-dot menu to edit your post.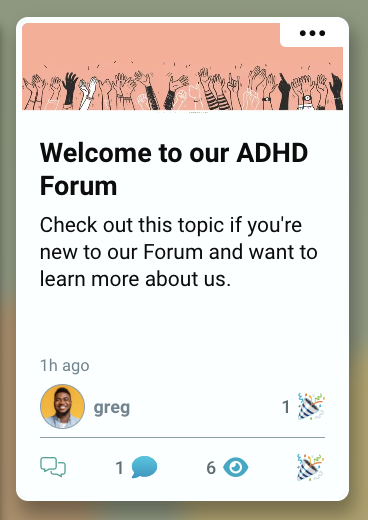
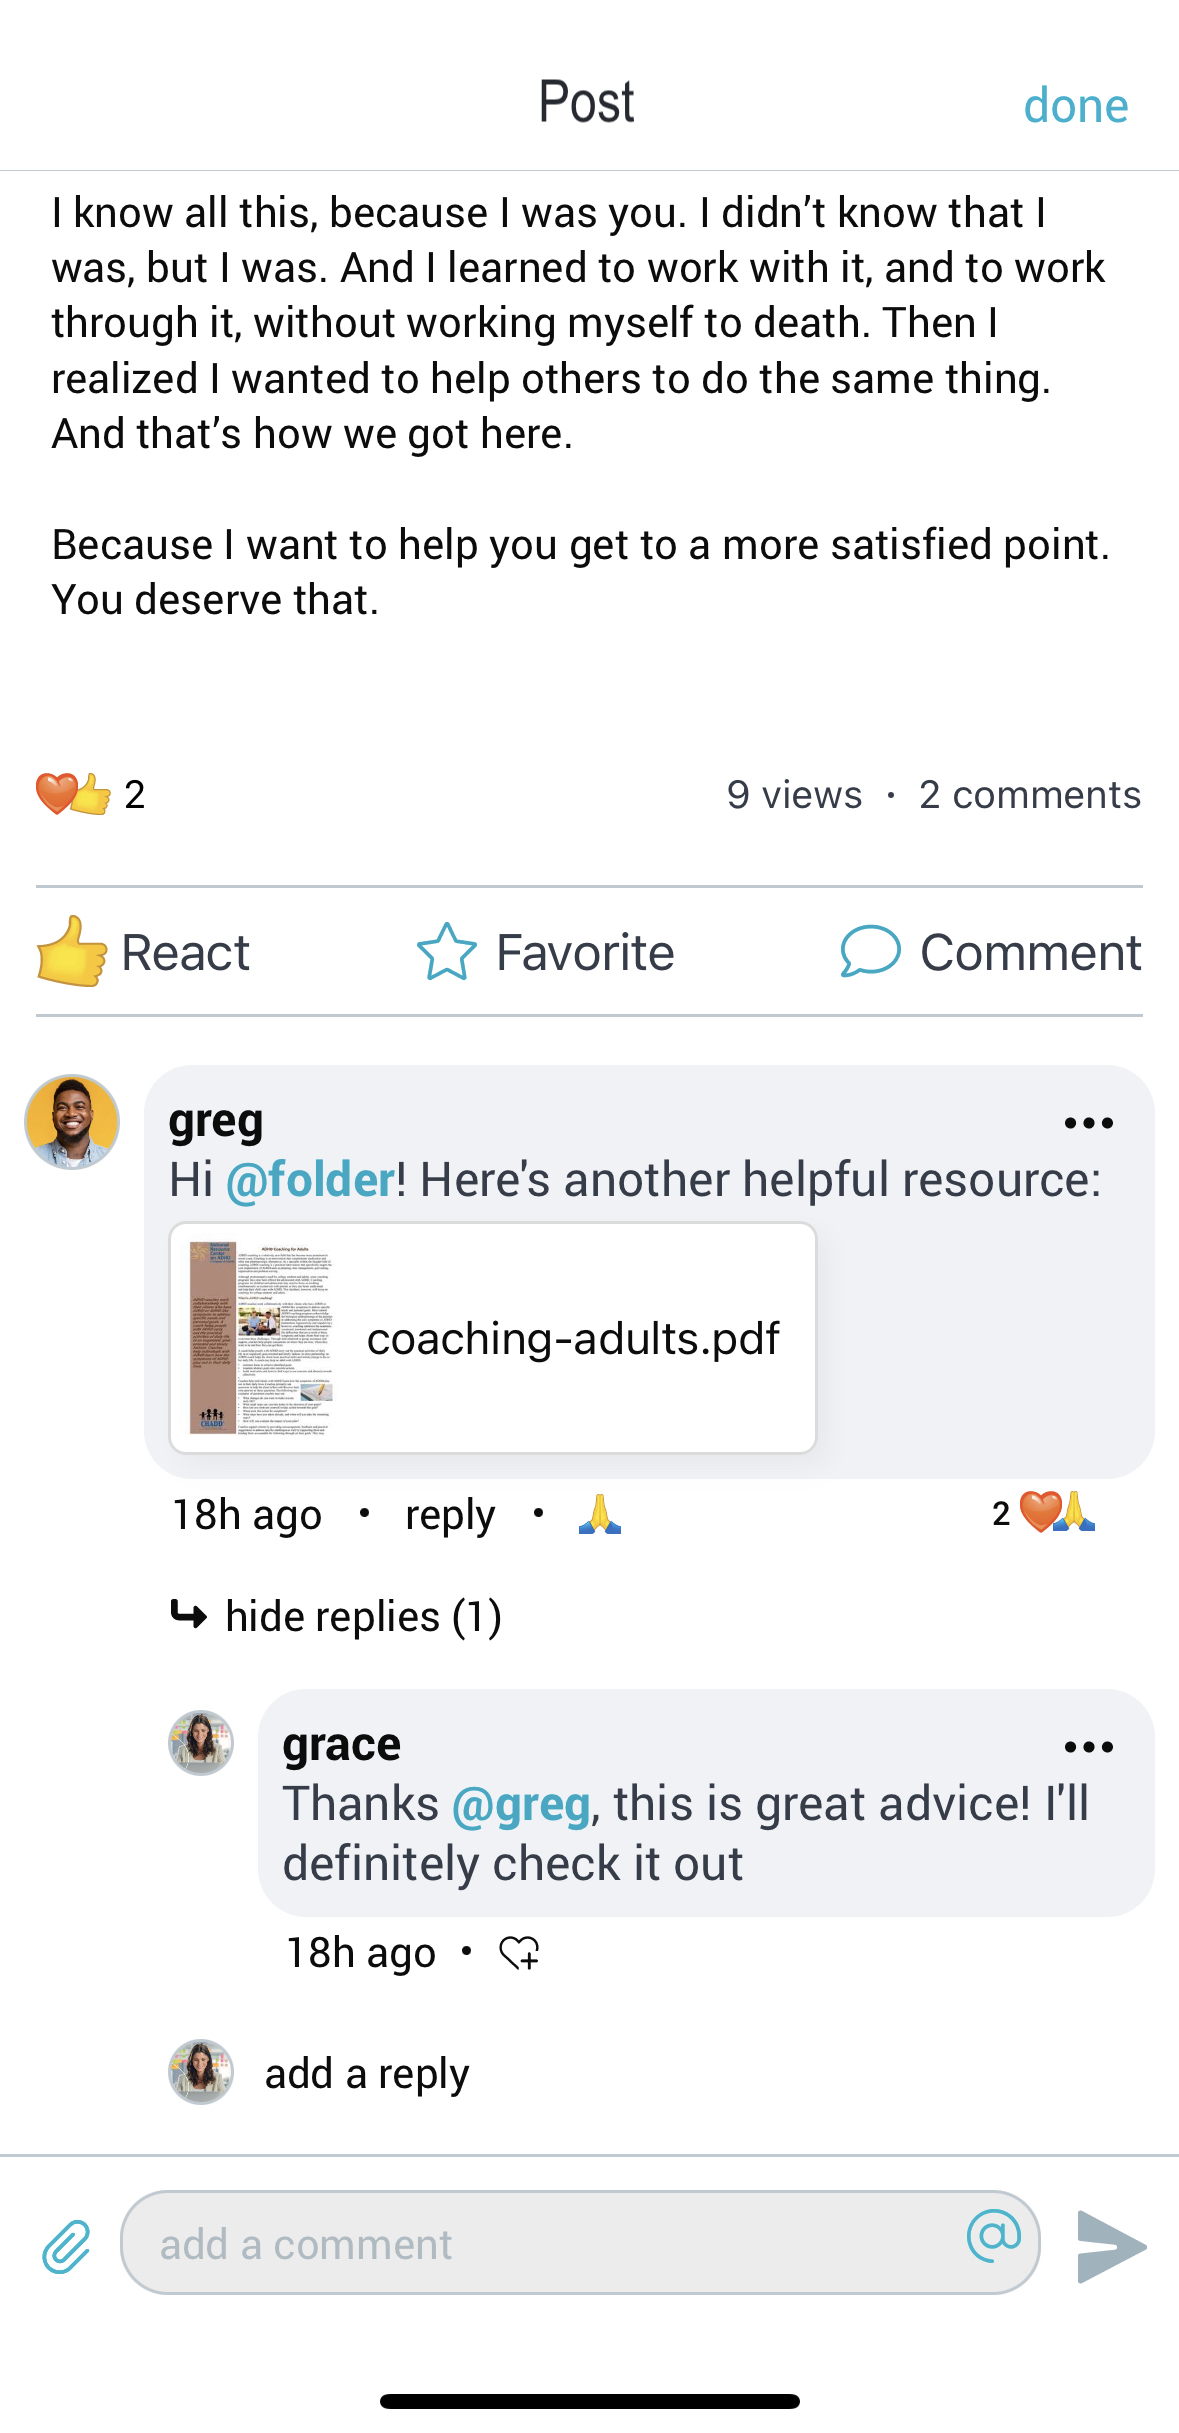
Interacting in Forums
Tap on a post to open it. View and react to existing comments and attachments, or add your own. Use the @ symbol to tag users in your comments. Use the paperclip symbol to include attachements of your own.
Locking a Post:
An admin can “lock” a post to disable new comments and reactions. To do so, open the post and go to the lock icon in the upper right-hand corner. Then tap “proceed”.
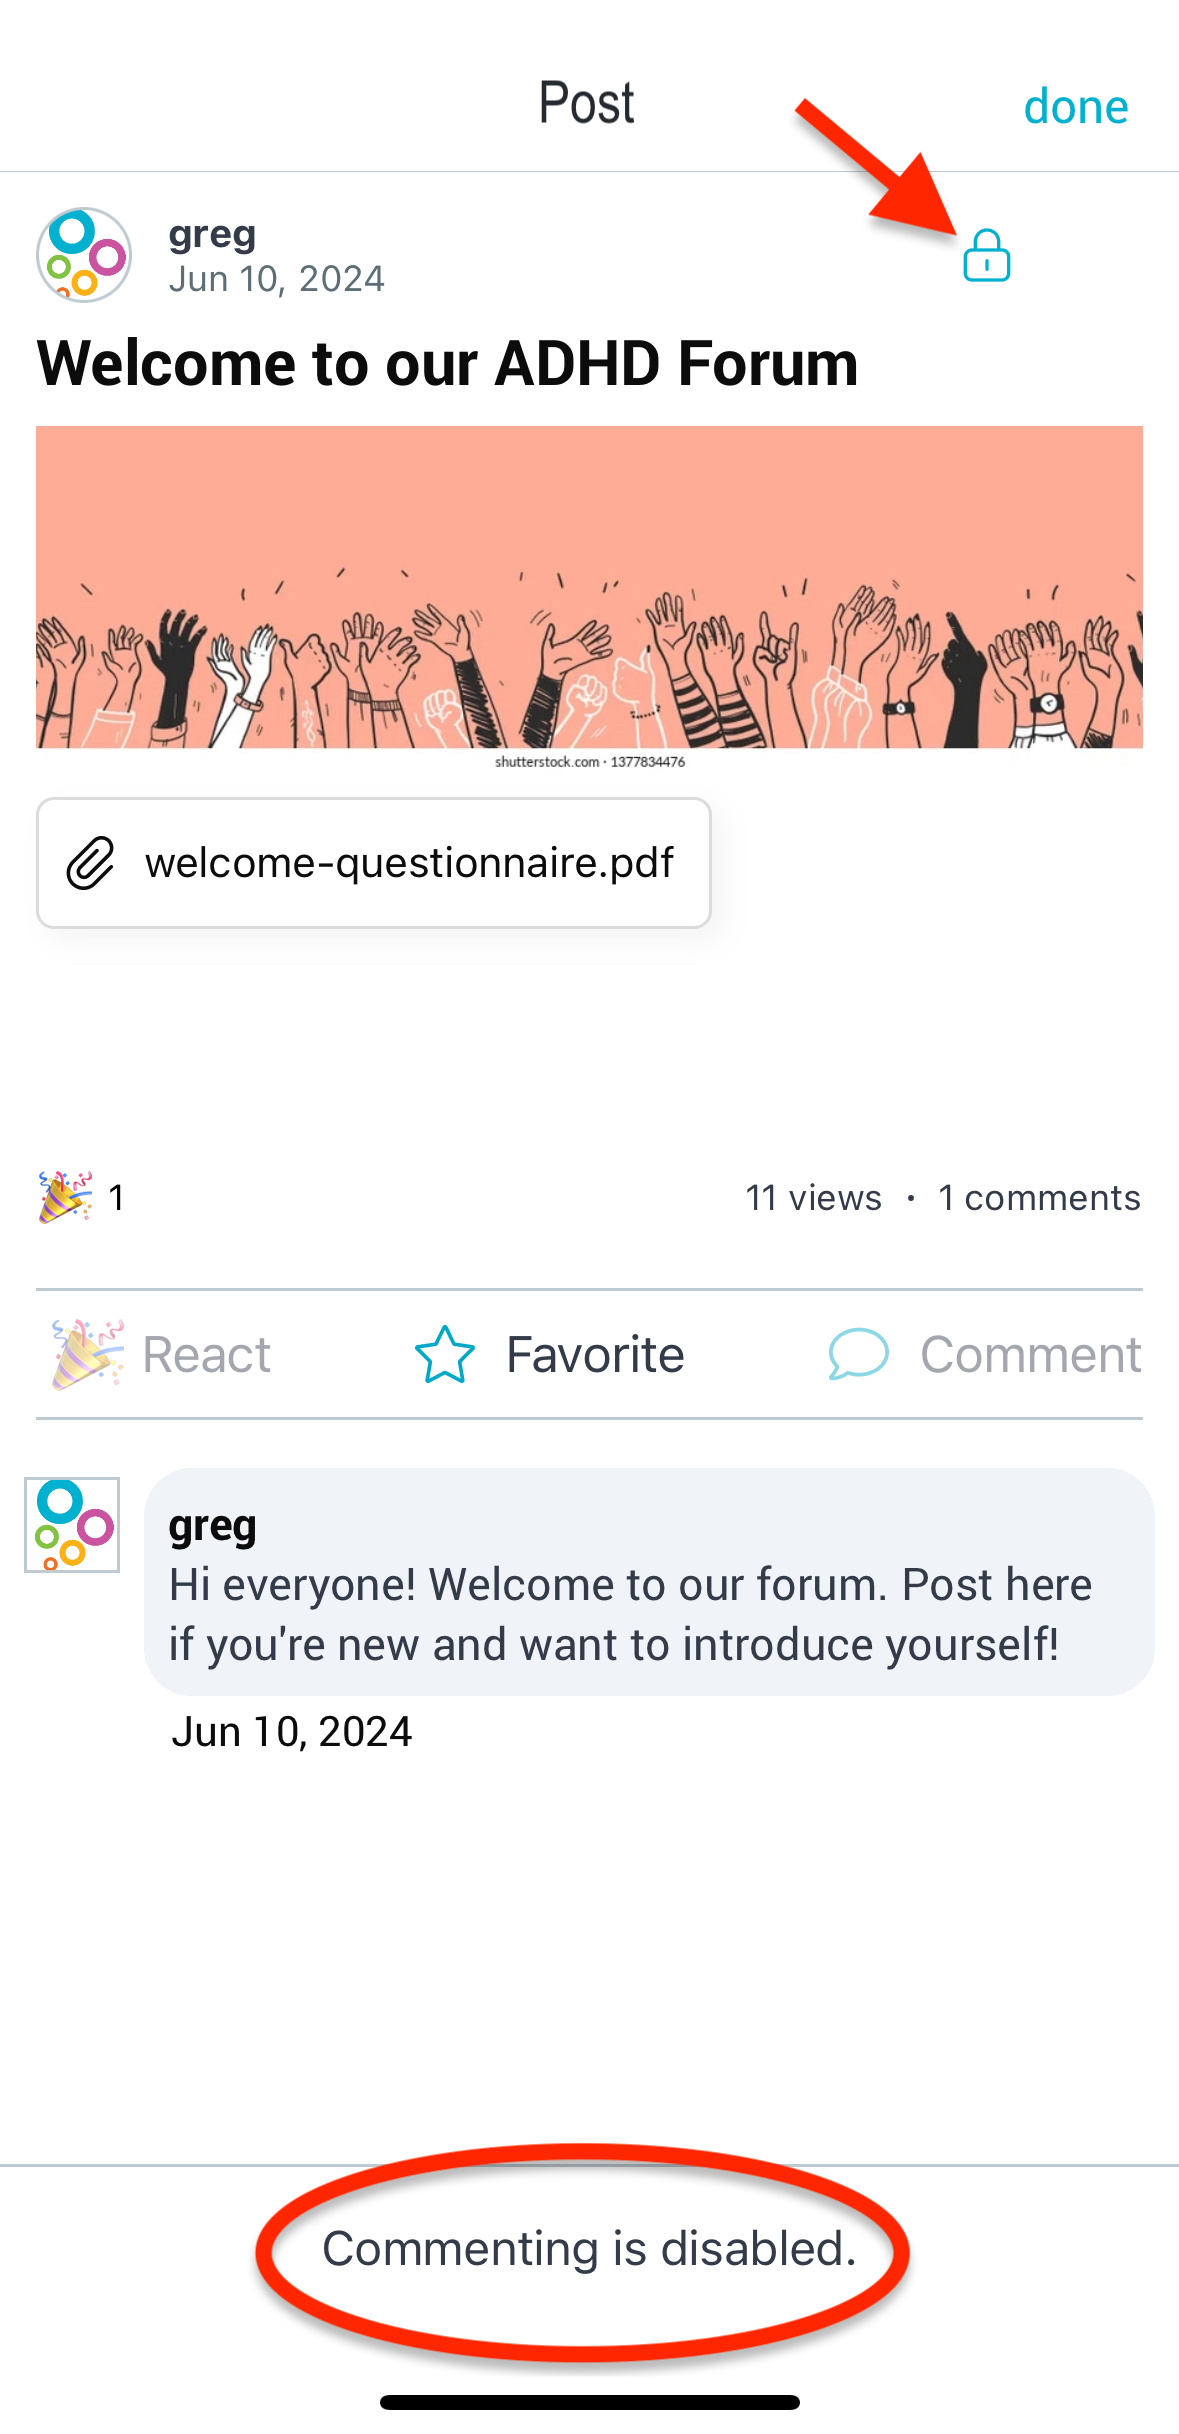
Once a post is locked, members will not be able to add new comments or reactions. Existing comments and reactions will still be visible. To unlock the post, simply tap on the lock again to re-enable commenting and reacting.
Monitor Community & Forum Analytics
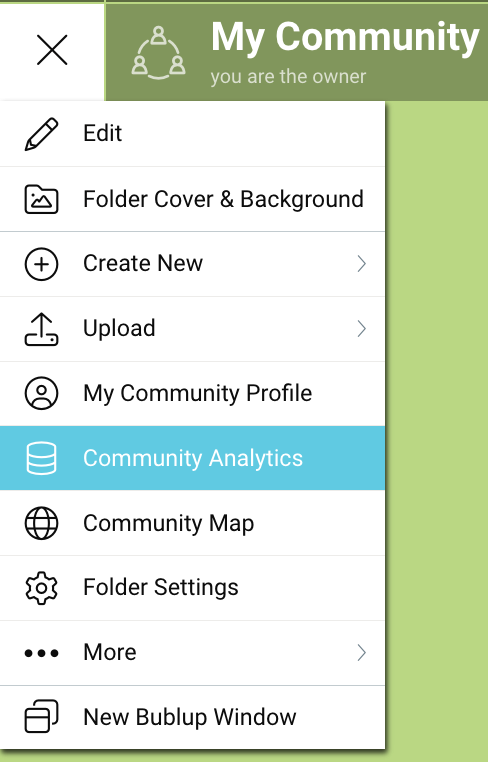
On desktop, go to community ☰ menu and click “Community Analytics”.
View your most popular topics, active users, and community engagement (page views, comments created, posts created, device type).
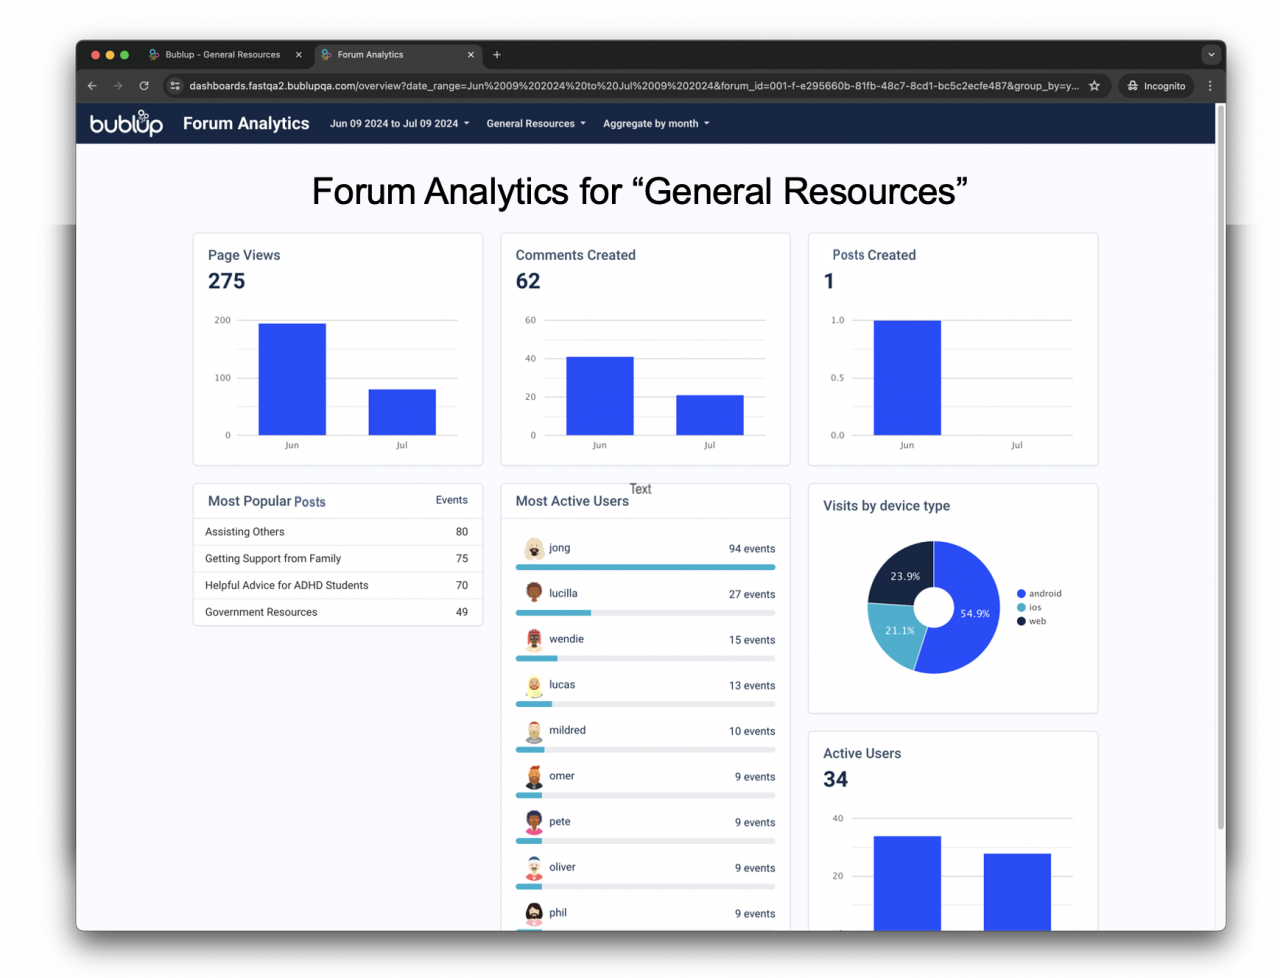
Select which forums to view, the date range, and the aggregate method (day, week, month).
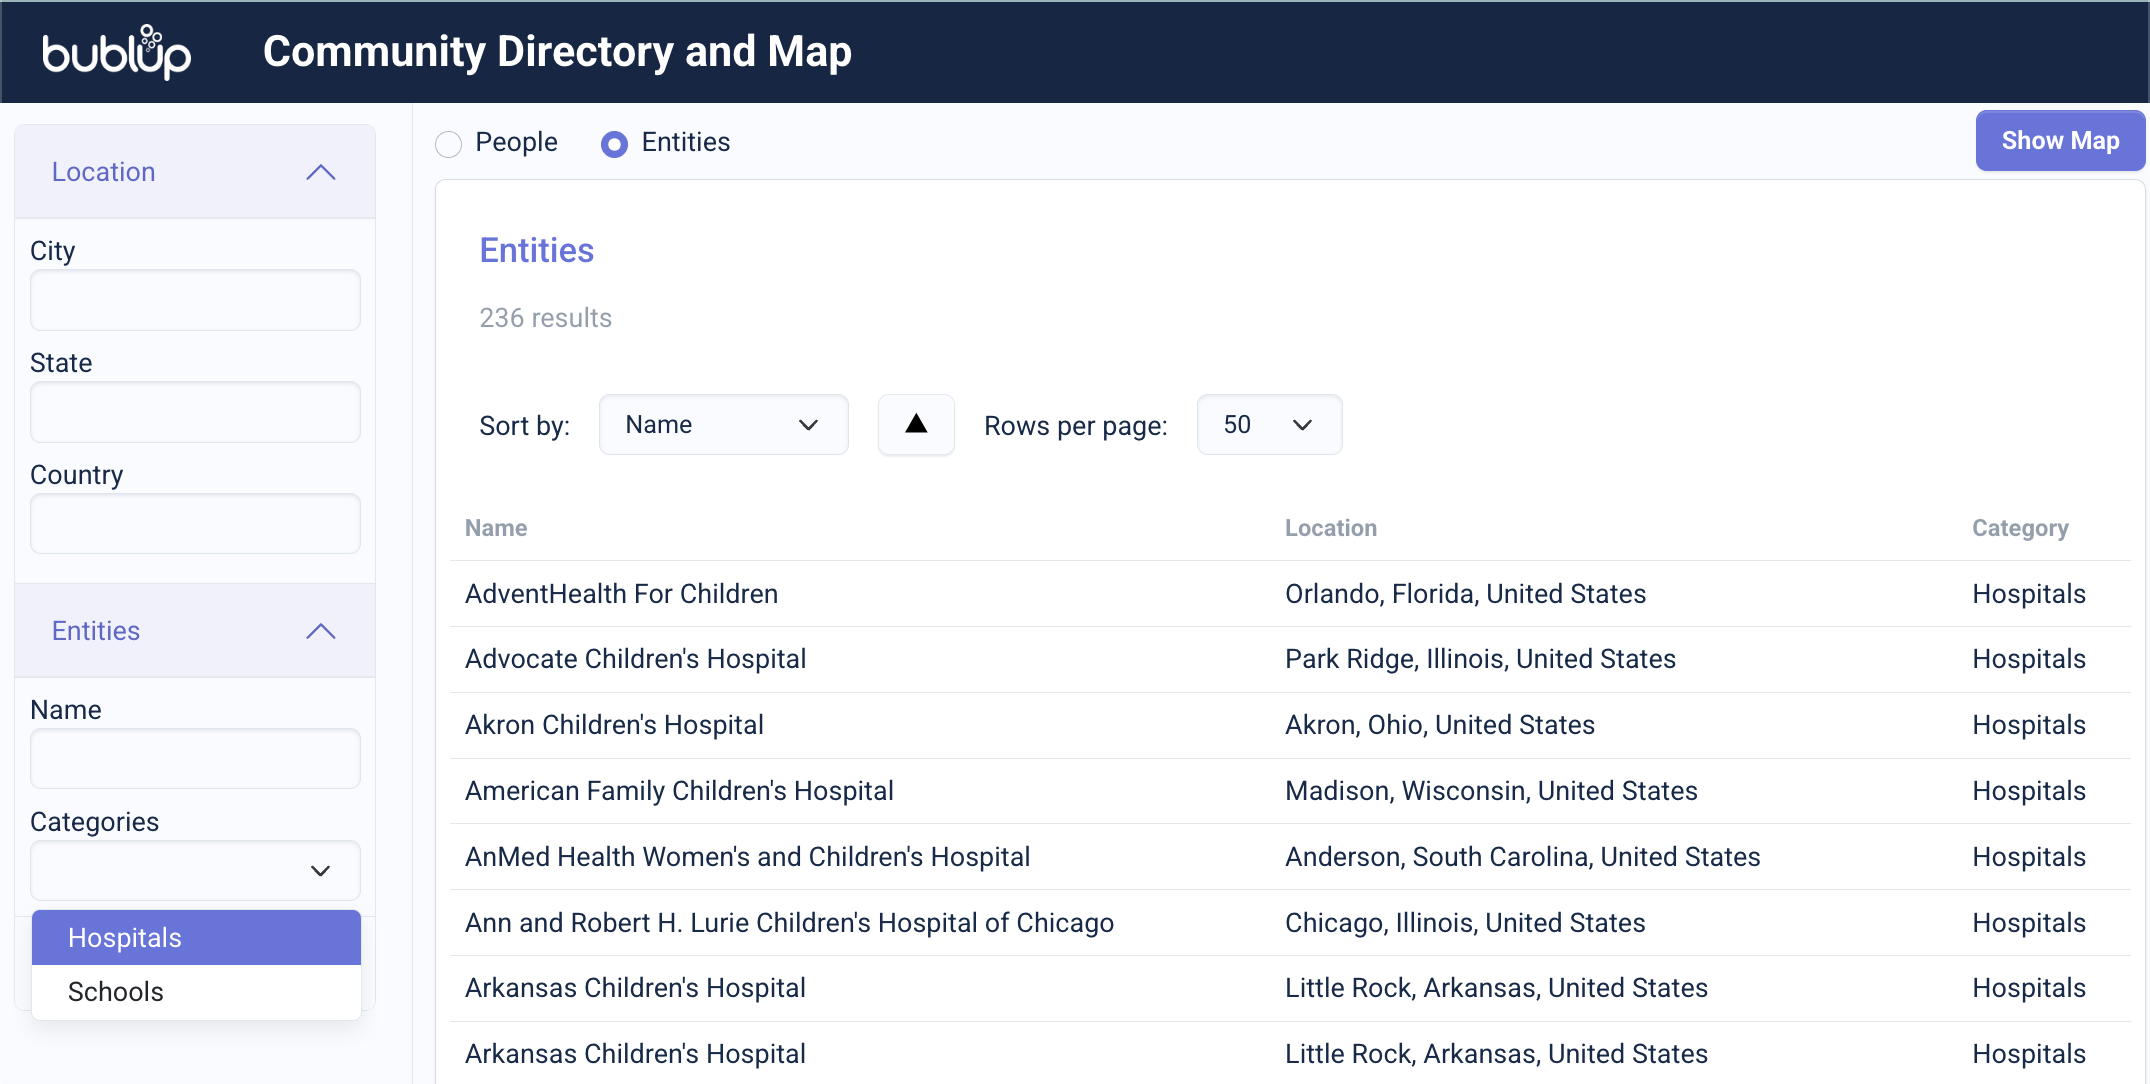
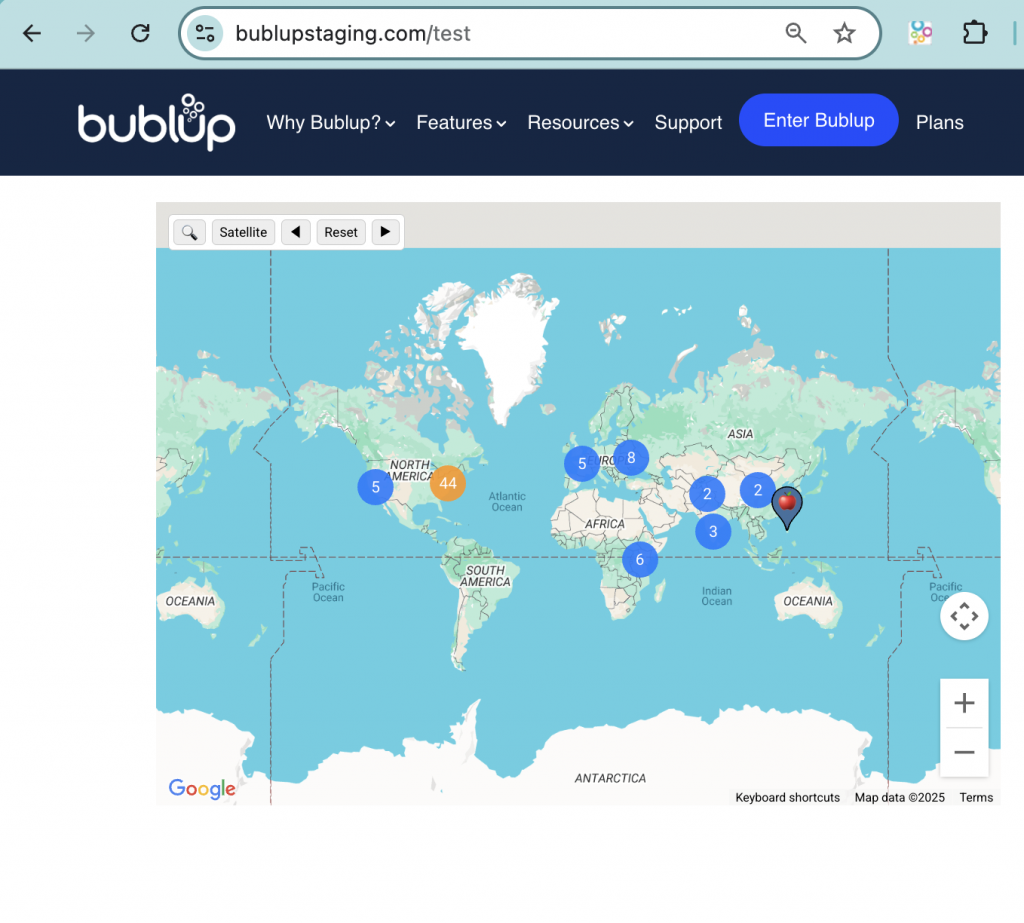
Create Community Directory & Maps
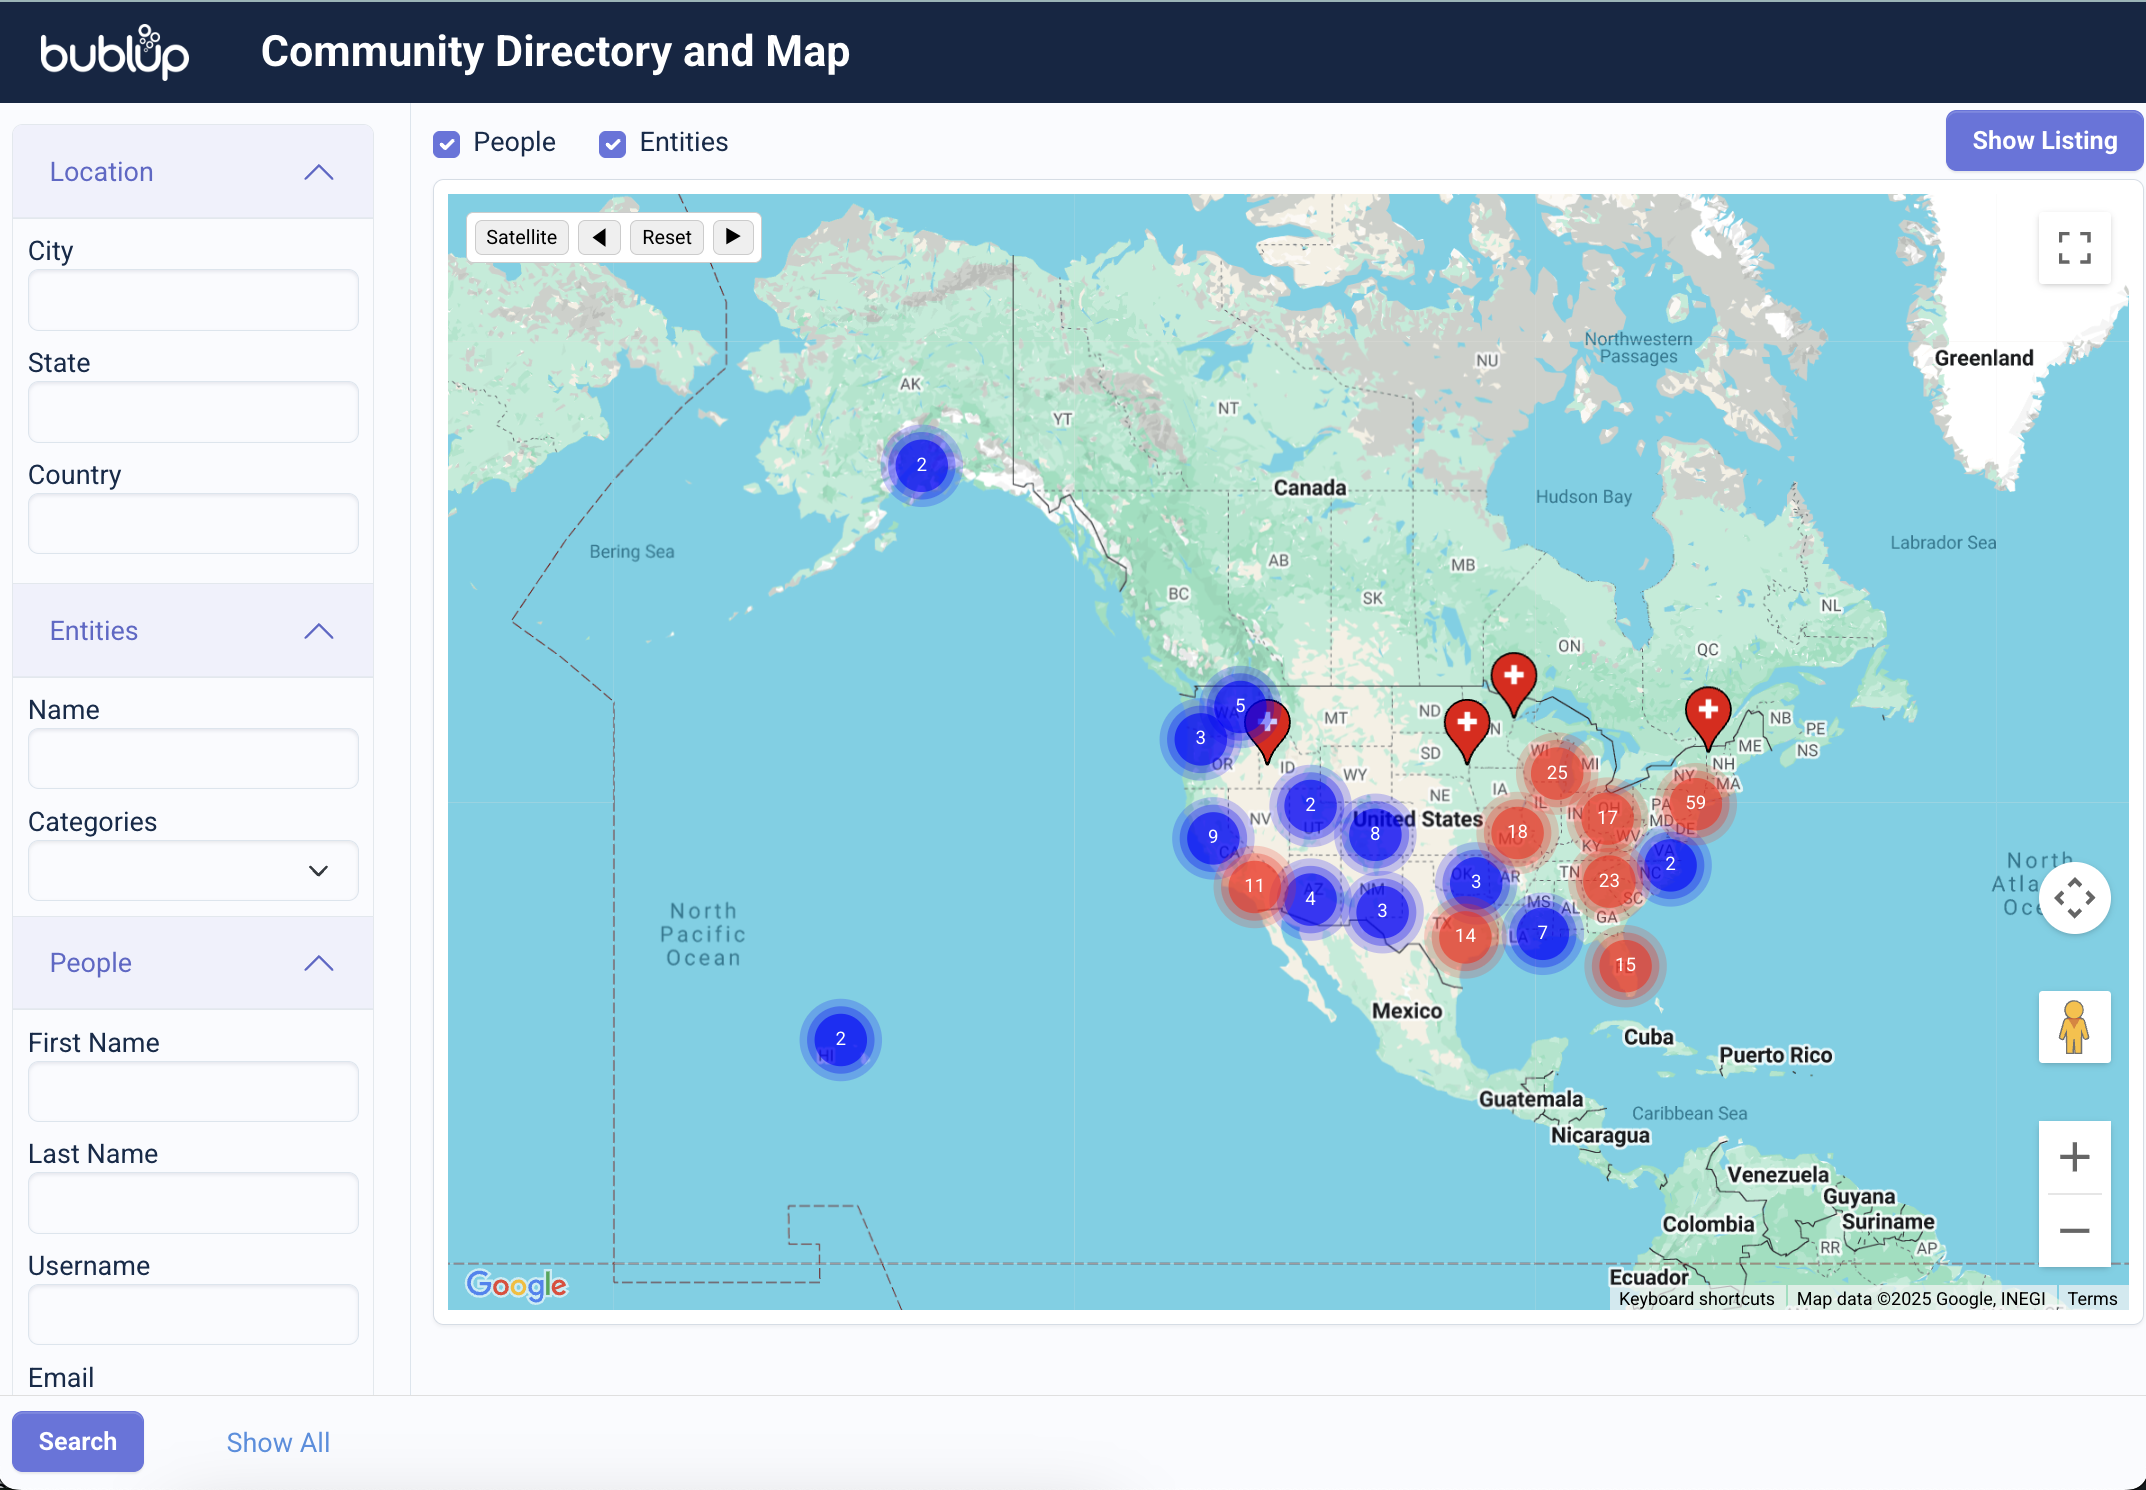
Bublup’s interactive Community Directory & Map feature lets you see where community members and entities are located around the world—bringing people together.
The map shows pins or clusters of where members are located based on their profile settings. It gives you a live, zoomable view of your group’s geographic spread, offering a better sense of the global community you’re a part of.
Privacy note: Users must opt-in to share their approximate location. Exact addresses are never displayed, and locations are generalized for safety.
This feature requires a Business or Enterprise plan to set up, but all community members can participate.
How to Access the Directory & Map
- Open your Community space and go to ☰ menu (on mobile, ••• menu) →“Community Directory & Map”.
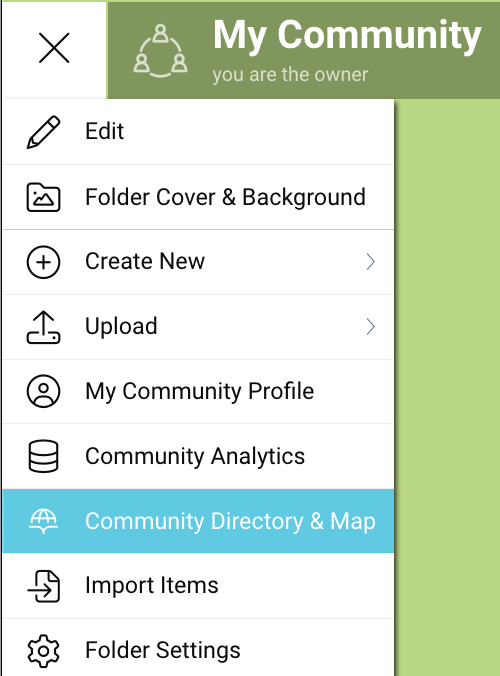
- This will open a separate tab with the community directory & map dashboard.
How It Works
- Zoom & Pan: Use your mouse or touch gestures to explore different areas of the map.
- Member Clusters: In areas with many members, pins will group together. Click on a cluster to zoom in and see individual members.
- Item Location Tags: Any items with location information set will also appear on the map.
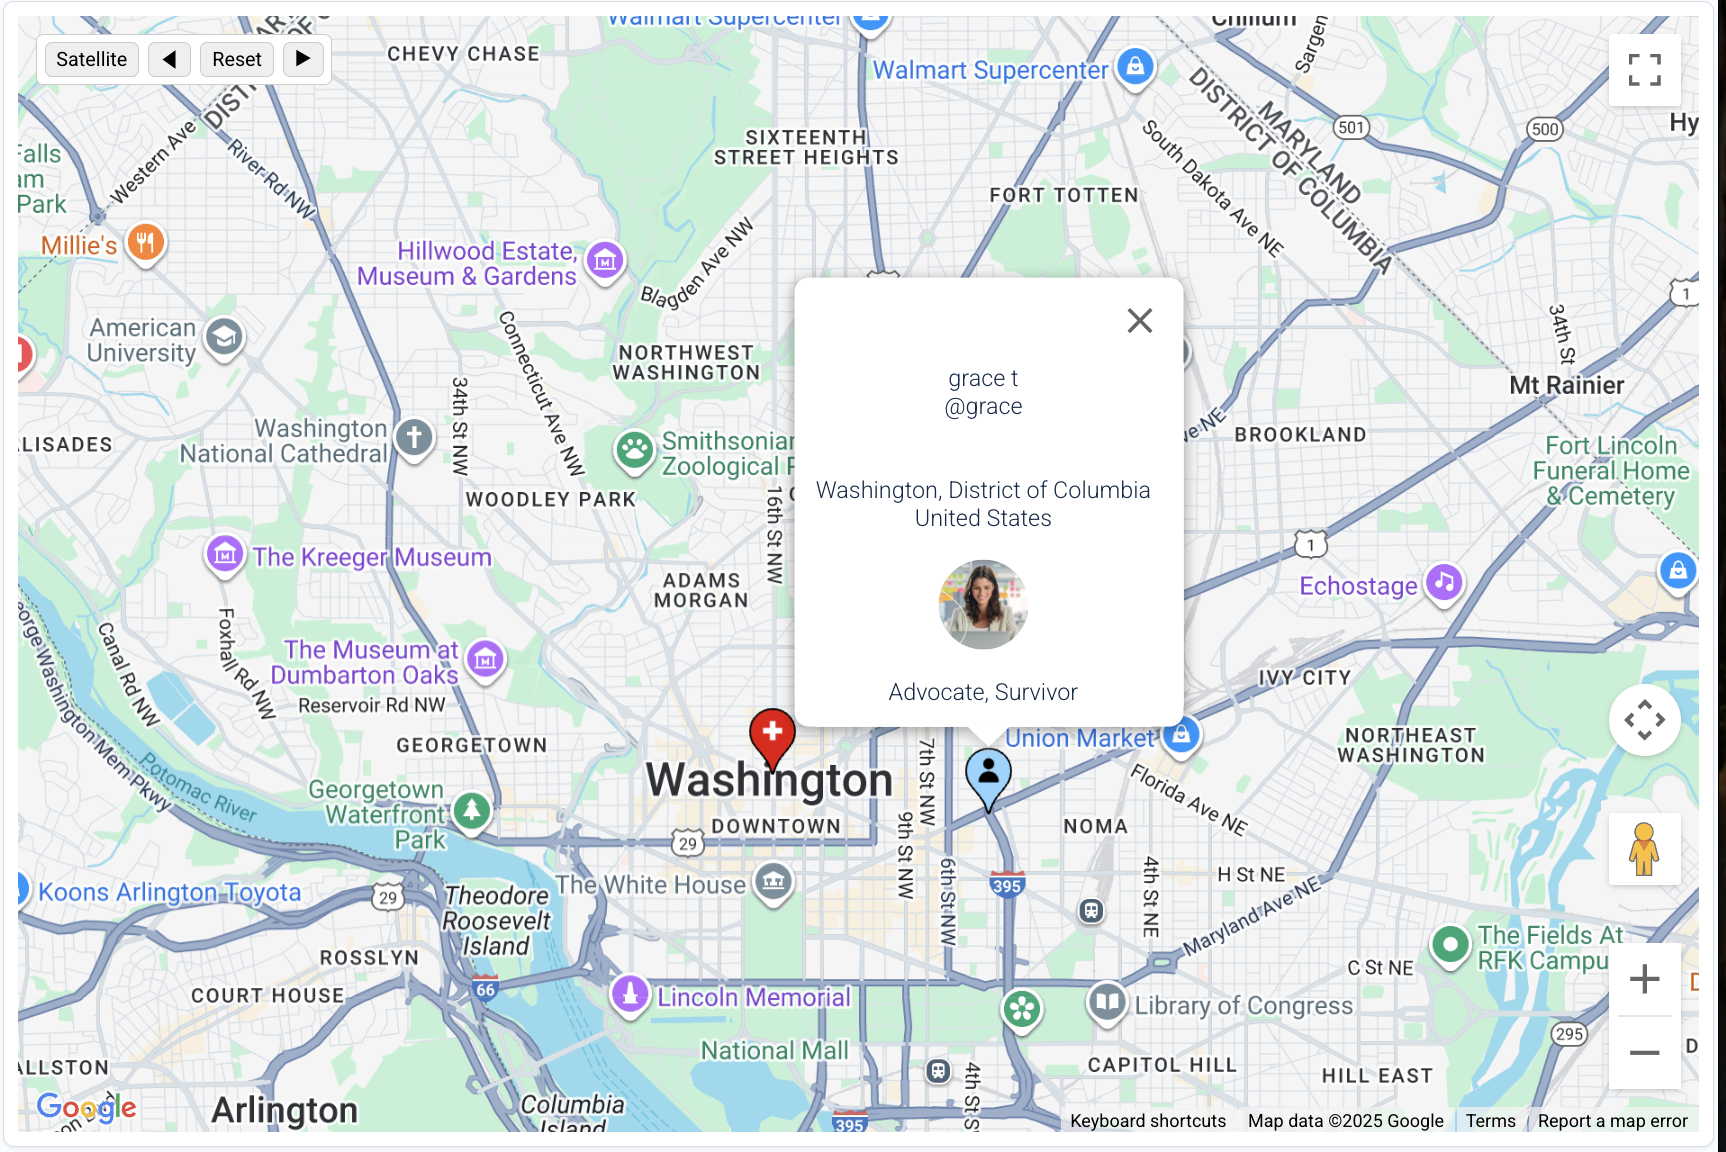
- Click on Pins: Tapping a location pin reveals either a member’s community profile or an entity’s location information.
How to Search the Directory & Map
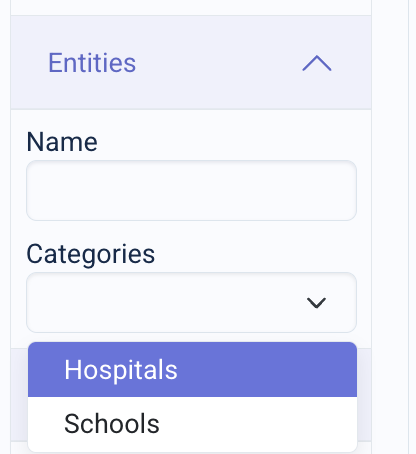
You can search based on a location, entity category, or person. In directory view, choose between searching “people” or “entities”. In map view, enable “people”, “entities” or both.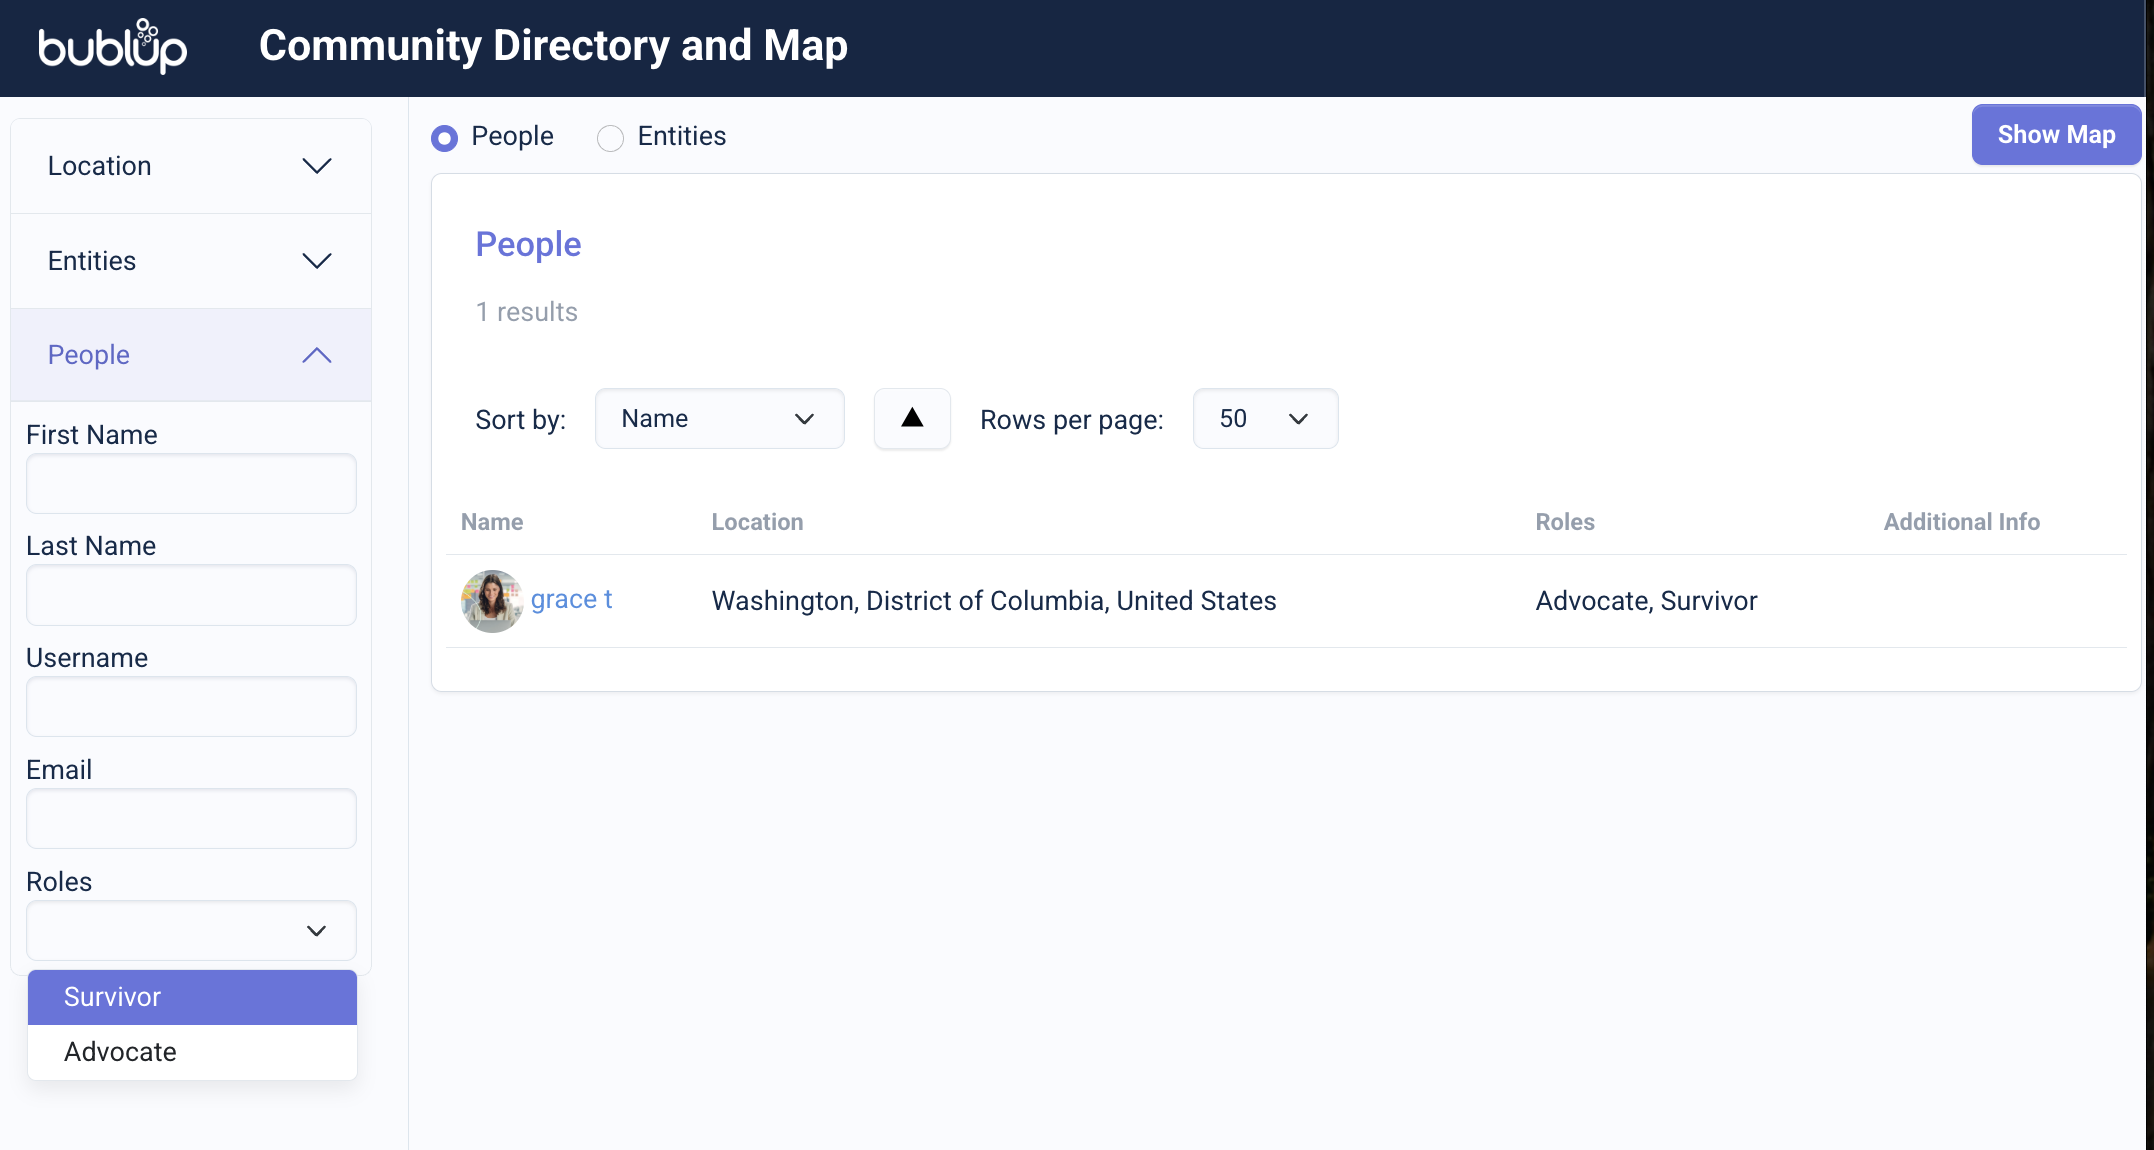
How to Share Your Location
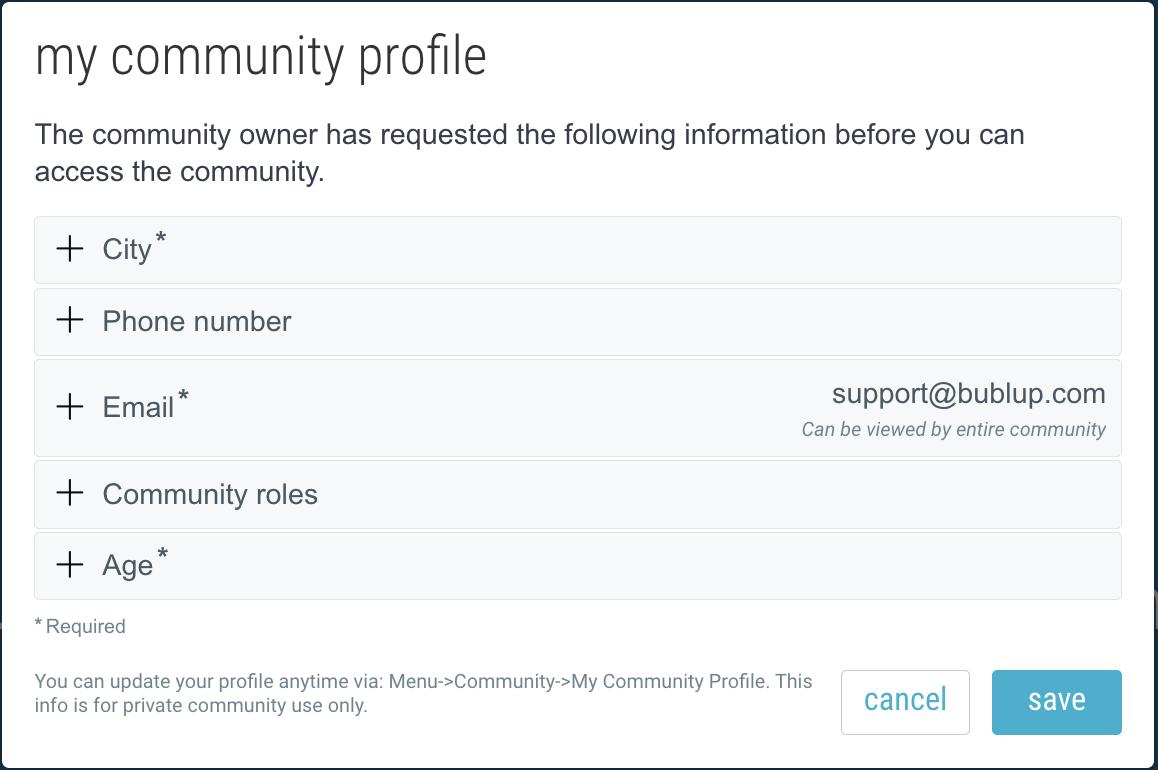
In order to share your location, Community admins must first follow these steps to turn on the community profiles feature.
To appear on the map, open your Community and go to ☰ menu→“My Community Profile”. Then add your city of residence.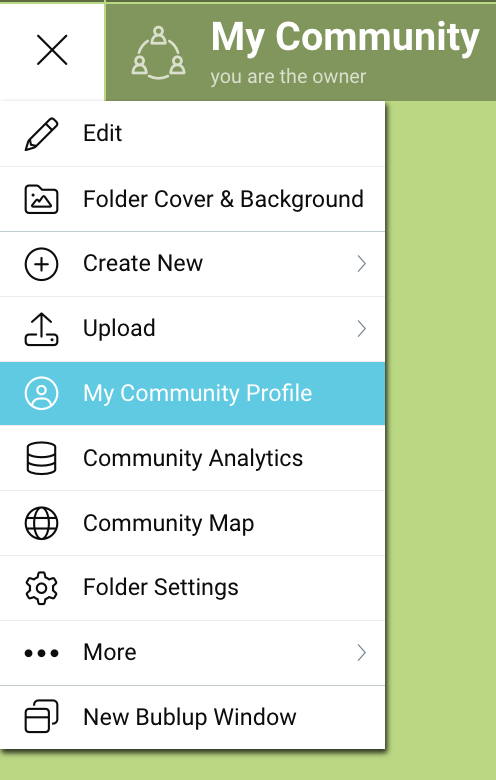
Branded Maps
If your community is branded, your directory and map site will also appear branded.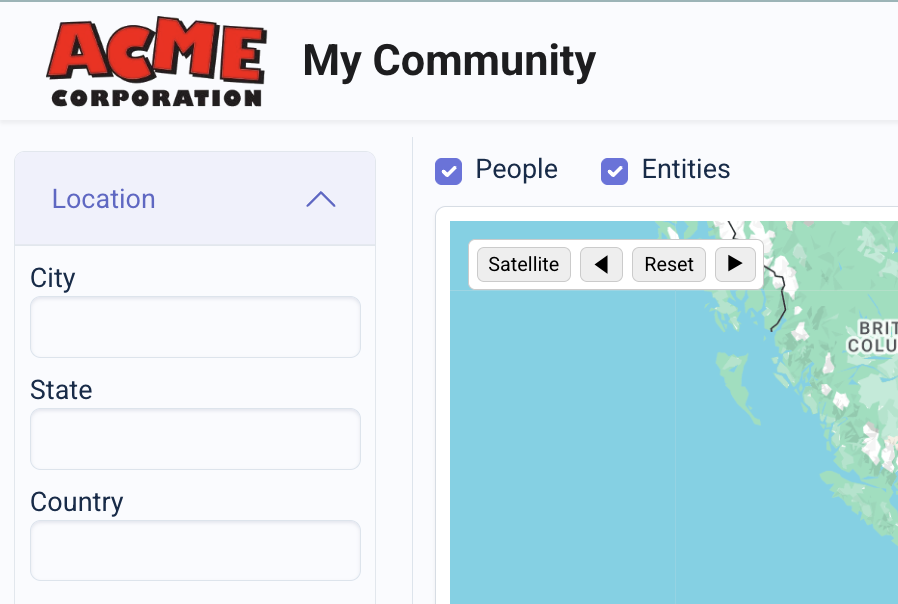
Add Item Locations on Map
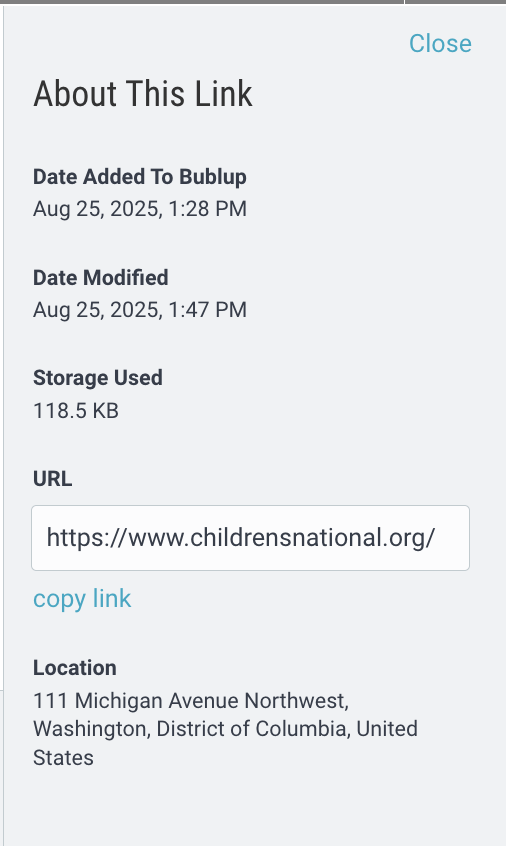
How to Add Location Info to Items
- Go to the item’s 3-dot menu and select “Set Location”.

- Type an address and select from the dropdown menu of verified addresses. Then click “save”.
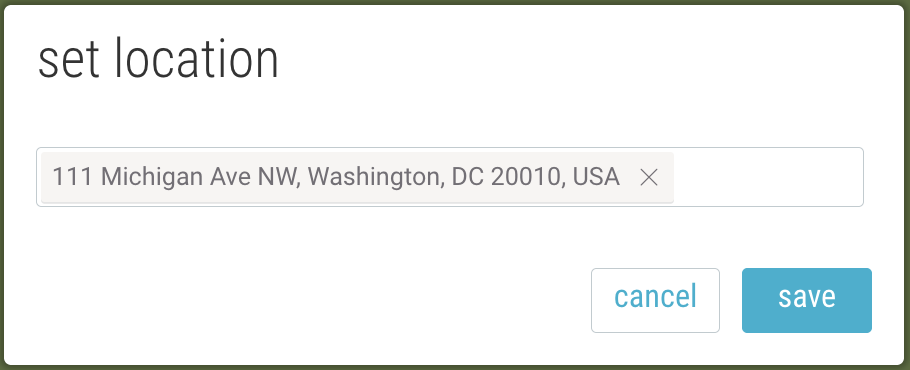
- The item’s location information can be found in item details view under “Location”.
Learn how to bulk import items with location information here.
How to Show Items in the Community Directory & Map
In order to see items and their locations on the Community Map, admins must first enable the feature.
- Open your Community “settings” (gear icon) and navigate to “Community Map Categories”.

- Click “add map category”. Then name it and optionally assign an emoji and background color.
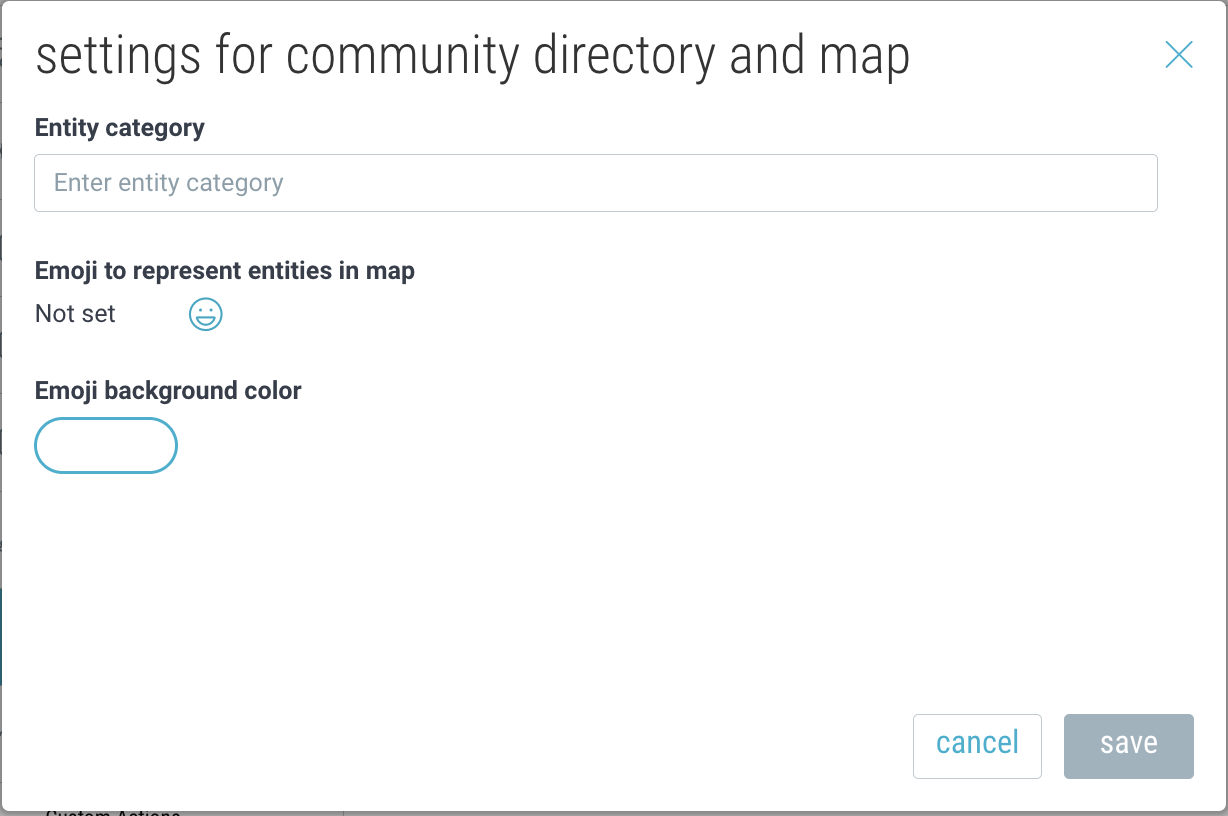
You can create and save multiple categories within your community.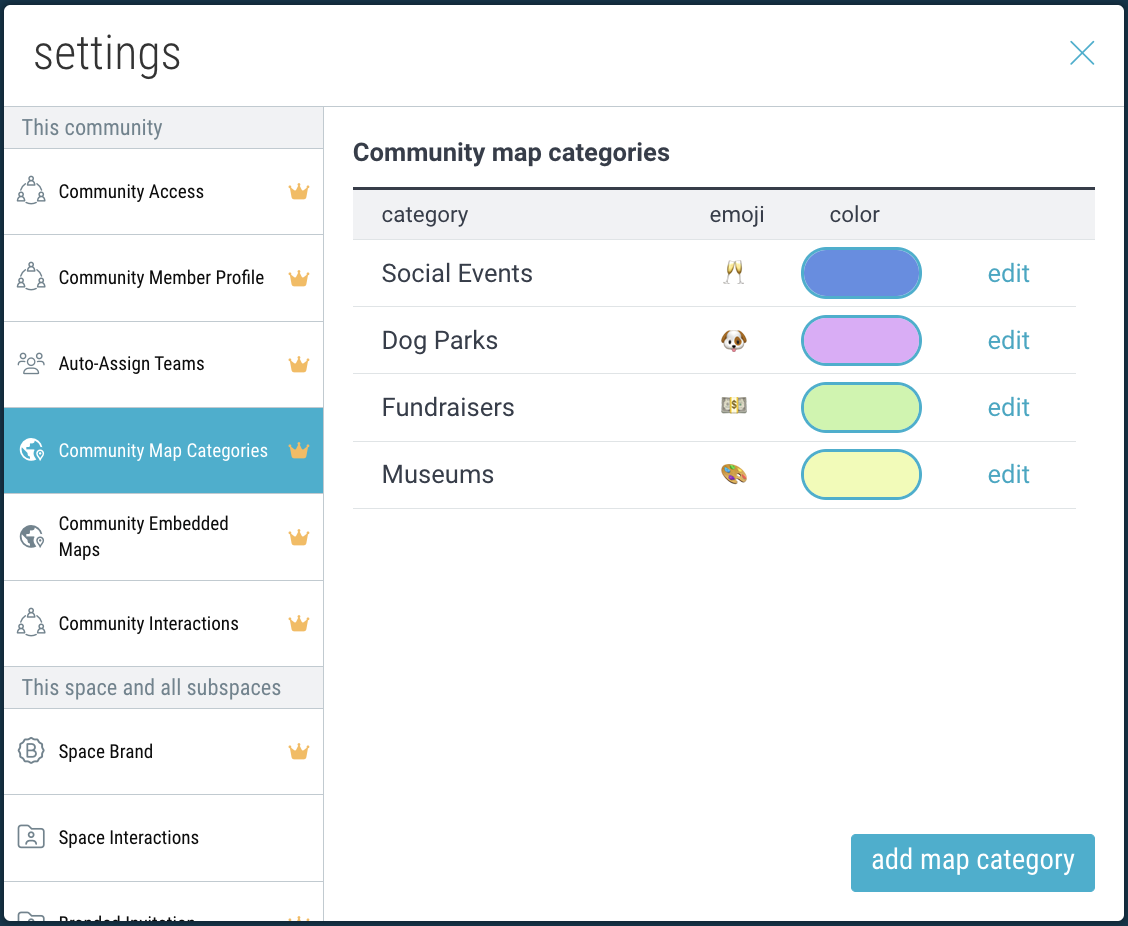
- Now, navigate to a specific subspace of your Community where you have items. Note: This setting needs to be enabled on a per-subspace basis within the Community.
- Go to “settings” → “Community Directory & Map” tab and click “edit”.
- Assign a category name to apply to all the items within this folder.
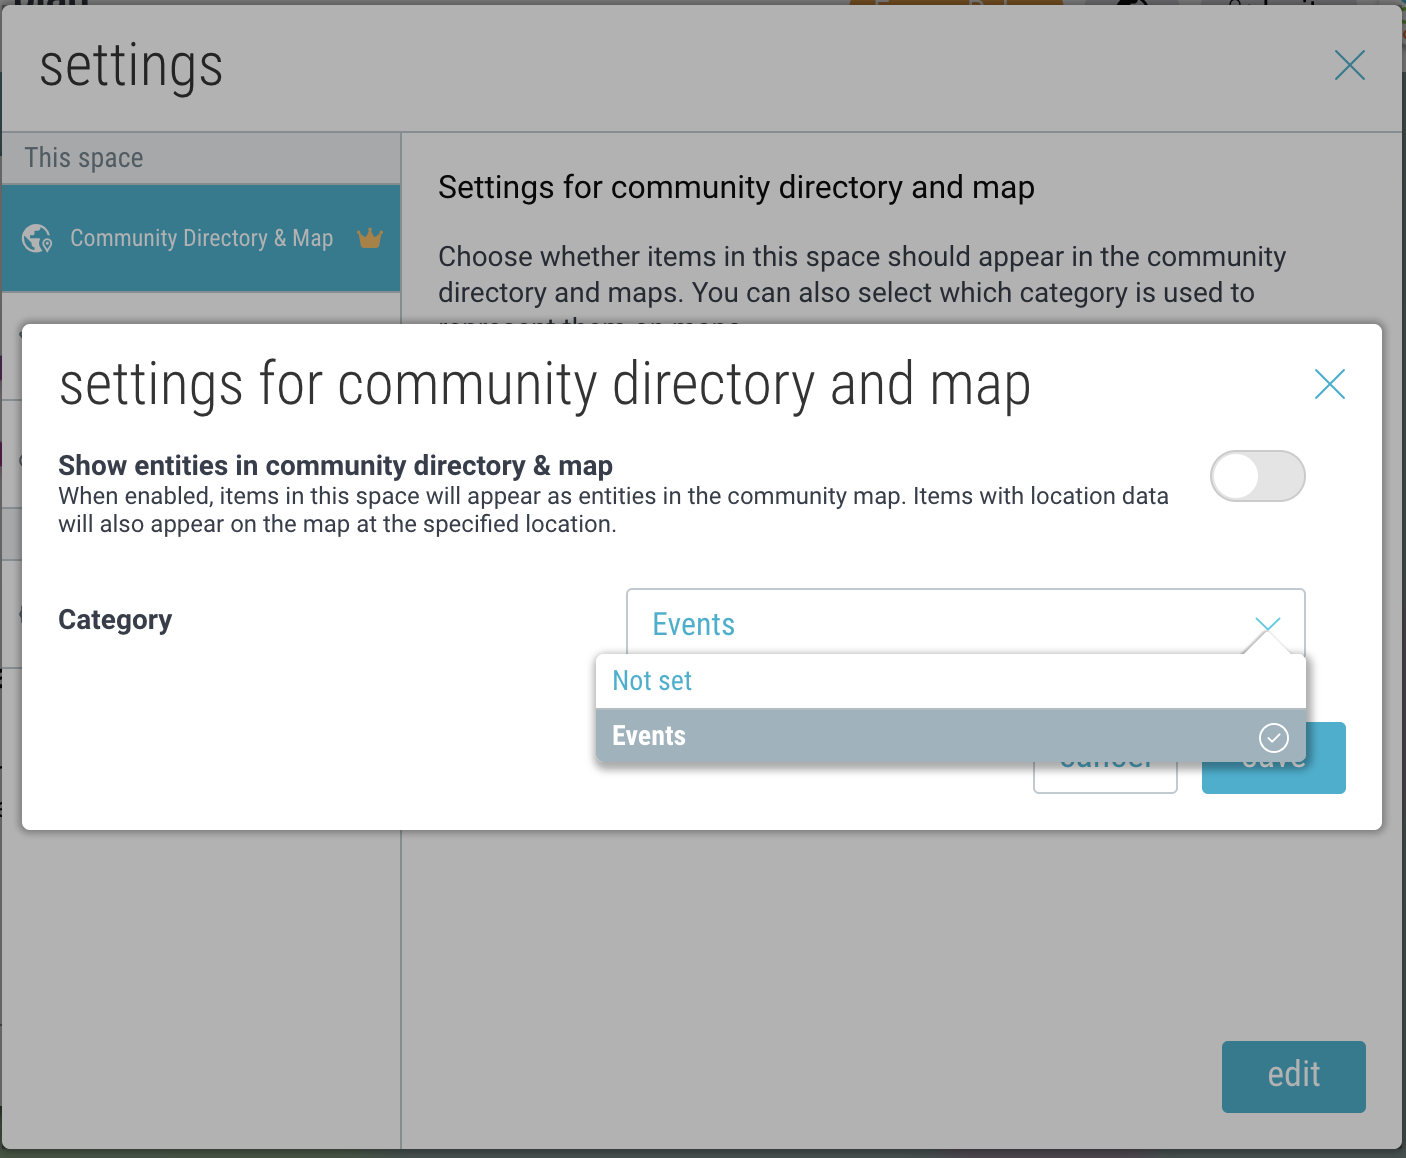
- These items will now appear in the directory and on the map under the specified category.
Embed Maps in External Websites
Add your community map to your website to showcase entities and resources.
- Open your Community settings (gear icon).
- Navigate to the “Community Embedded Map” tab and click the toggle to enable the feature.
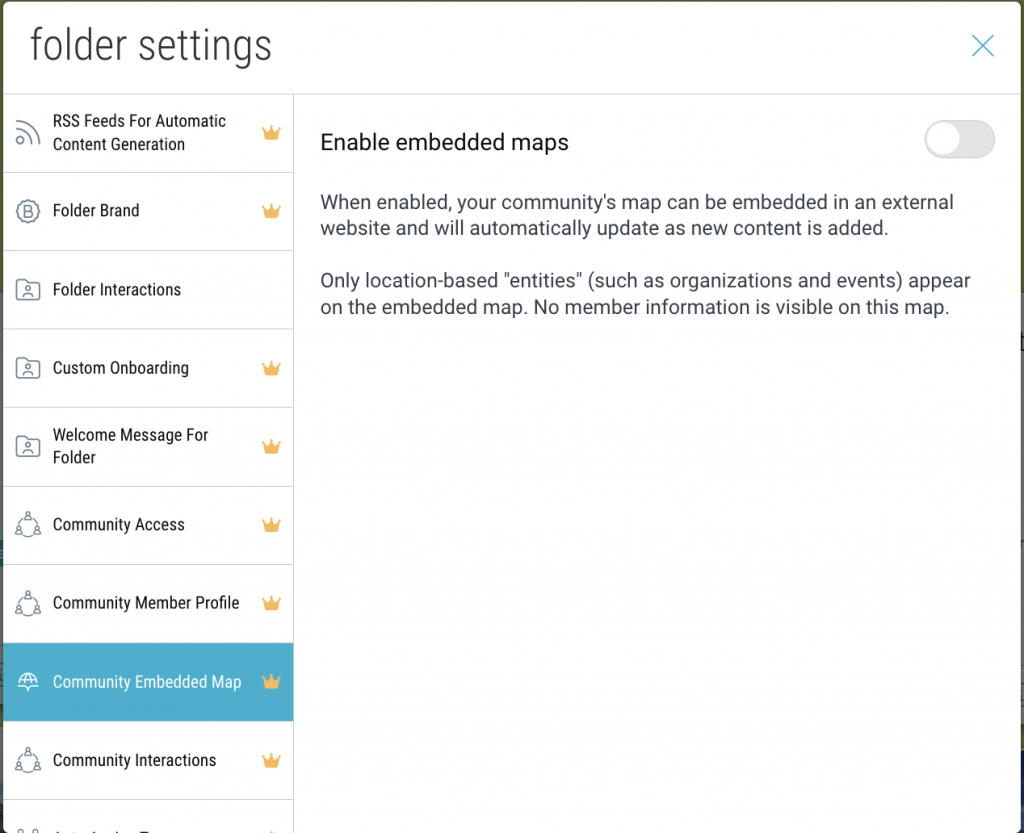
- Enter your website url.
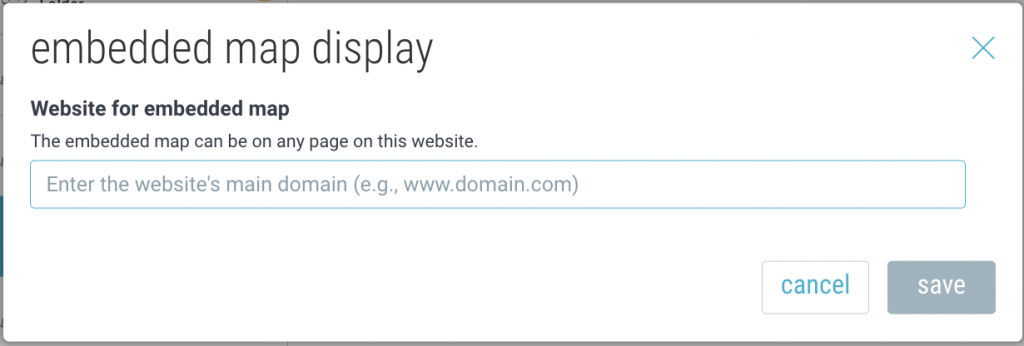
- Copy the HTML snippet and paste that code into your website in your desired location.

- You wil now see the embedded map on your website.
Connect RSS Feeds
Automatically populate your Feed spaces with new links from RSS and YouTube sources of your choice.
Setting up your Feeds:
1. Use the + button and select the “Feed” option under “Spaces”. Then name your space.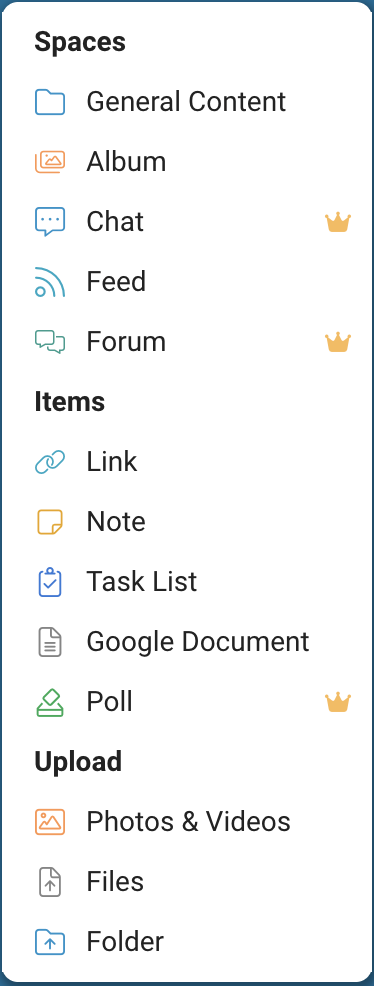
2. This space can combine feeds from multiple sources. To set up the first feed, give it a name and select the source type: RSS or YouTube.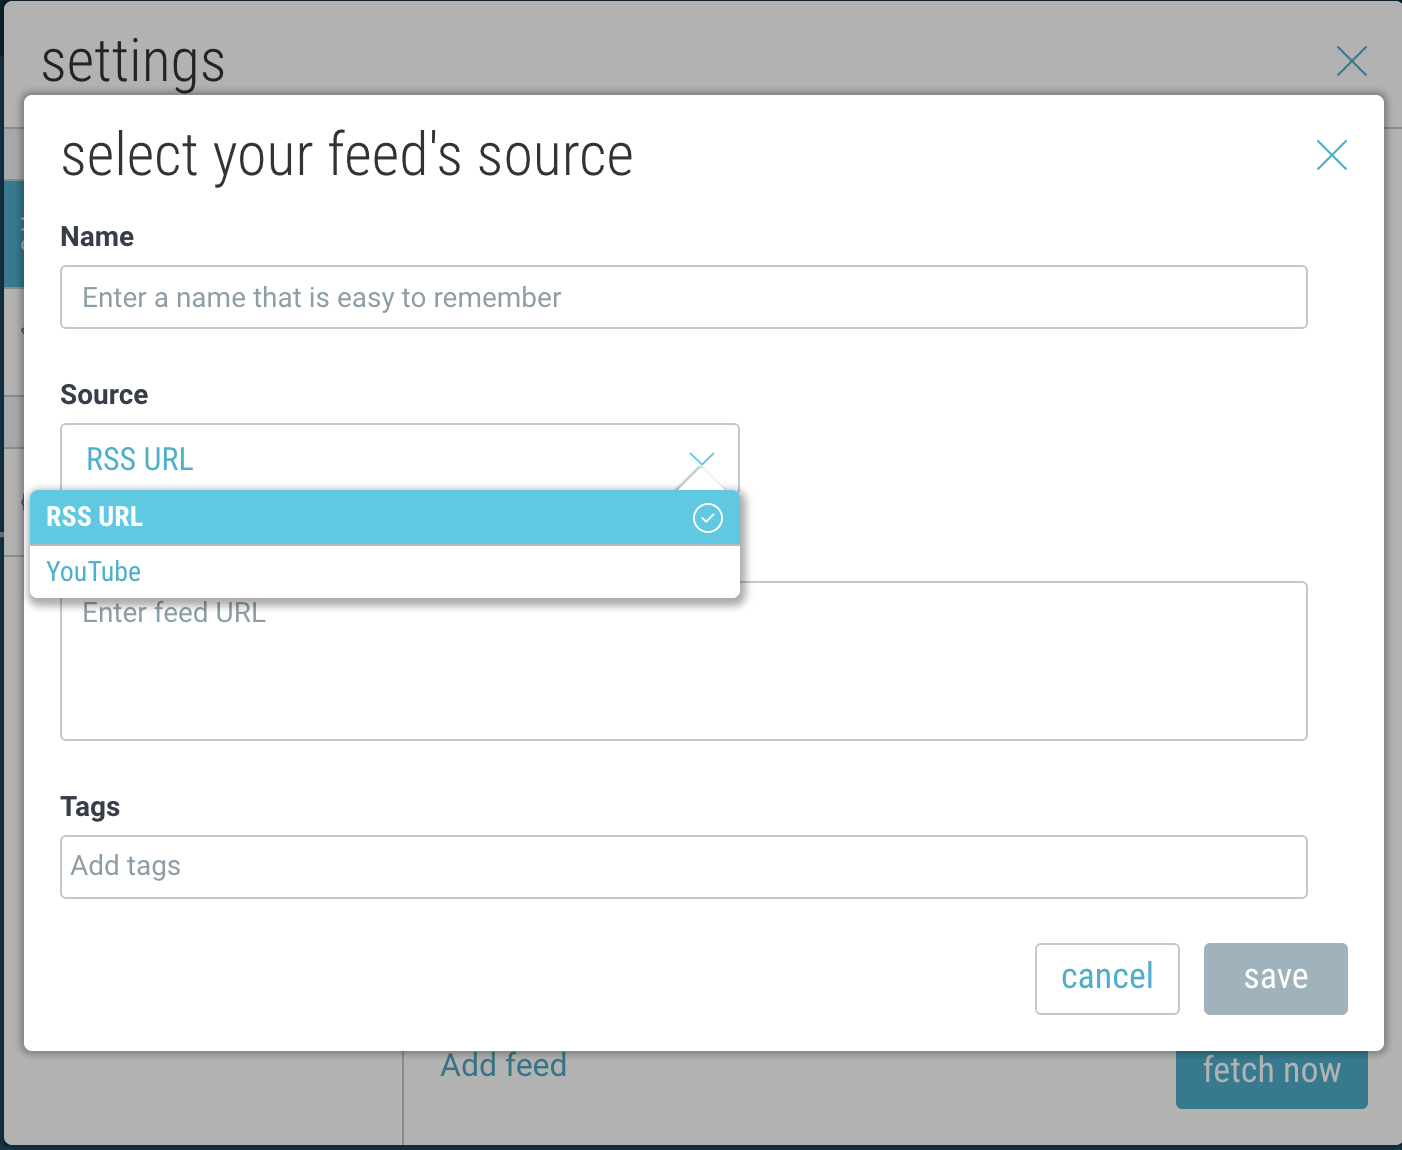
3. If you selected “RSS“, copy and paste a link to the RSS feed source of your choice.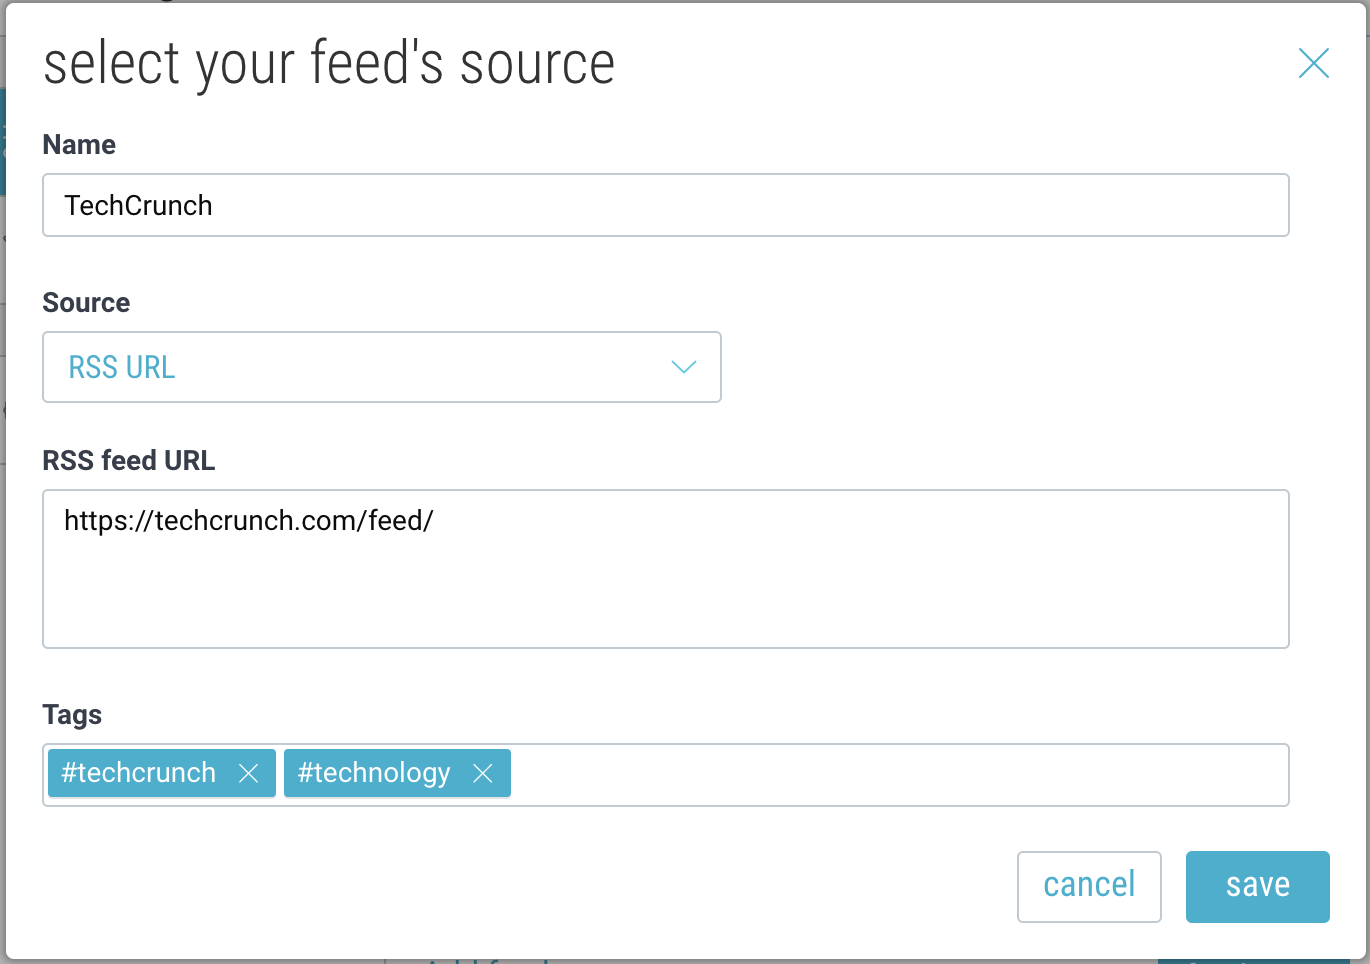
Check out this link for some examples of popular RSS feeds, or set up Google Alerts as RSS feeds.
4. If you select “YouTube“, choose between Username, Channel, Playlist, or Community Posts, and enter the corresponding ID or handle. You can also optionally filter out YouTube “shorts”.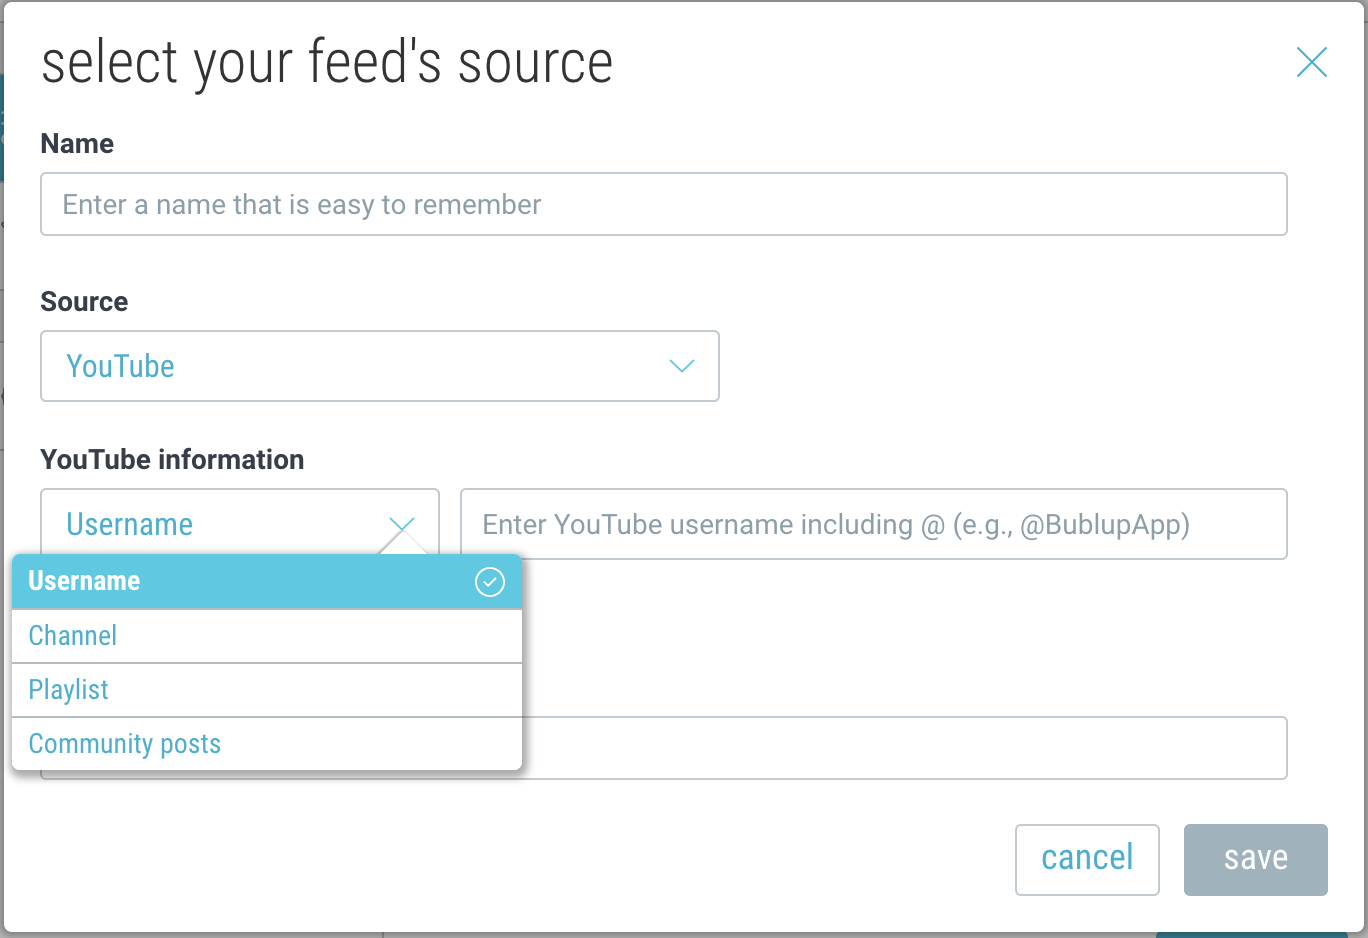
5. Add (optional) tags and click “save”.
6. Click “fetch now” when you’re ready to start populating your space.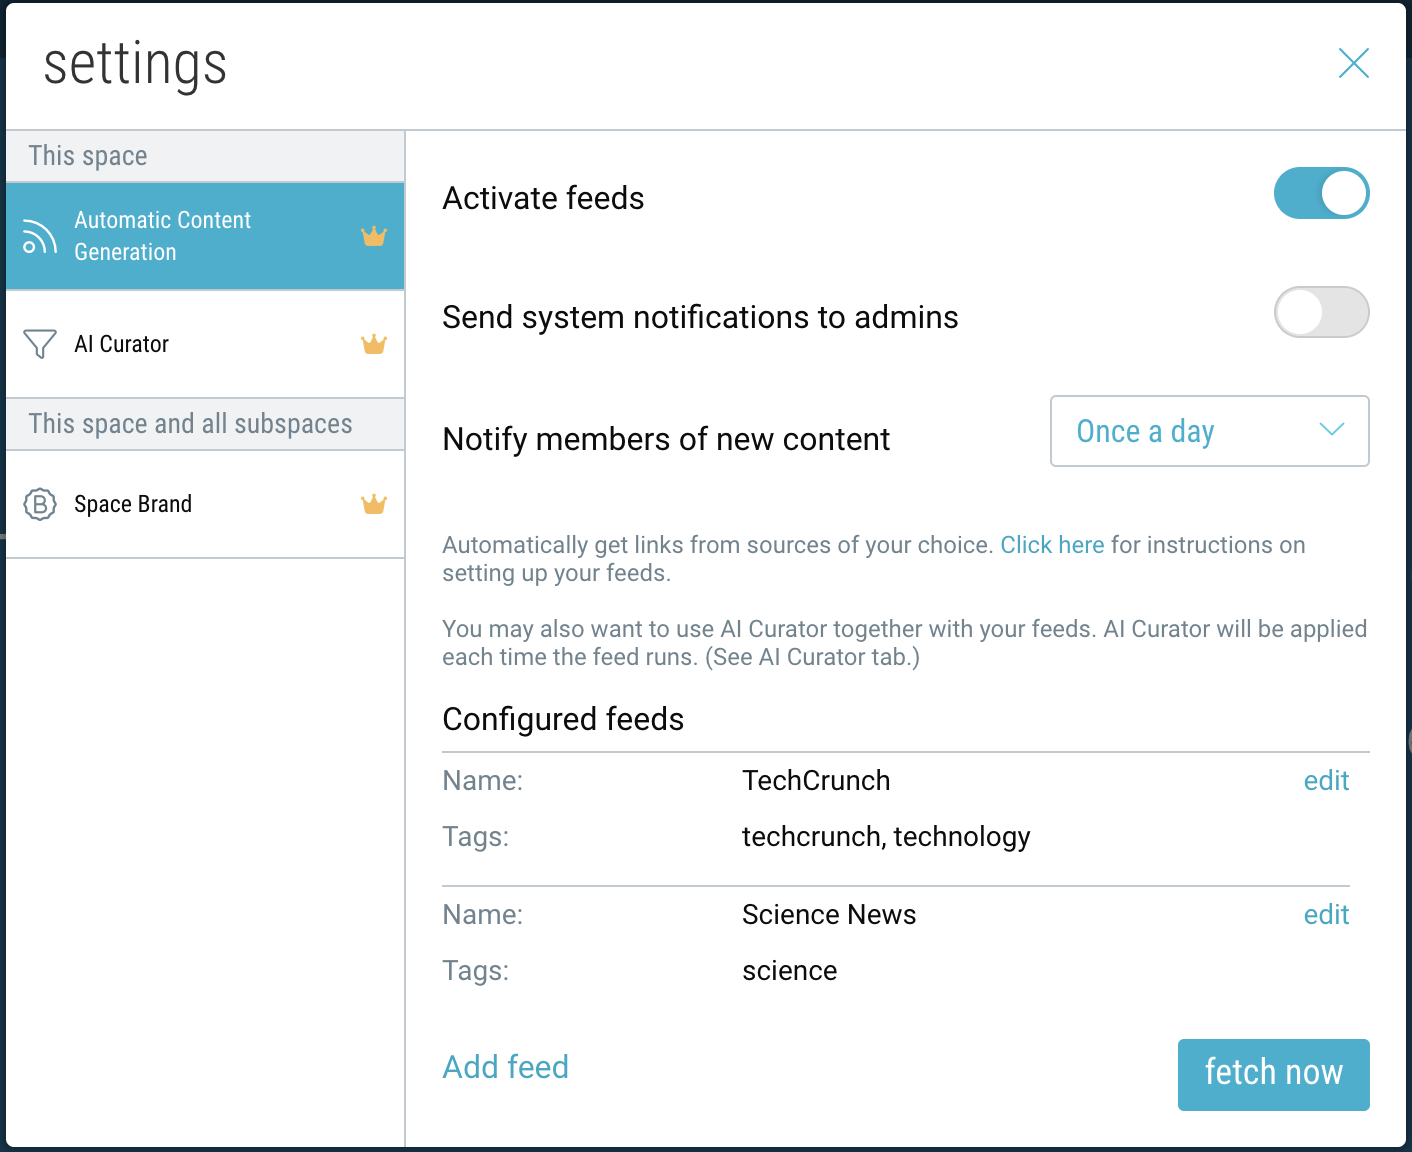
7. Your space will begin to automatically populate with links from your feeds, and will update throughout the day as new content is detected.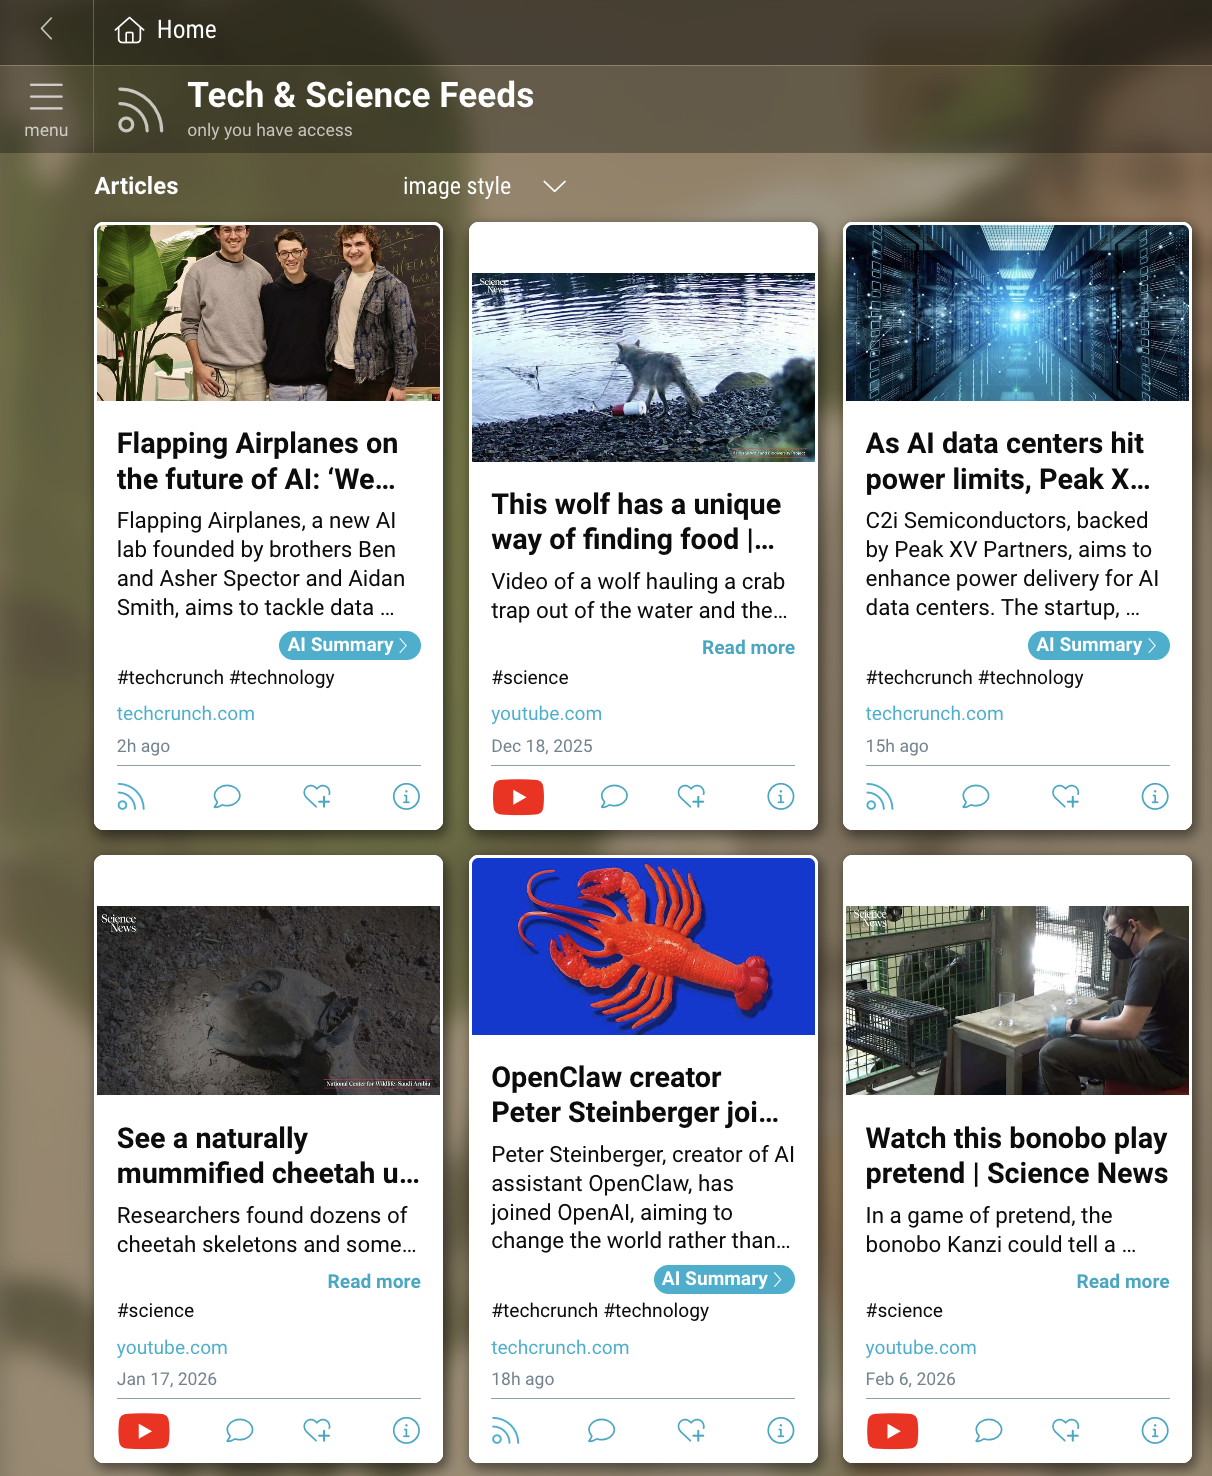
Managing Your Settings:
Navigate to the “settings” icon in the upper-right corner of your space.
- To enable or disable your feed space, click the toggle next to “Activate feeds”.
- To alert the admins of this space of any system notifications, enable that toggle preference.
- To change how often members are notified of new content, select your preferred time interval.
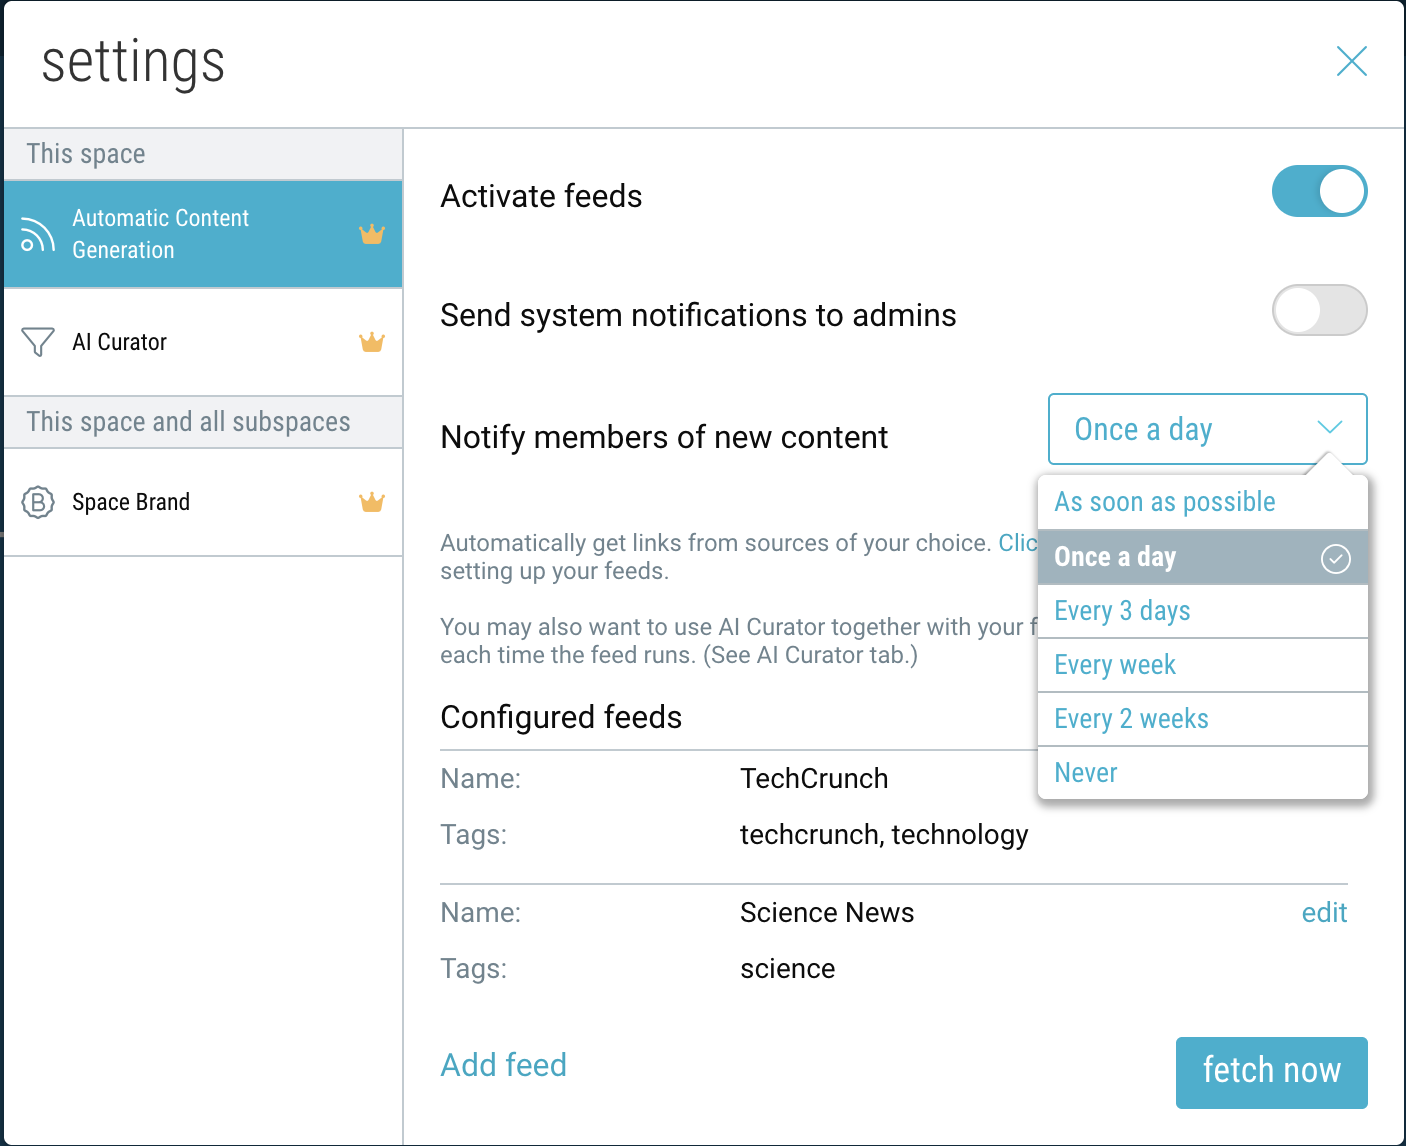
- To add multiple RSS feeds to the same folder, click “Add RSS feed”. To edit or remove an existing feed, click “edit”.
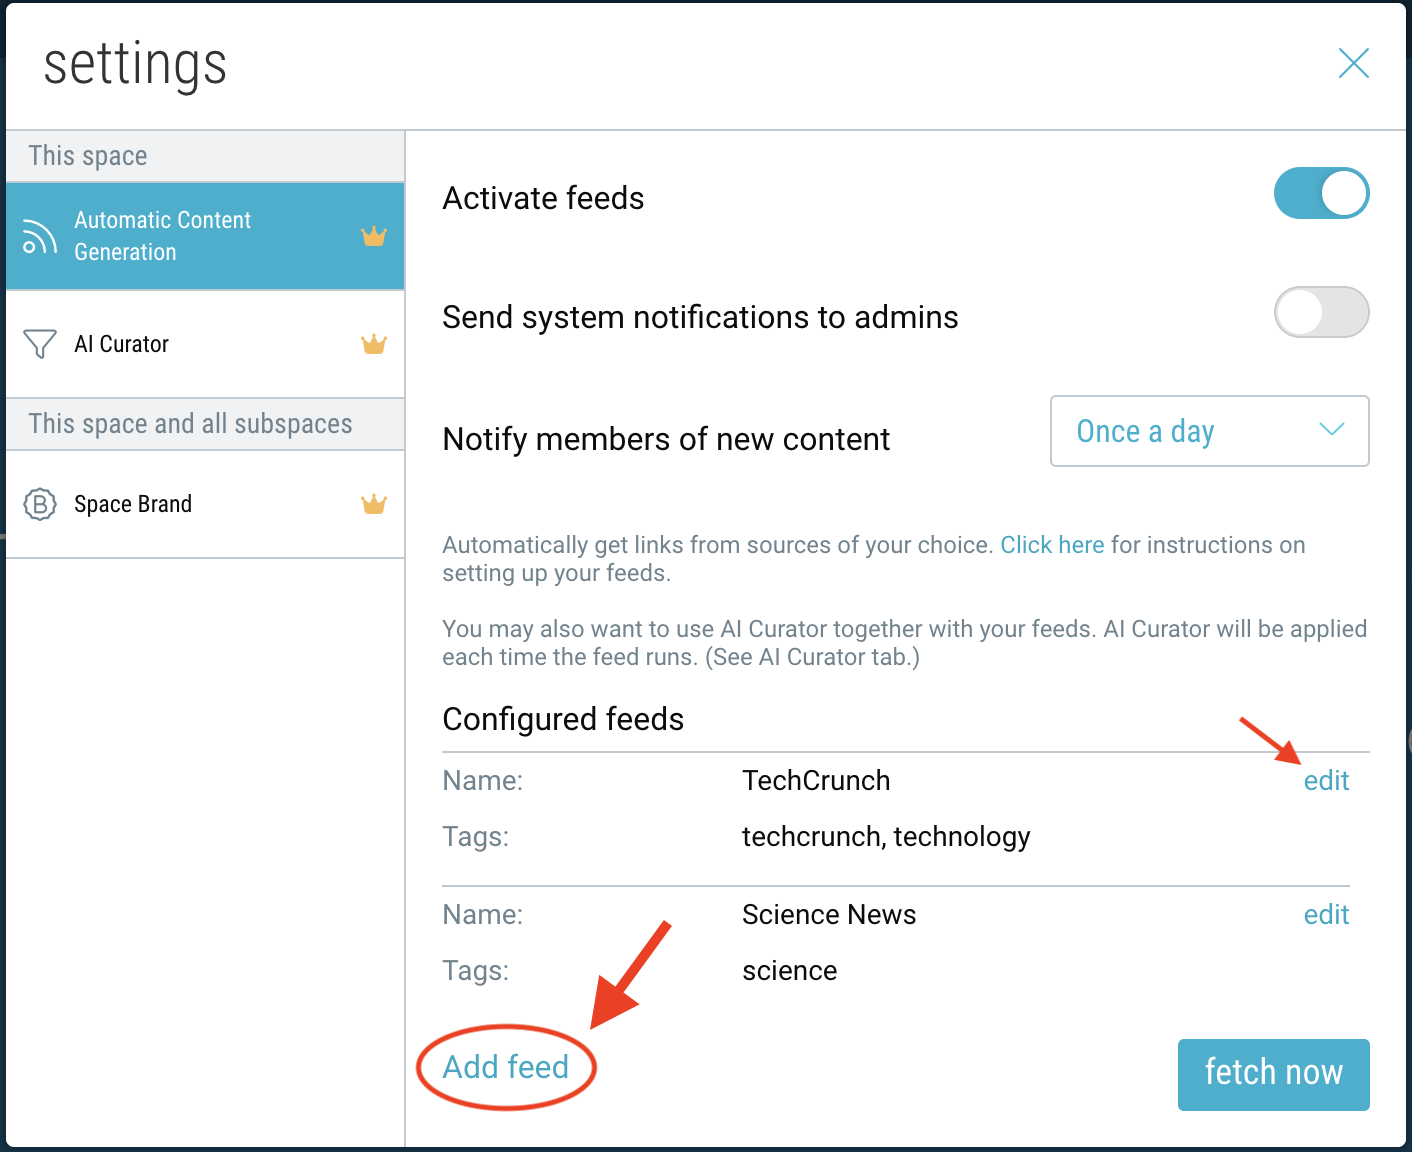
- To automatically filter content from your feeds, enable the AI Curator by navigating to that settings tab.
Managing Your Feeds:
The total number of feeds allowed (across all spaces) depends on your plan:
-
- Basic: 1 feed
- Premium: 3 feeds
- Pro: 5 feeds
- Business: 10 feeds
- Enterprise: 100 feeds
The number of most recent items stored in your space also depends on your plan:
-
- Basic: 25 items
- Premium: 50 items
- Pro: 100 items
- Business: 200 items
- Enterprise: unlimited (older items will be moved to an “Archive” space)
Setting up RSS Feeds via Google Alerts:

1. Go to www.google.com/alerts.
2. Create an alert for your phrase of interest (e.g. “cricket world cup”).
3. Click “show options”. Under “Deliver to”, select ‘RSS Feed’.
4. Click “Create Alert” to generate a custom RSS feed link.
5. Copy the RSS feed link and add it to your Bublup space using the steps above.
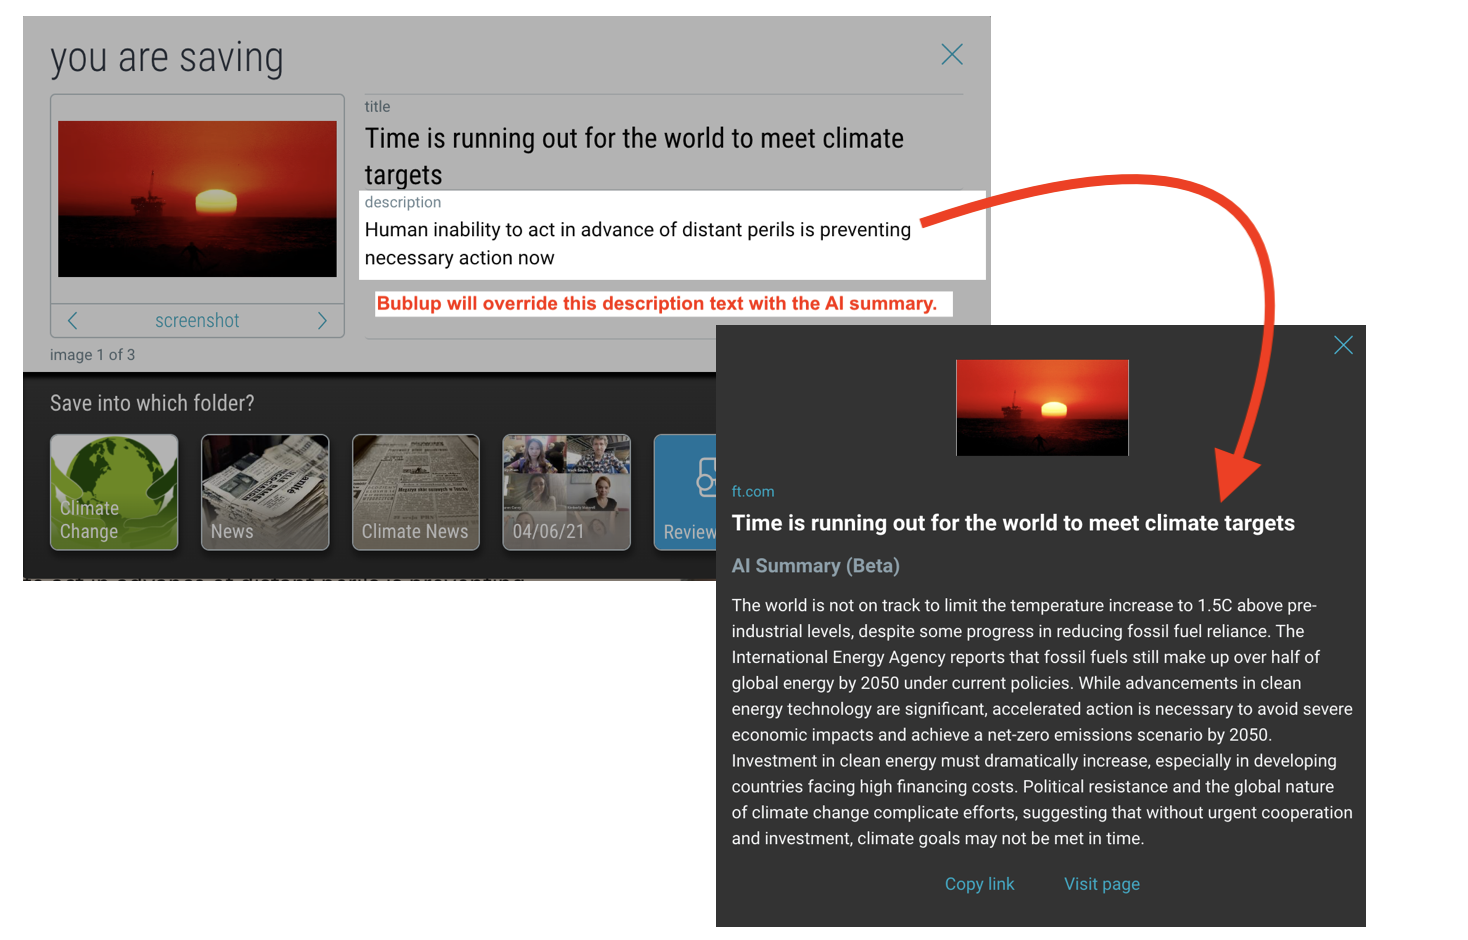
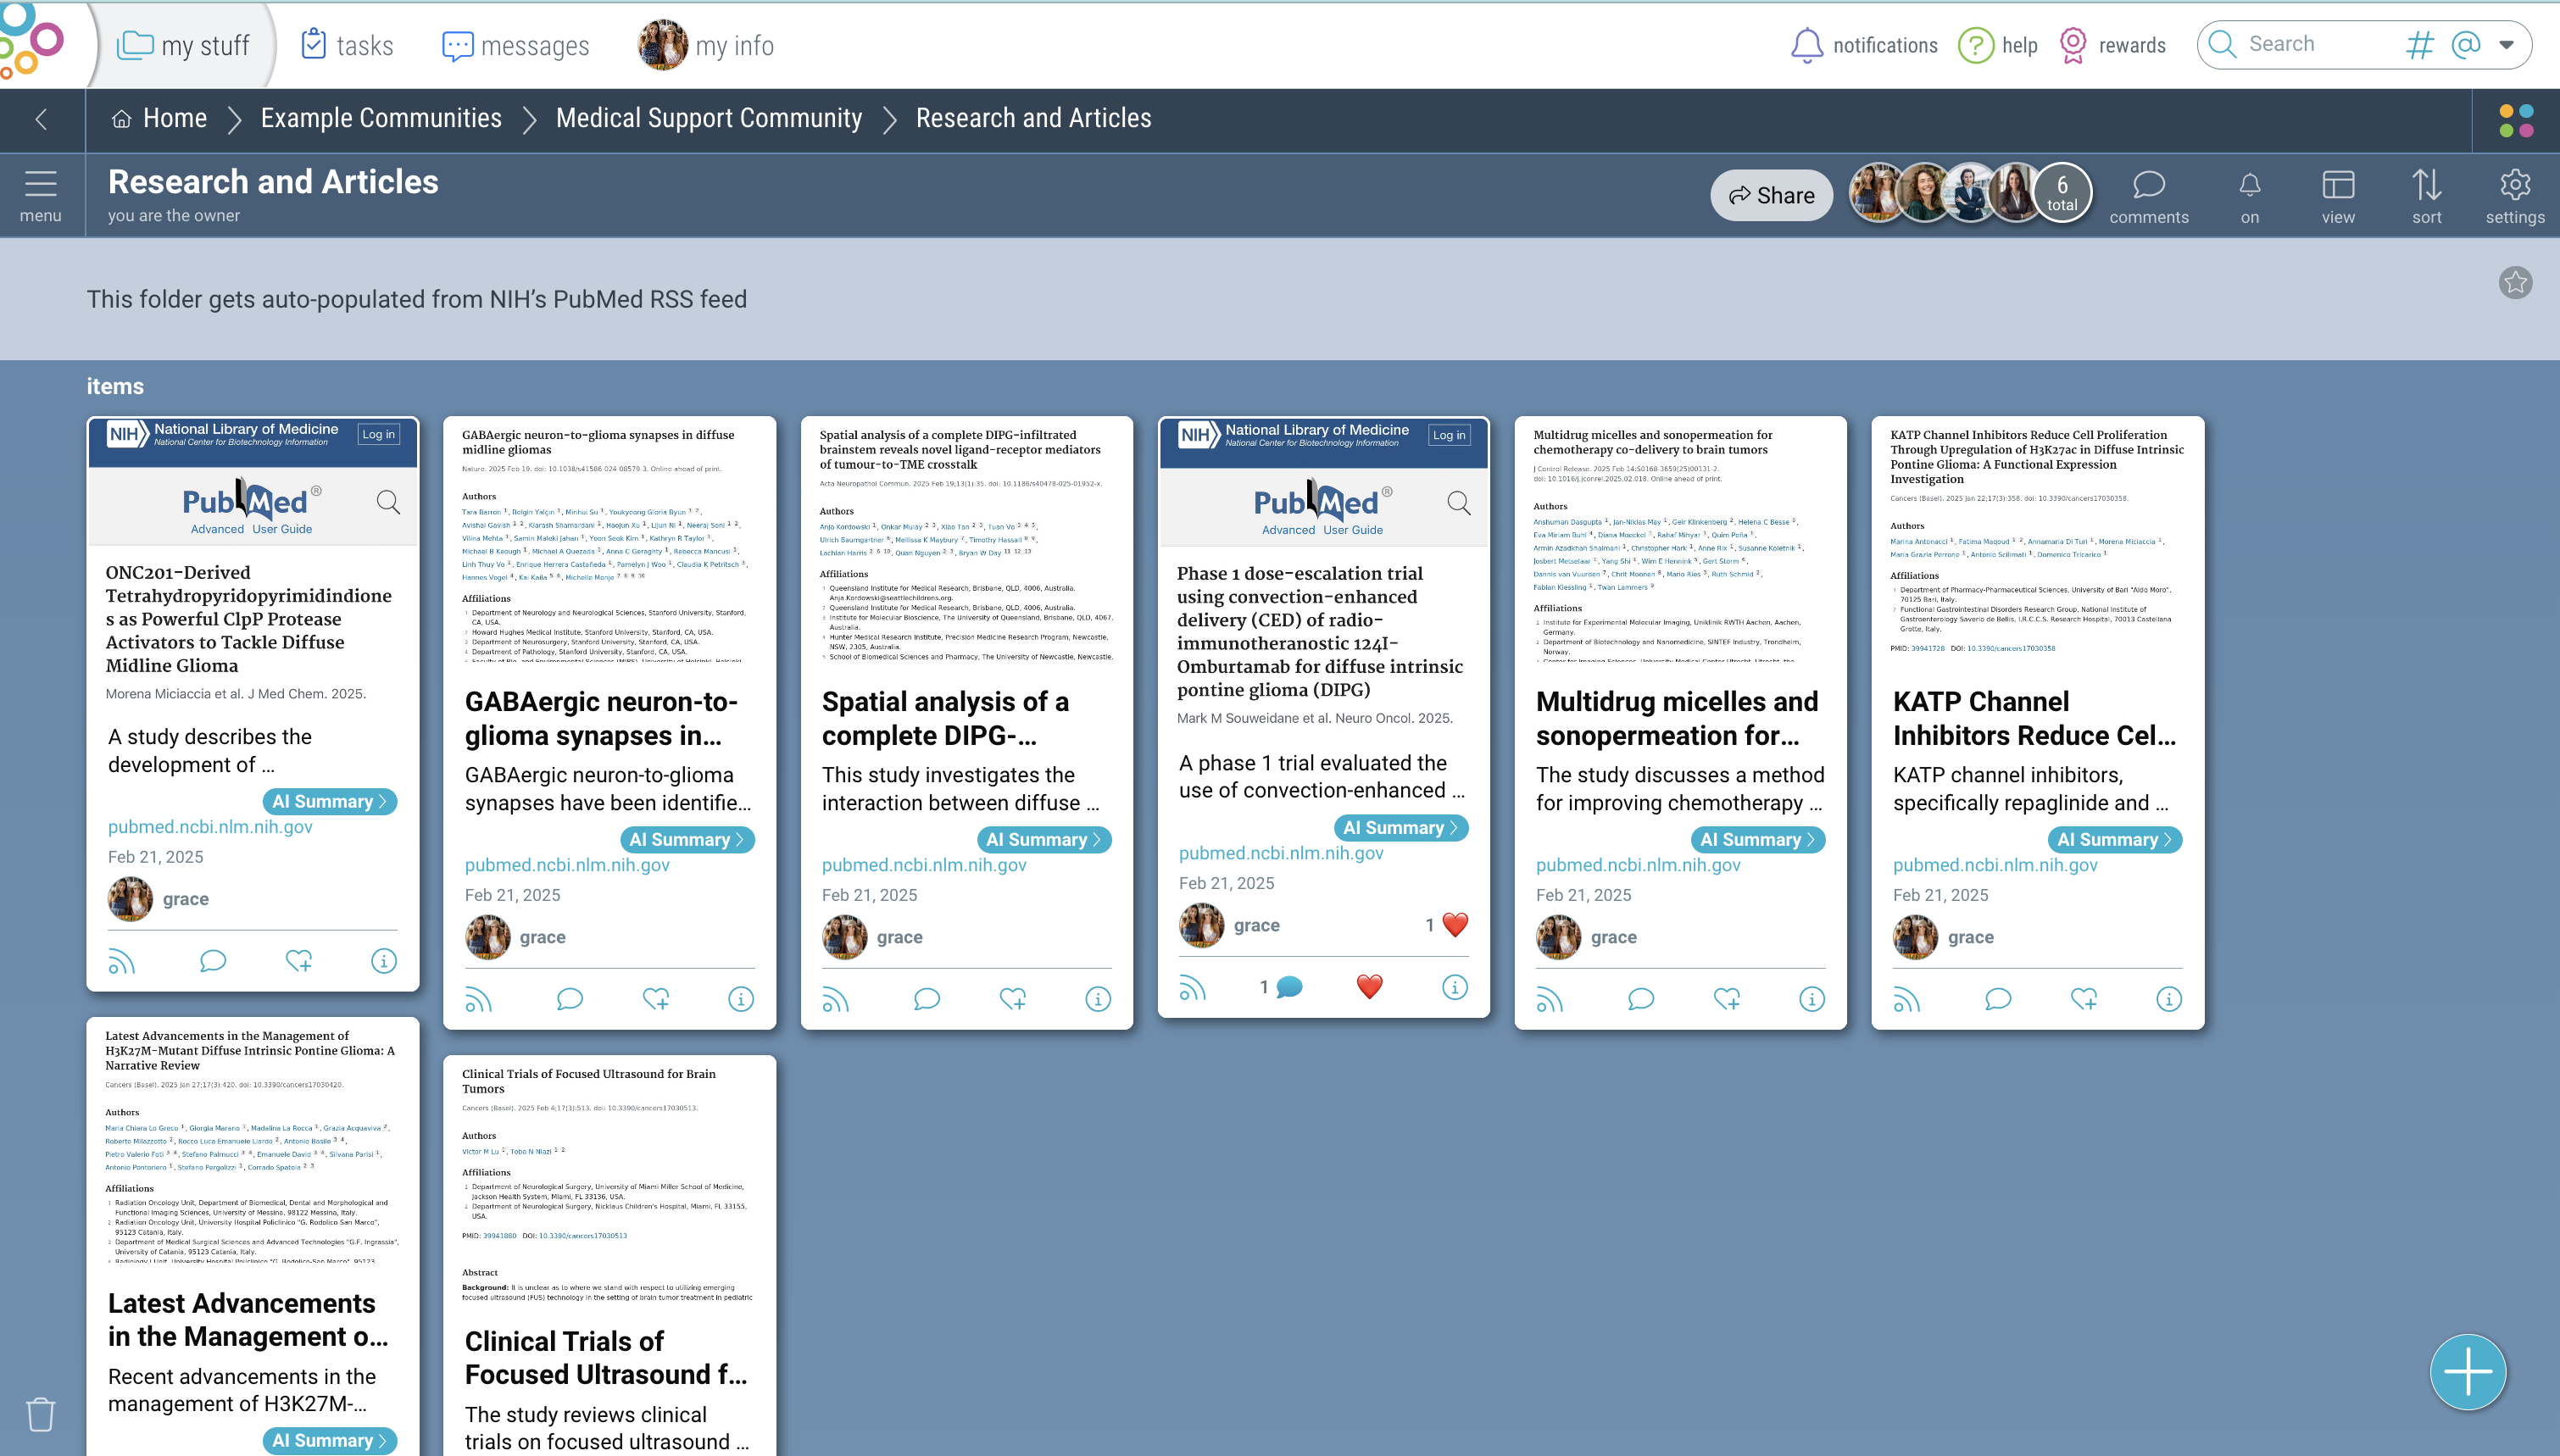
Generate AI Summaries
Bublup uses AI to automatically generate summaries for links saved in your Bublup account.
Viewing AI Summaries
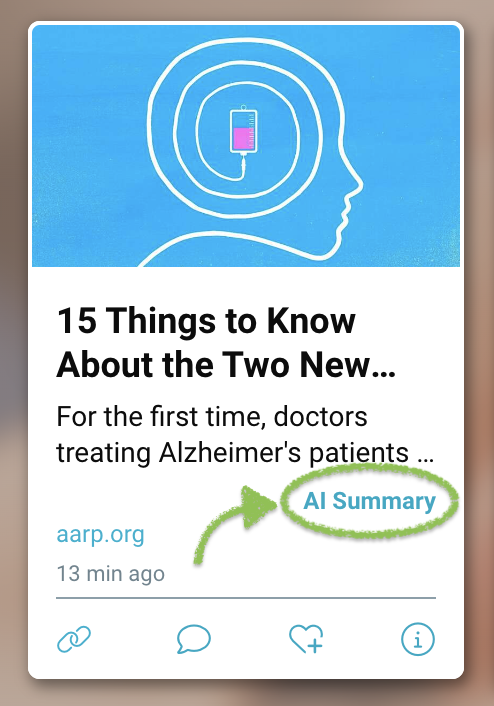
When a summary has been generated, you will see an “AI Summary” button on the item card.
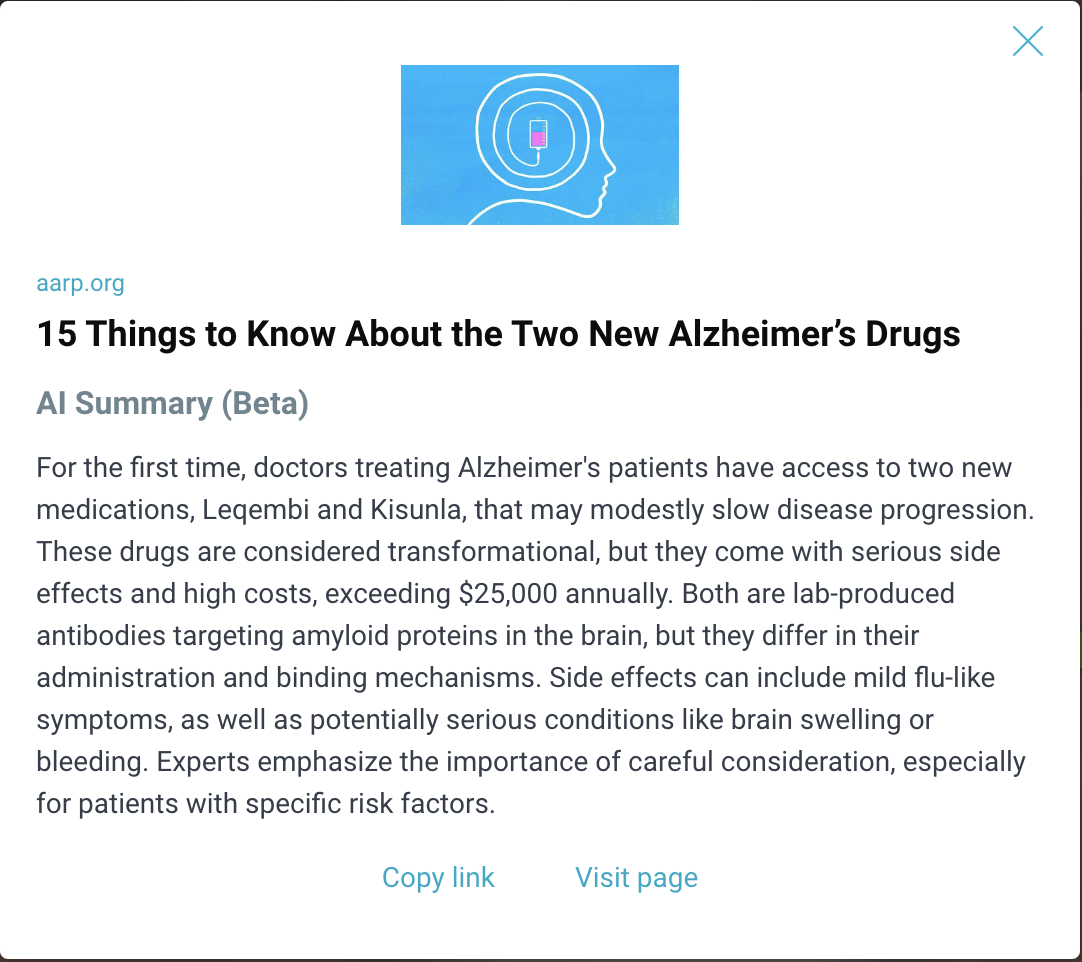
Click on the “AI Summary” button to view the full summary. From here, you can also visit the original page or copy its url.
Note: To edit the new AI Summary description, click the 3-dot menu on the item and select “Edit”.
Managing AI Settings
Click on “my info” at the top. Then click “AI” under “Preferences”.
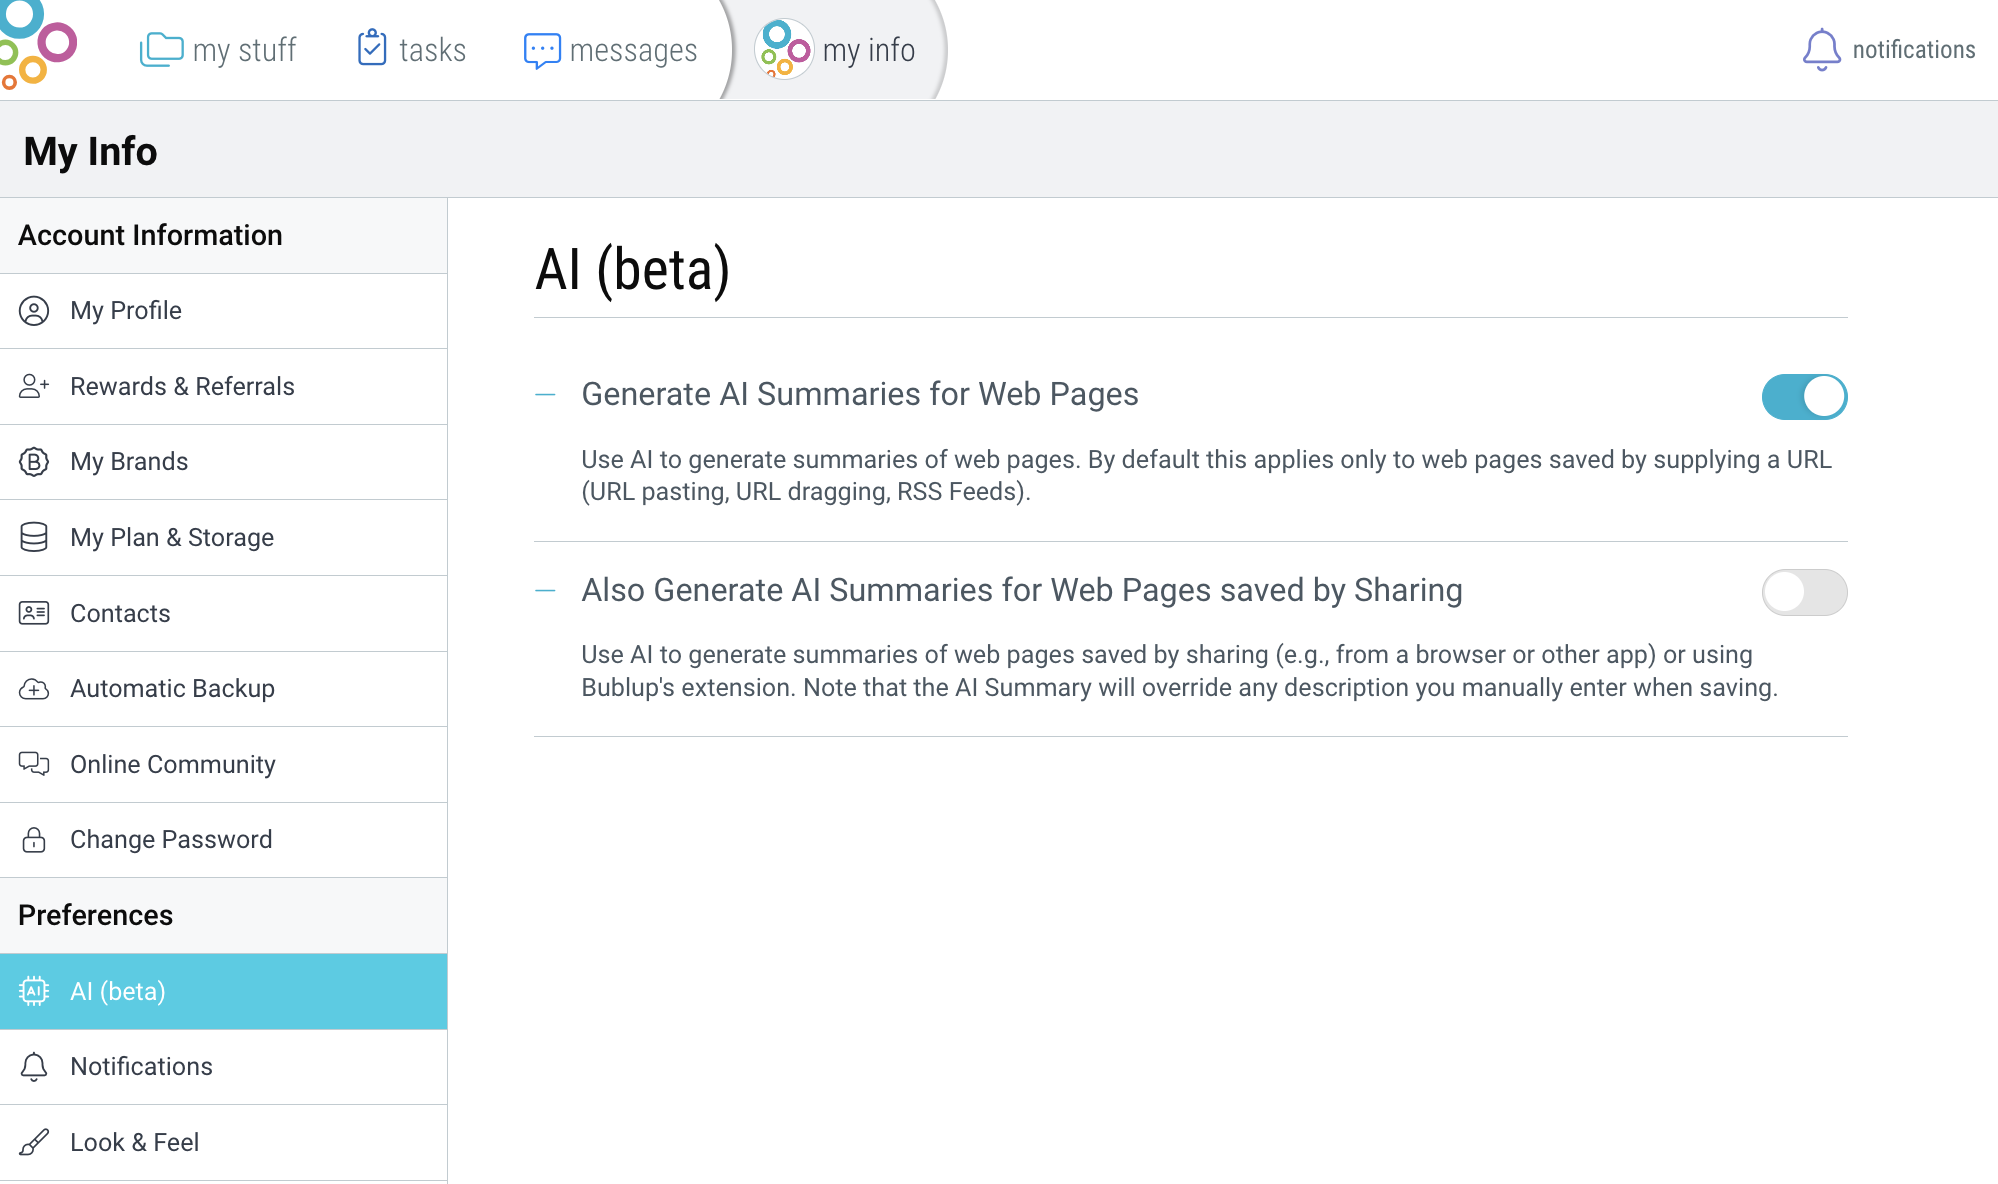
Generate AI Summaries for Web Pages
Use AI to generate summaries of web pages. By default this applies only to web pages saved by supplying a URL (URL pasting, URL dragging, RSS Feeds).
Also Generate AI Summaries for Web Pages saved by Sharing
Use AI to generate summaries of web pages saved by sharing (e.g., from a browser or other app) or by using Bublup’s extension. Note that the AI Summary will override any description you manually enter when saving.
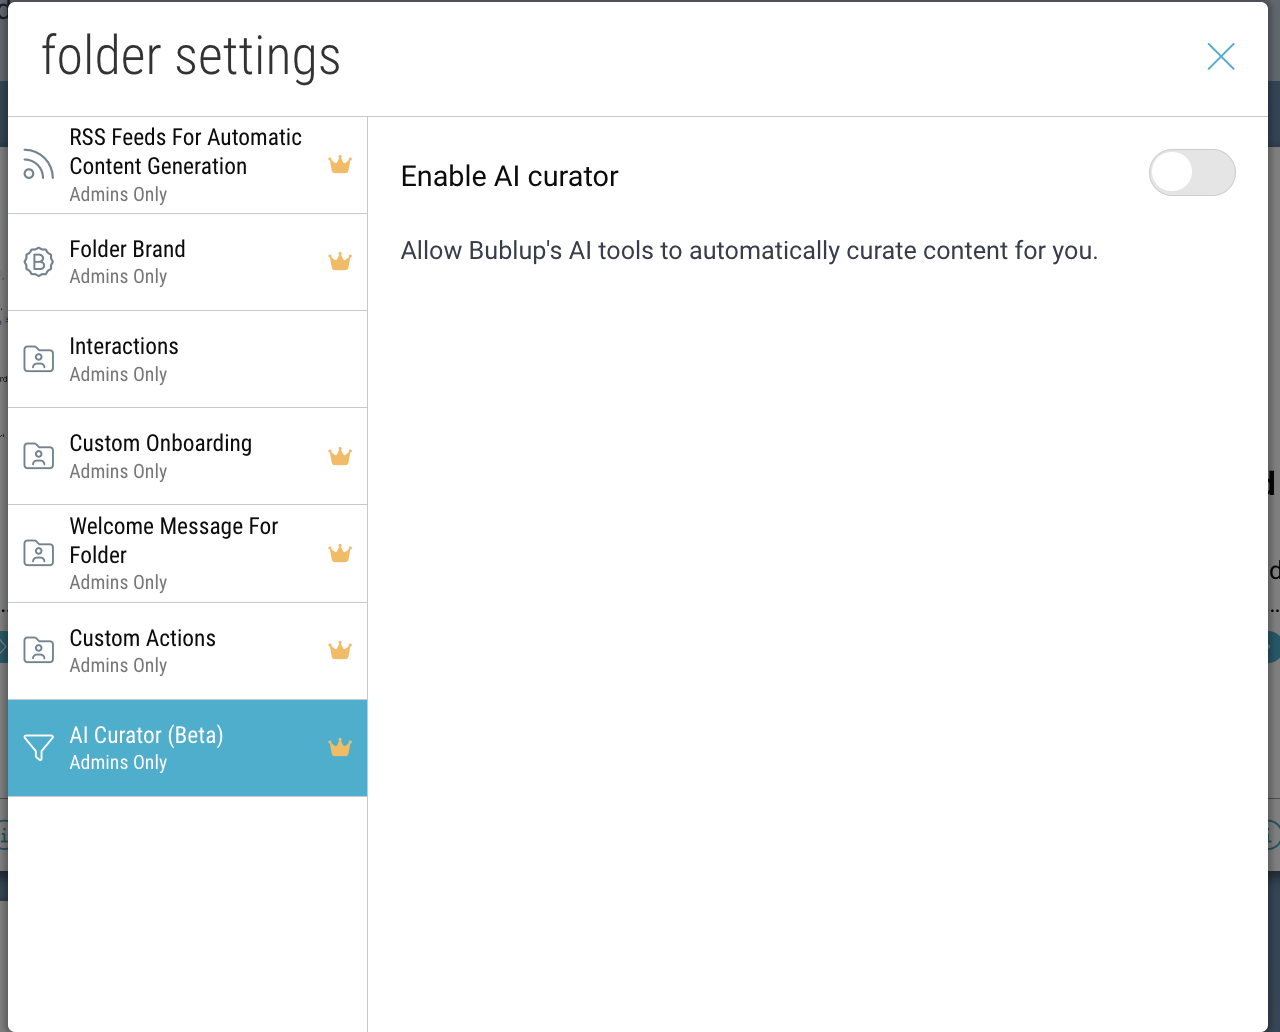
Use AI to Filter & Curate Content
Use Bublup’s AI Curator, in combination with Feeds, to automatically curate content whenever new content is added to your feed—no need to do it manually. This helps keep your feed spaces relevant and eliminates unwanted content. This feature is available to Business and Enterprise plans.
Setting up your space’s AI Curator:
(Note: This feature must be set up initially on desktop.)
1. Click the “settings” icon in the upper-right corner of your space.
2. In the “AI Curator” tab, click the toggle next to “Enable AI curator” to toggle it on.
3. From here, you can:
- Automatically sync rolls to pull in new content
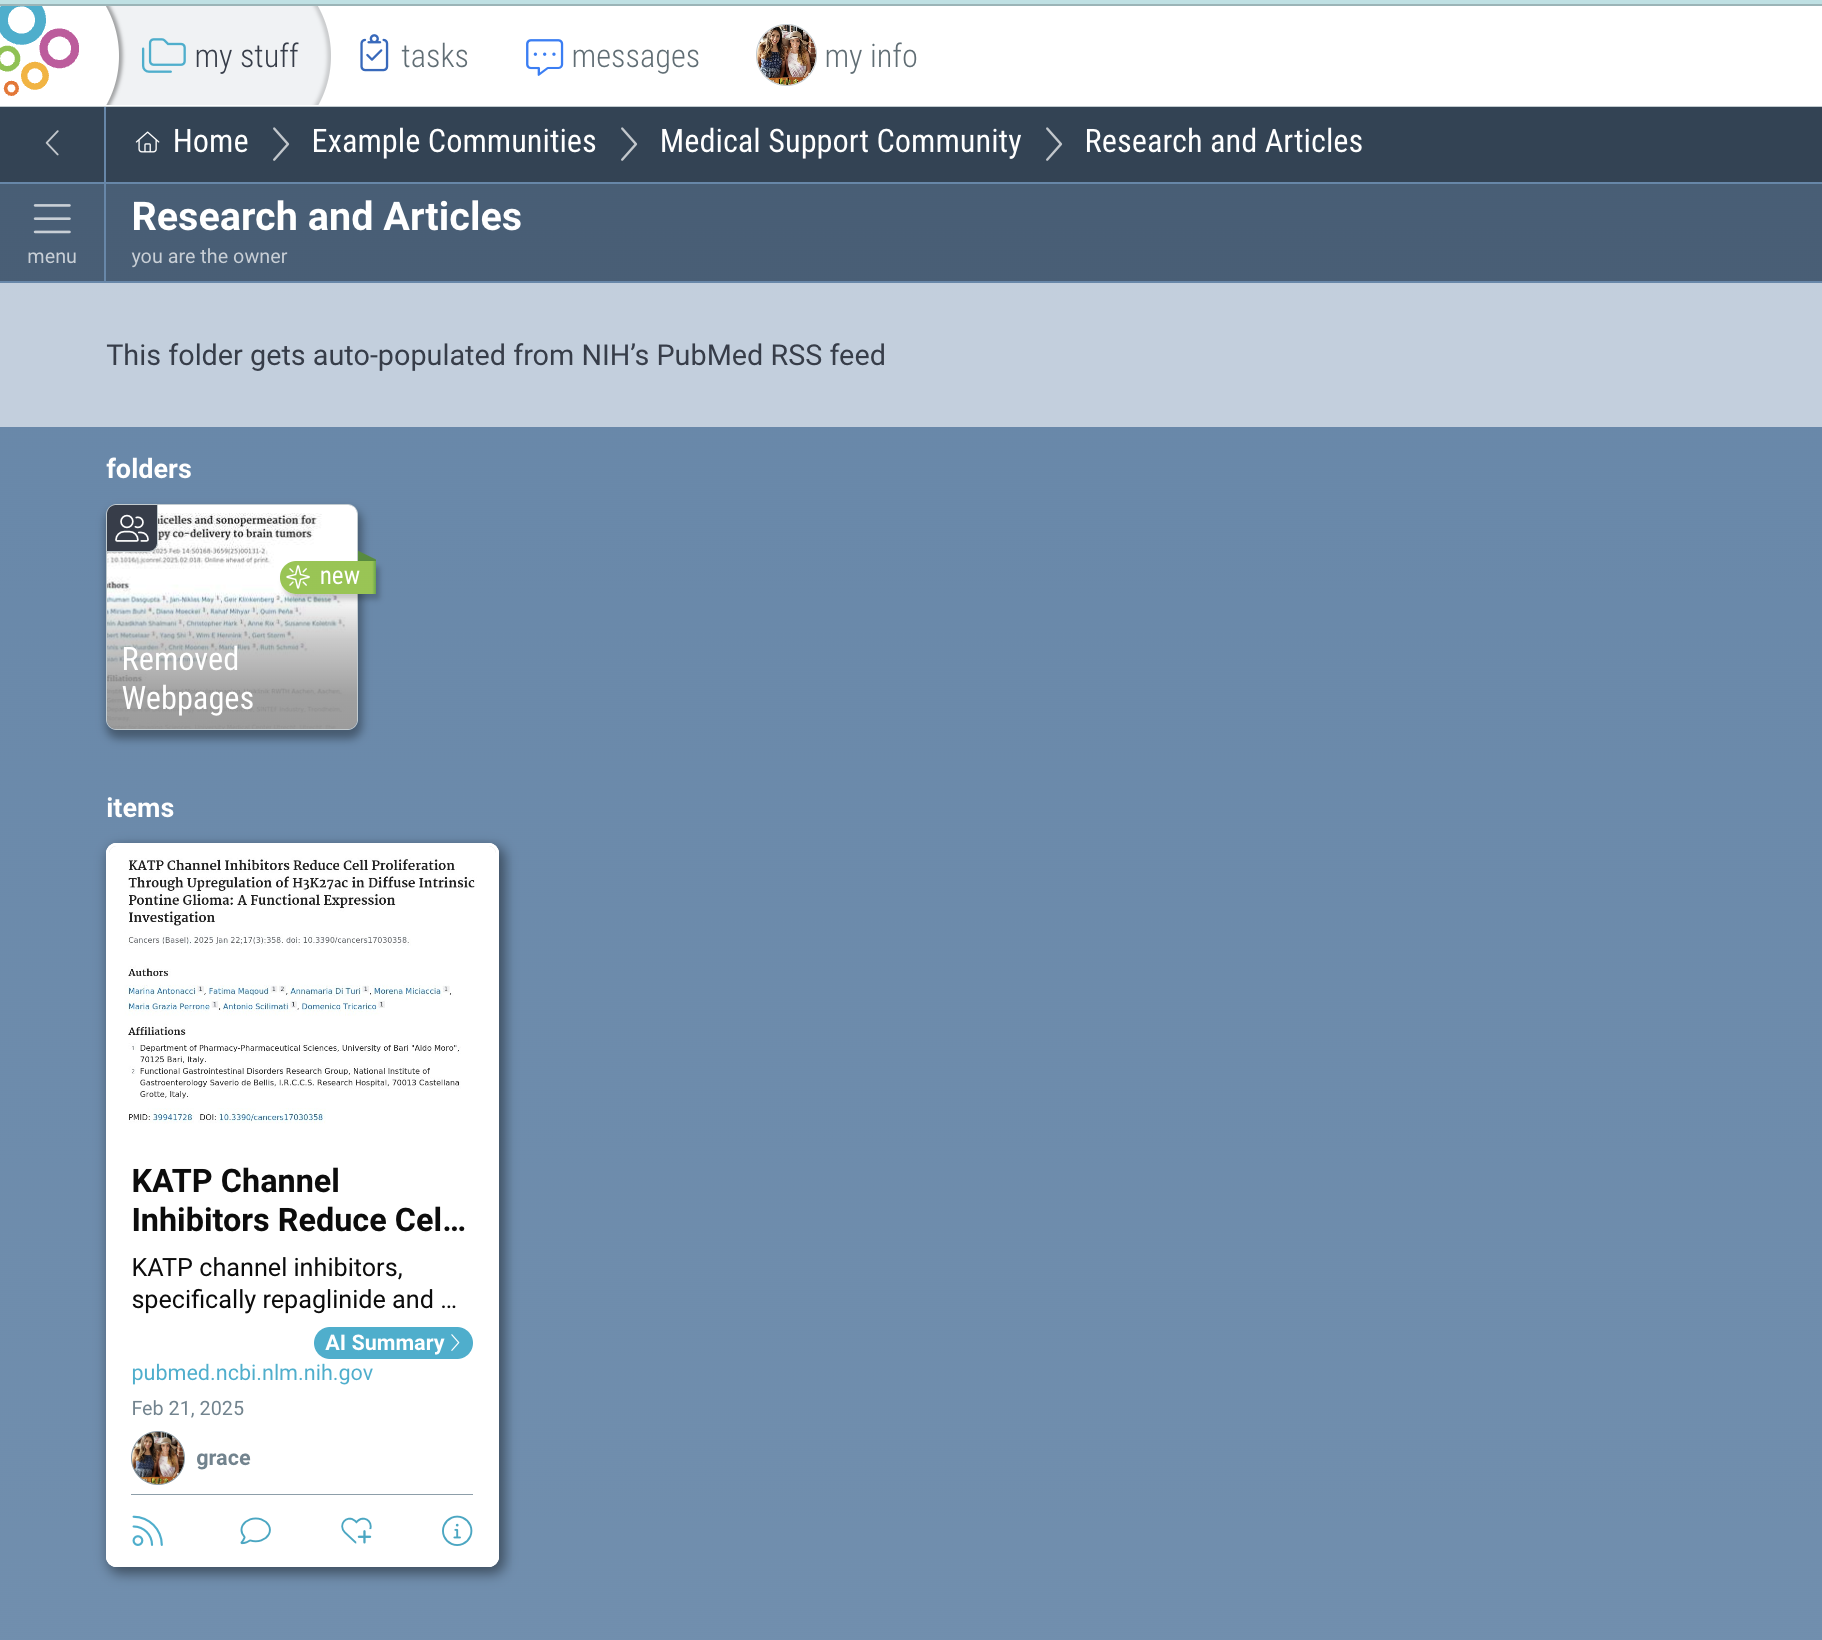
- Remove similar webpages from your feed
- Add custom filters to remove webpages
Creating an AI keyword filter:
1. To create a new smart keyword filter, click “Add filter”.
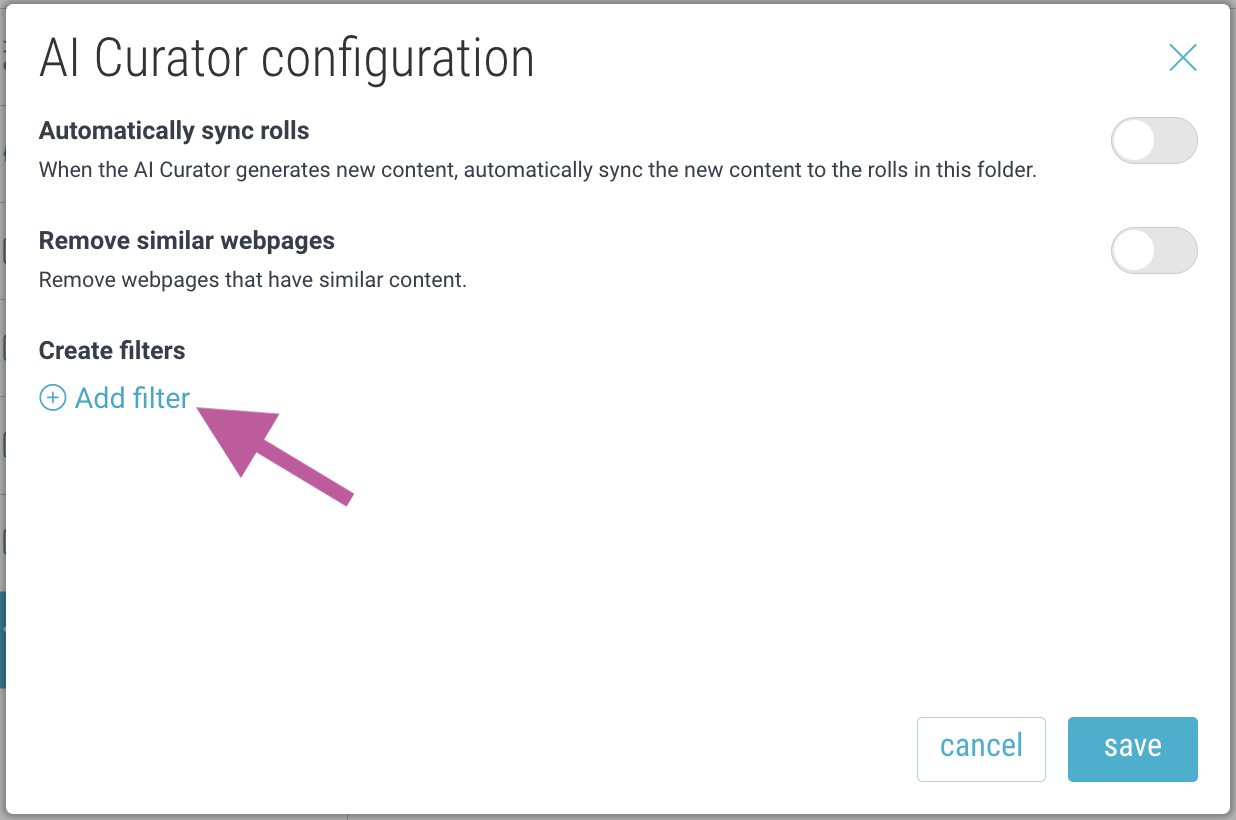
2. Select your preferred filtering method and enter your keywords.
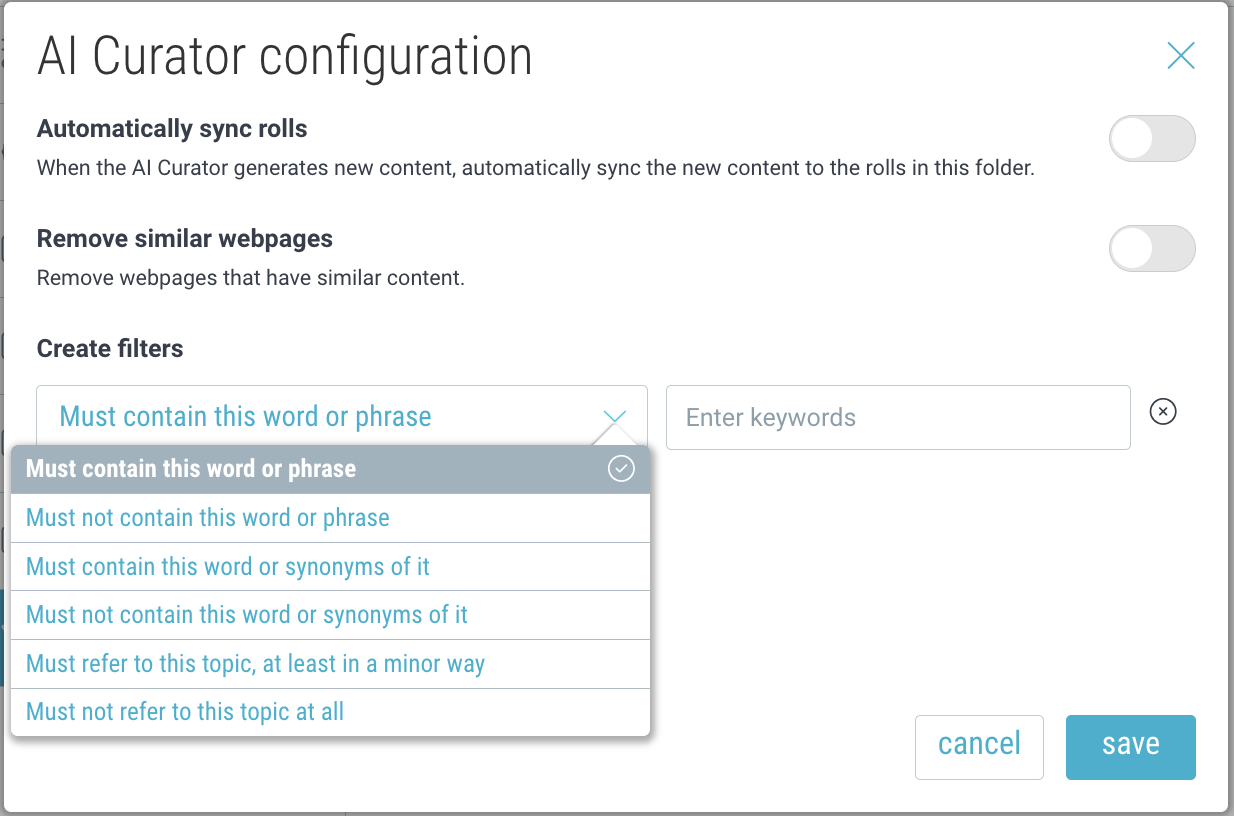
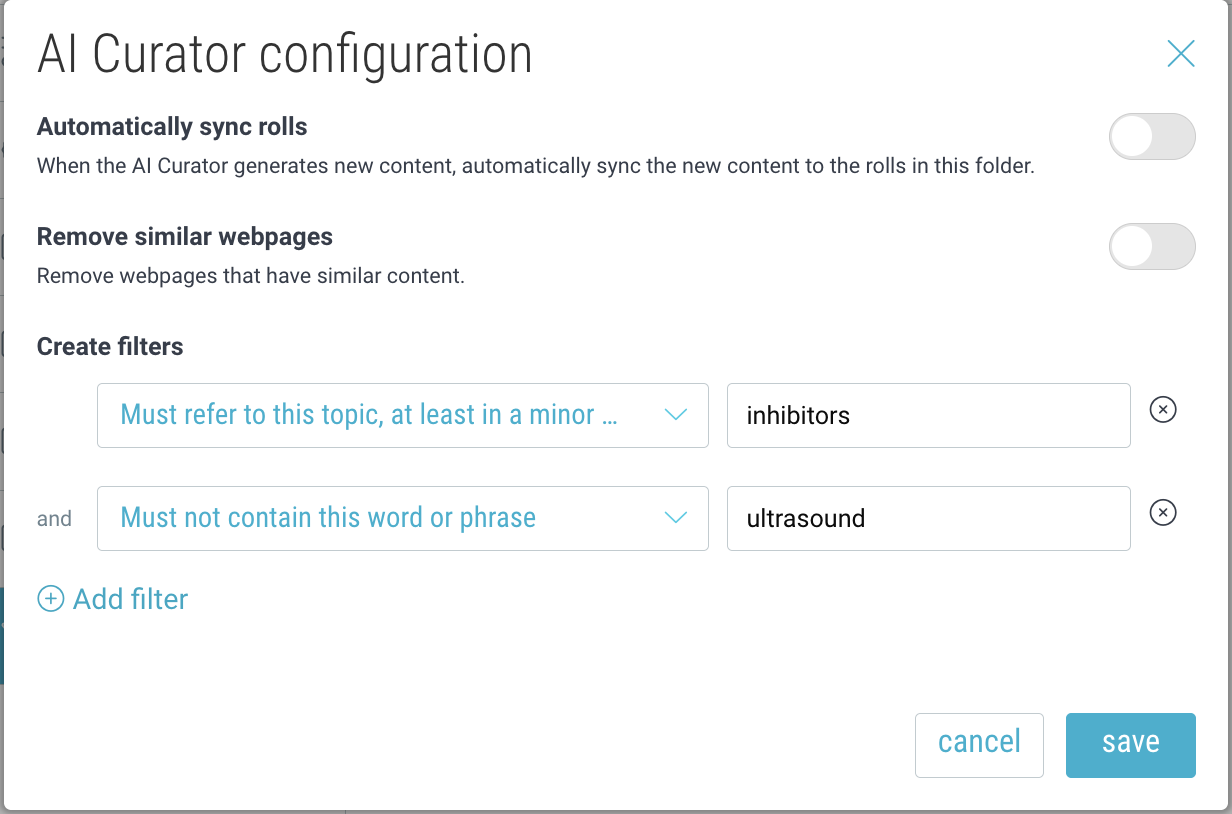
3. Any content matching your filter criteria will be removed.
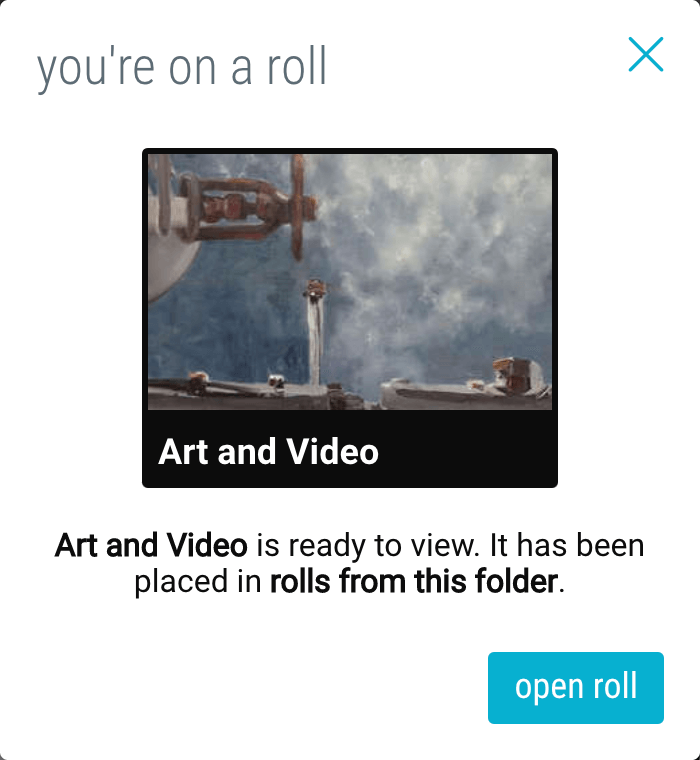
Create Rolls (instant web pages)
A roll is a web page made from a Bublup space in just a few clicks. No matter the type of content in your space, Bublup lays it out in an easy-to-share format.
1. Click the ‘+’ button in the bottom-right corner of your space.
2. Click on the ‘Roll’ option in the menu.
3. Click the “open roll” button in the confirmation box.
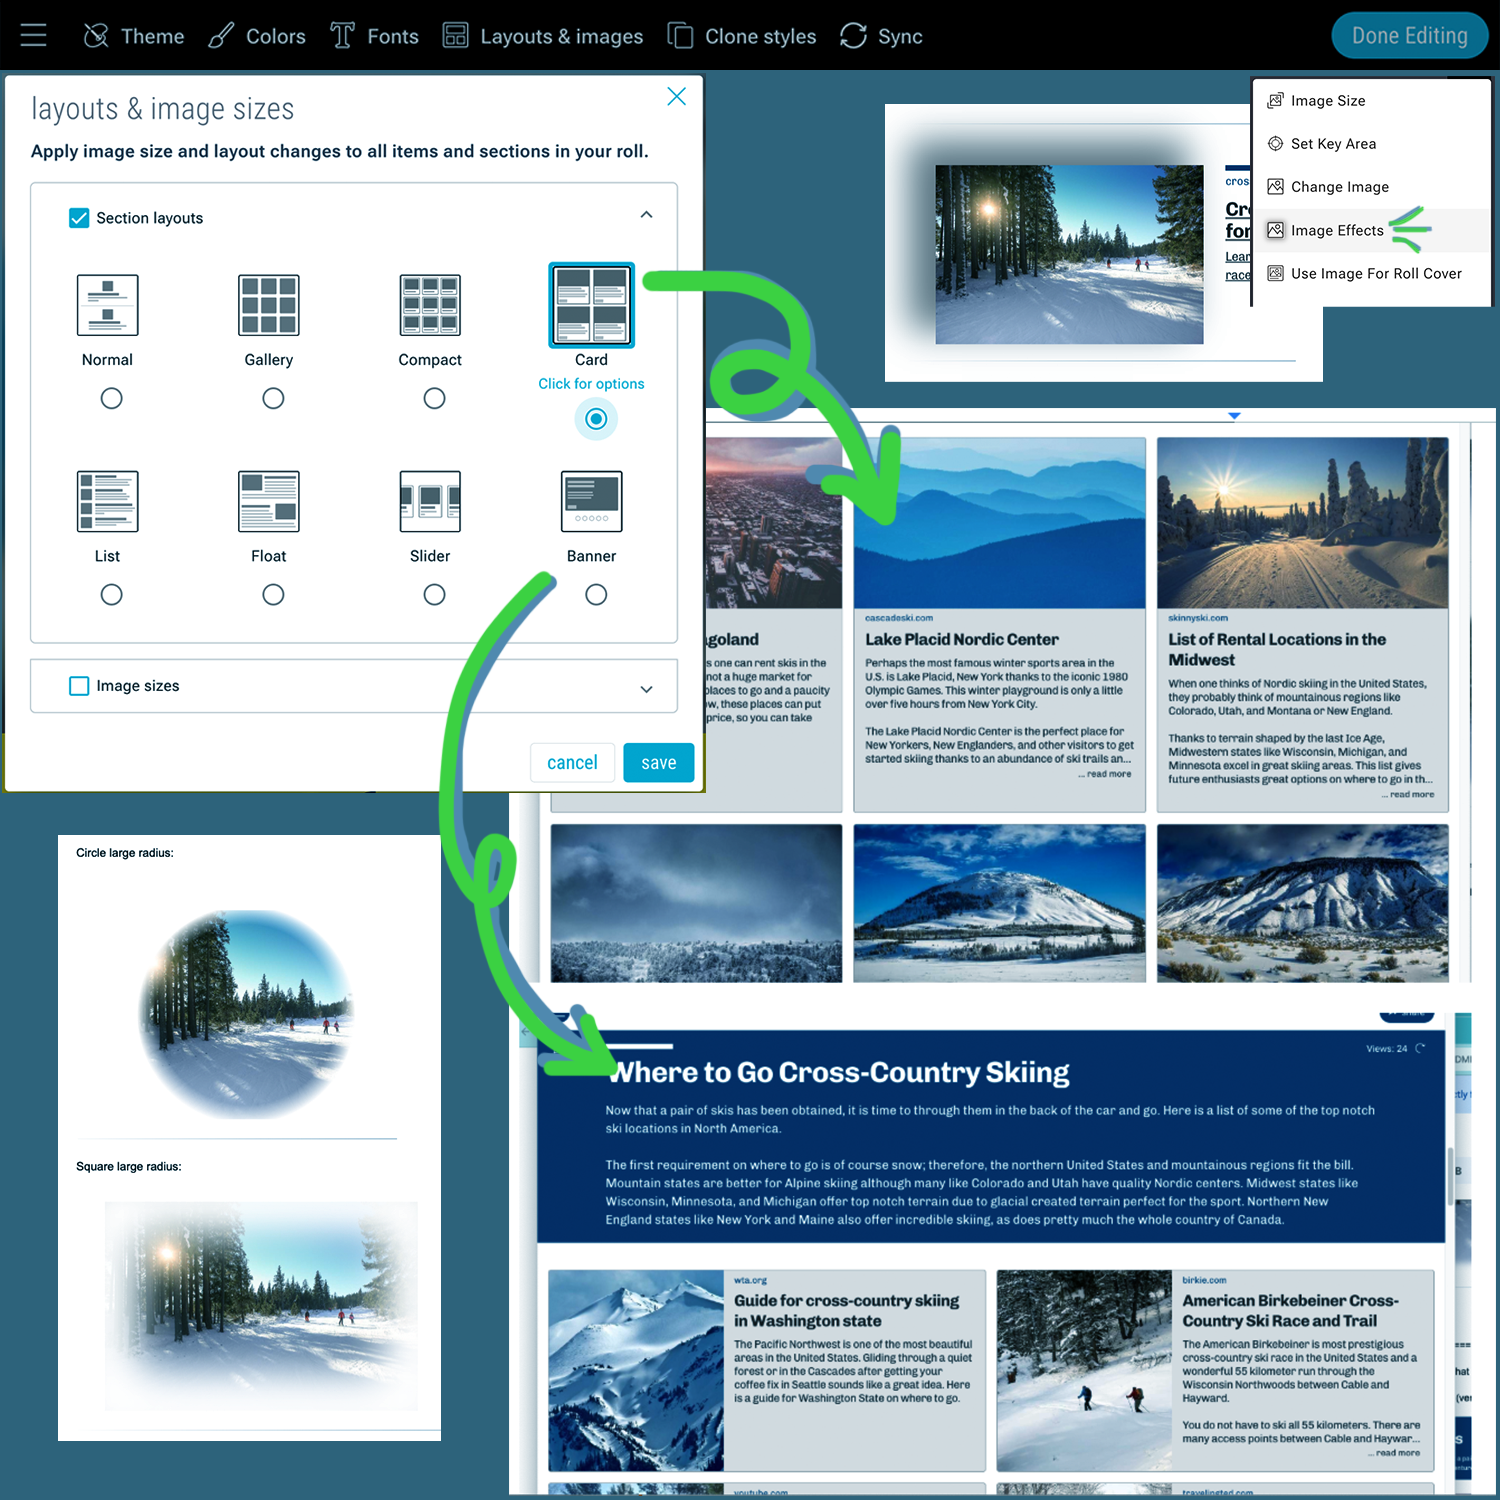
Roll Customization
Choose from different themes, layouts, and colors. Add jump-to links, widgets, password protection, and more. Apply custom branding and domain urls.