
Space owners and admins can customize advanced settings within a shared space or community. These are premium features, and some settings can only be managed on desktop. Certain settings only apply to specific space types.
To manage, go to the “settings” icon in the upper-right hand corner of the space.
Space & Subspace Settings
Space Brand:
Include your organization’s brand visible within the space and when sharing content or rolls from this space. Click here to learn more.
Space Interactions:
- Member List Visible
Control whether the member list is visible in the space. - Allow Reactions
Enable or disable reactions in your space. - Allow Comments
Enable or disable comments in your space. - Allow Notifications When Content Changes
Use this feature to disable notifications about activity for all shared space members. This setting will not disable comment or reaction notifications. - Limit Rolls to Admins Only
Only allow admins to create and view rolls within this space.
Branded Invitation:
Display a custom message to appear on the sign-up screen for new users who receive your space invite. Note: This feature requires a Business or Enterprise plan.
Welcome Message for Space:
Provide a customized welcome message for users to see the first time they enter your folder. Note: This feature requires a Business or Enterprise plan.
Custom Action Button:
Add a custom button at the top of your space. Customize the text and colors, as well as the URL that it will link to. Note: This feature requires a Business or Enterprise plan.![]()
Space-specific Settings
Feeds (only visible within Feed spaces):
Automatically populate your folder with new links from sources of your choice. Click here to learn more.
AI Curator:
Use Bublup’s AI Curator, in combination with Feeds to automatically curate content whenever new content is added to your feed—no need to do it manually. Click here to learn more.
Behave as a Link:
Turn a space into a direct web link. When enabled, clicking/tapping the space will open a specified webpage instead of the space’s contents. Click here to learn how to set this up.
Community Settings
Community Access:
Require admin approval for all users prior to being admitted as a member of the community. Add approval questions for the members. These can be optional or required and can be open-ended or pre-defined.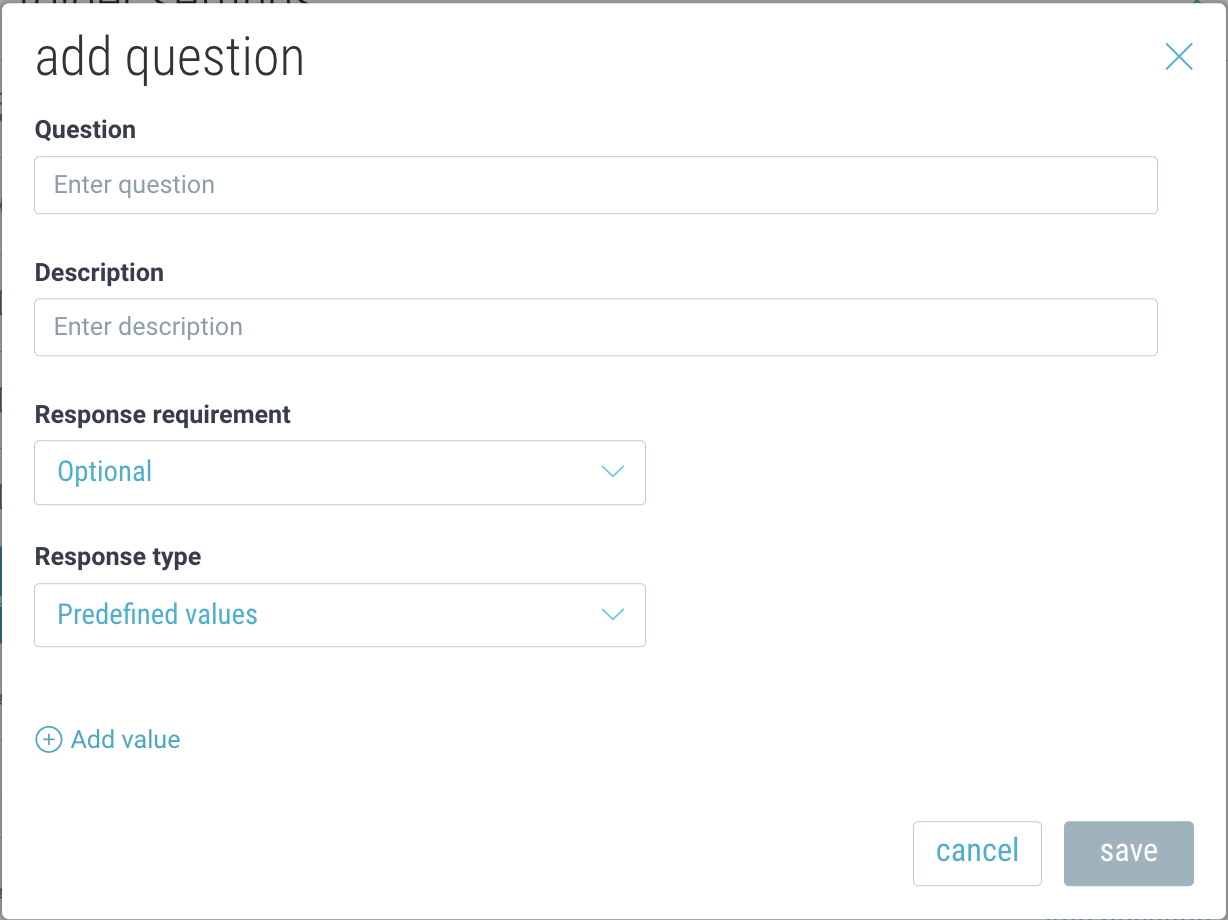
To review and approve membership requests, go to the community ☰ menu and click “Membership Requests”.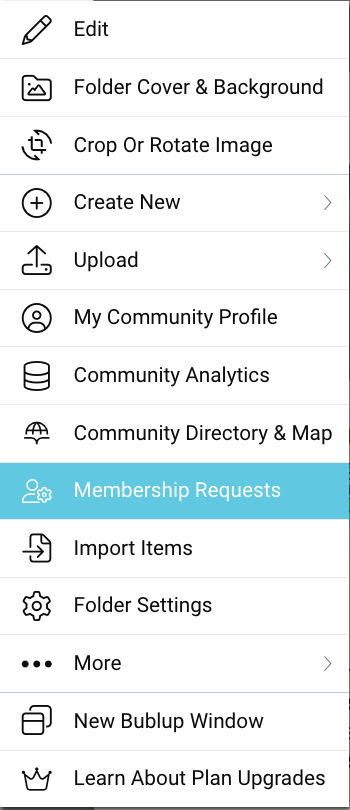
Community Member Profile:
Community admins can request that their community members share profile information, including custom fields, with other members. Click here to learn more.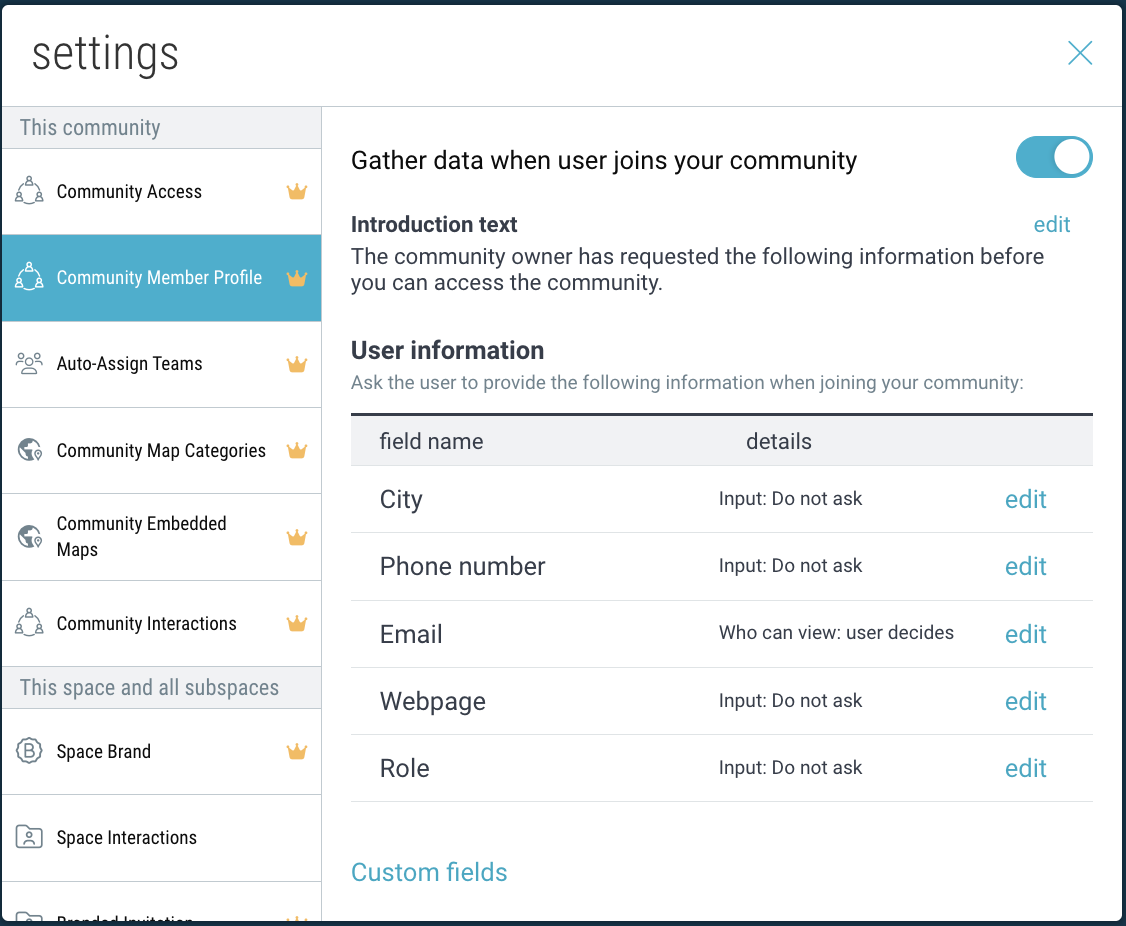
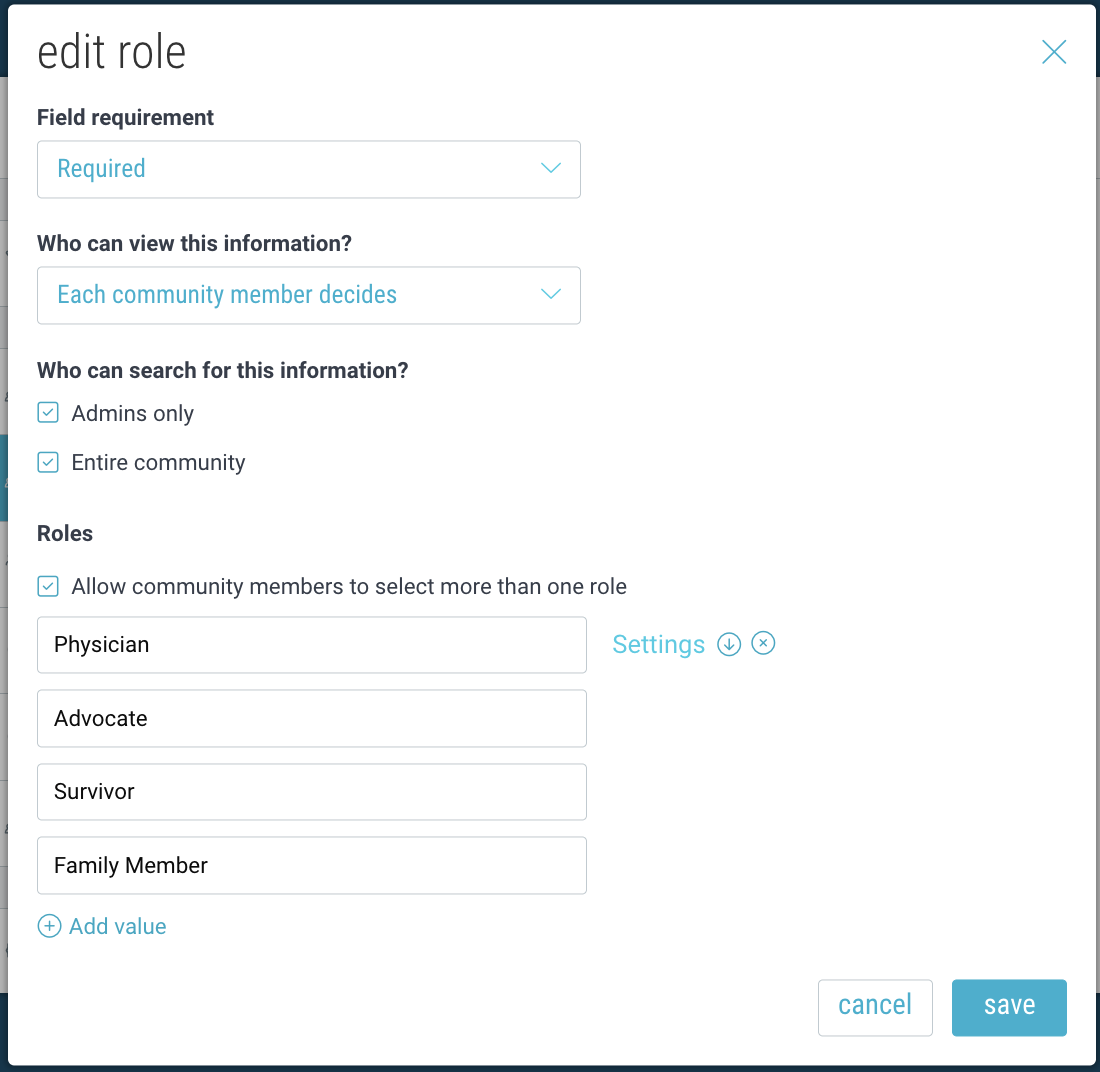
(Pro tip: You can map a role to existing teams by hovering over the role and clicking “Settings”.)
Auto-Assign Teams:
Auto-assign community members to specific teams based on their role or other rules. The syntax must use the following convention: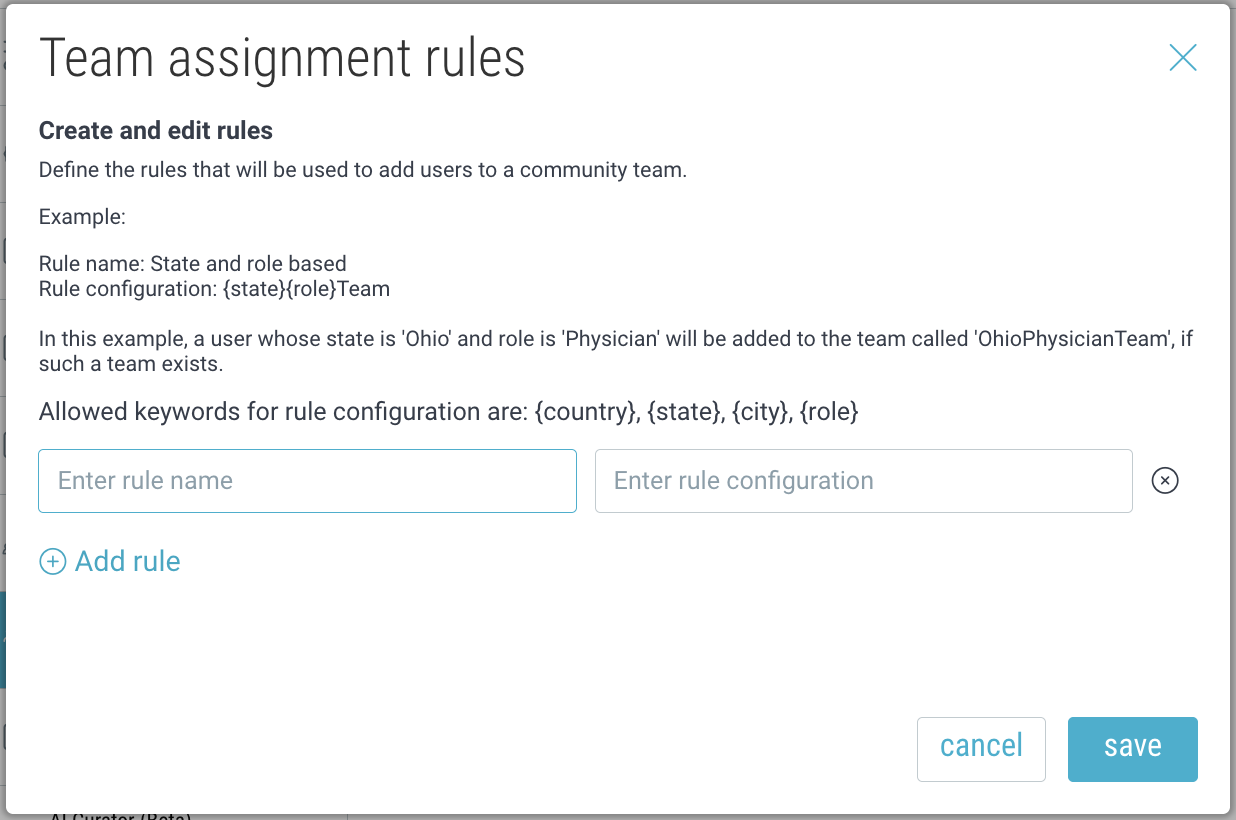
Community Map Categories:
Create categories for entities that will appear on your community map and assign them to the items within different subspaces of your community. Click here to learn more.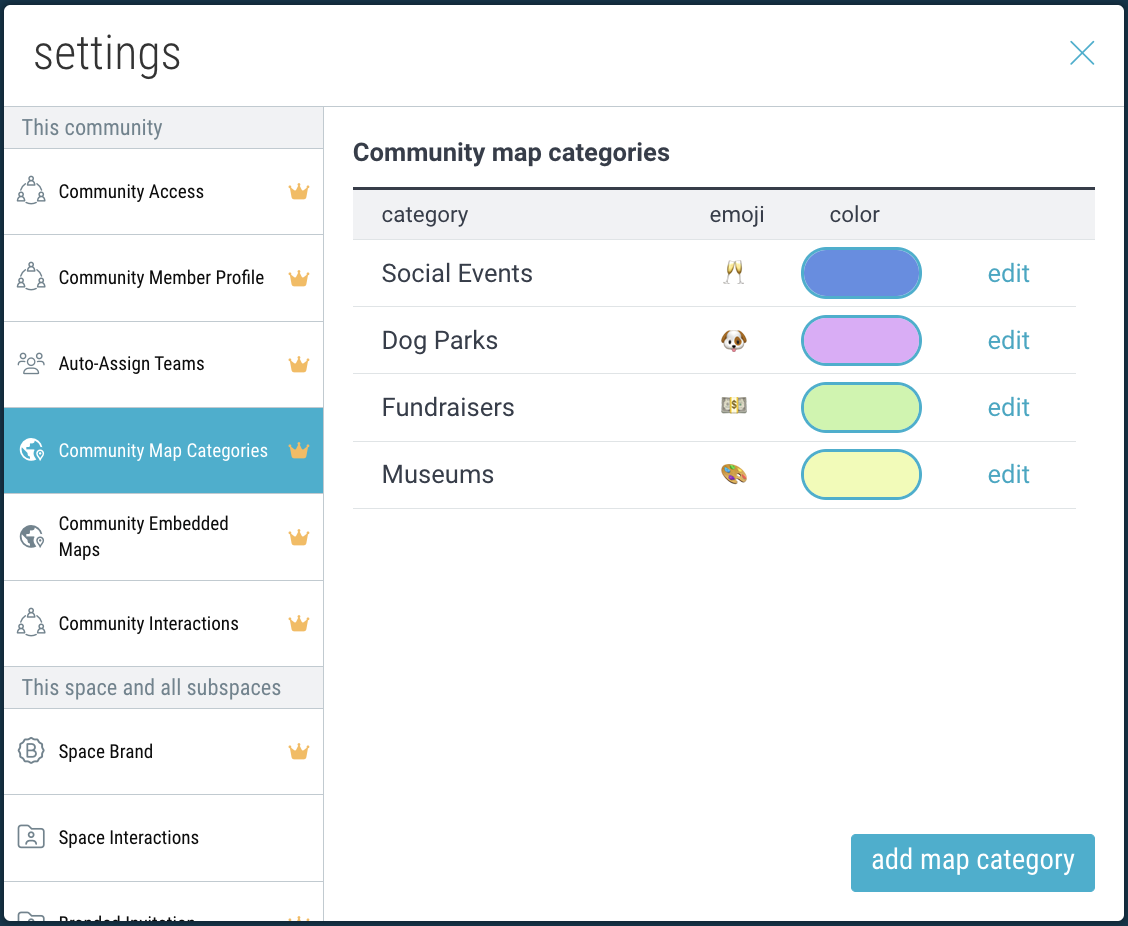
Community Embedded Maps:
Add your community map to your website to showcase entities and resources. Click here to learn more.
Community Interactions:
- Display a marker for deleted comments
If enabled, users will see the word “deleted” wherever a comment was deleted.
If disabled, deleted comments will not appear at all.